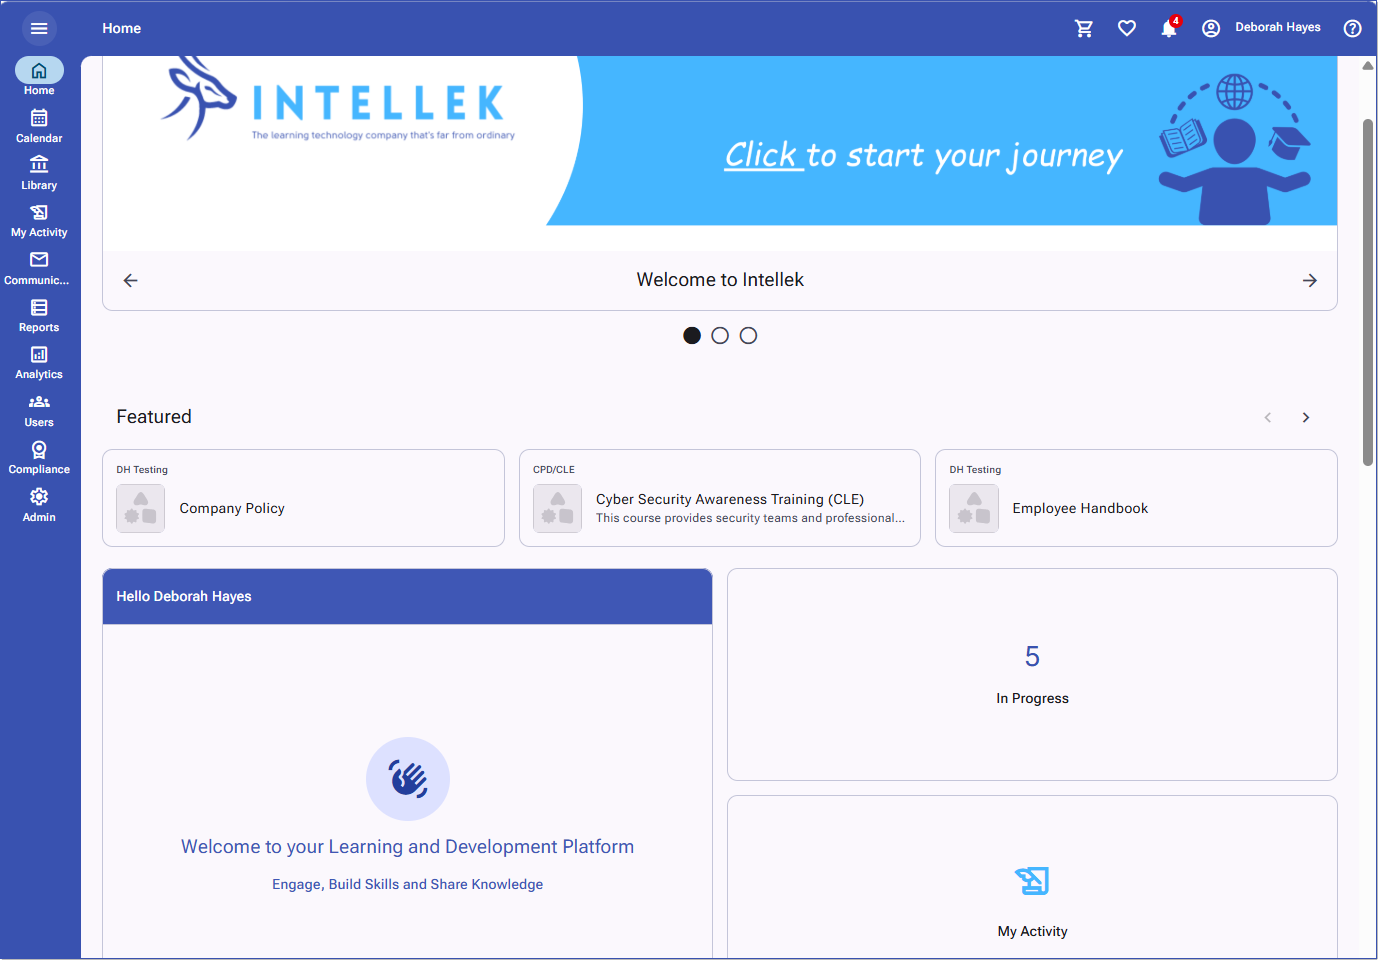
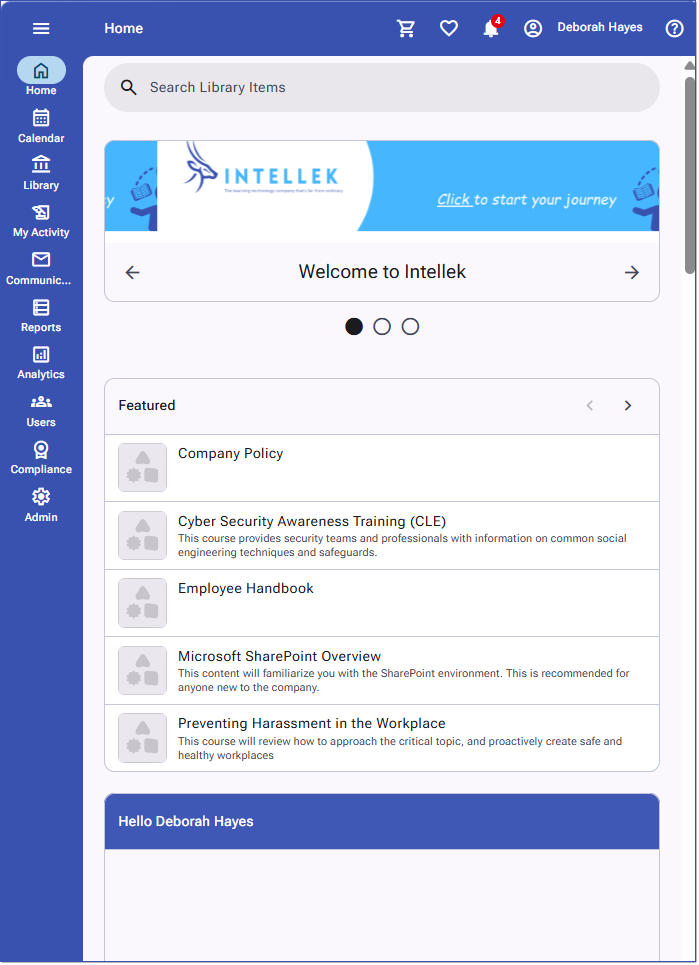
The LMS v4 Phase 2 - Home Dashboard (Stage 1) introduces a modern, fully responsive user experience with an updated look and feel. This enhancement includes new customization options, expanded dashboard assignment capabilities, and a range of new dashboard cards designed to improve the experience for learners, managers, and administrators.
Key features include:
•Dashboard Manager – Customize dashboard layouts by selecting card sizes, arranging card placement, and reordering dashboard sections.
•Dashboard Preview – Easily preview dashboard designs before making them available to users.
•Expanded Dashboard Assignment – Assign dashboard layouts to specific user groups and/or security profiles for a more personalized experience.
•Manager Dashboards – Create dashboards specifically for managers with dedicated assignment permissions and manager-focused dashboard cards.
•New Dashboard Cards – Enhance the user experience with additional card types, including:
oMy Certificates
oQuick Links
oIncomplete Assignments (Manager)
oHours of Training Completed (Manager)
These enhancements provide greater flexibility in dashboard design and management while delivering a more engaging and personalized experience for users.
The v4 Home Dashboard will be delivered into stages of development which you can follow from the LMS Roadmap.
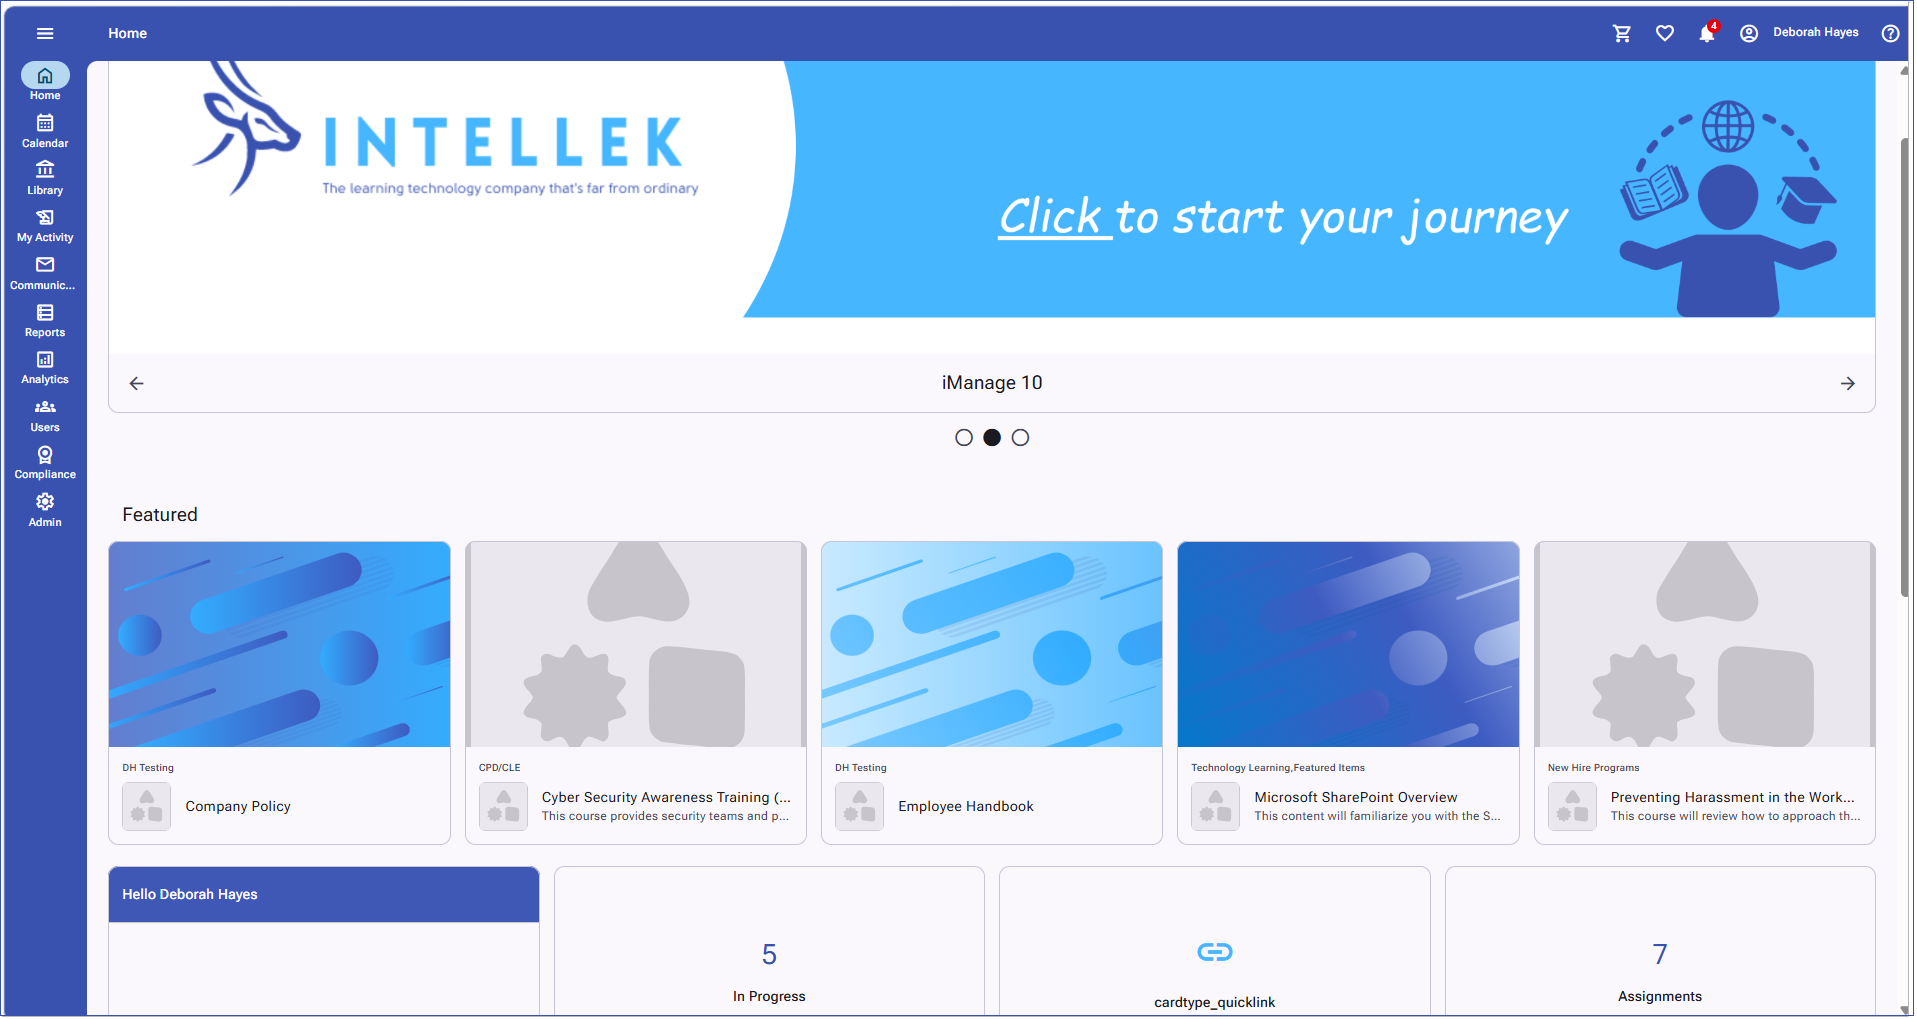
When the Home Dashboard feature is first enabled for your LMS instance, the Default Home Dashboard is automatically assigned to all users.
Existing dashboard banners are automatically migrated to the Default Home Dashboard. Any Featured, Recommended, or Trending learning carousels currently in use are also included.
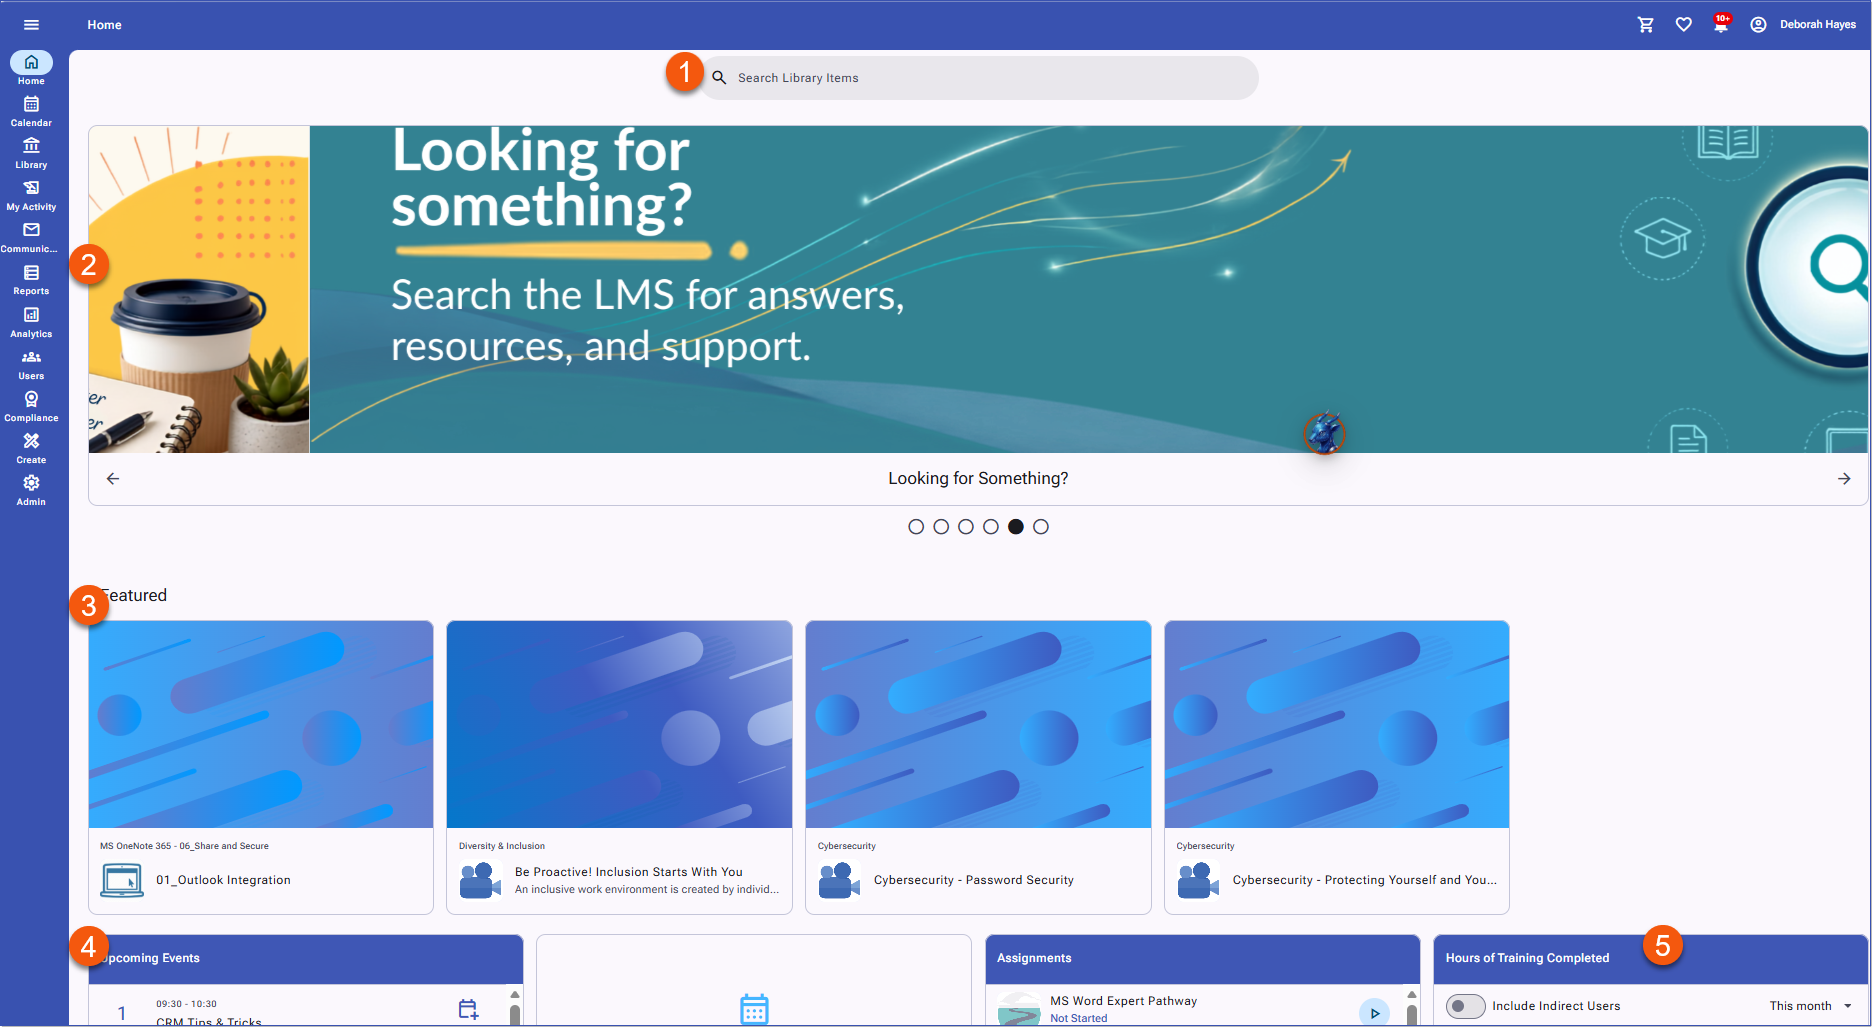
The default dashboard layout includes:
1.A search bar at the top of the page
2.News content (banners)
3.Featured, Recommended, and Trending learning carousels
4.Standard learning cards
5.An additional card column that displays the Welcome card by default
The Default Home Dashboard provides users with a fully functional homepage while administrators design, configure, and assign custom dashboards.
Default Home Dashboard - Click to Zoom
Dashboard Editor
The Dashboard Editor is where administrators create and manage custom dashboard layouts for different user groups and security profiles. Use the Dashboard Editor to design personalized Home Dashboard experiences by selecting from the various content block types including cards, news items, recommended items, etc. Administrators determine the card types and sizes, arrangement of the content, and can reorder sections to meet the needs of specific audiences.
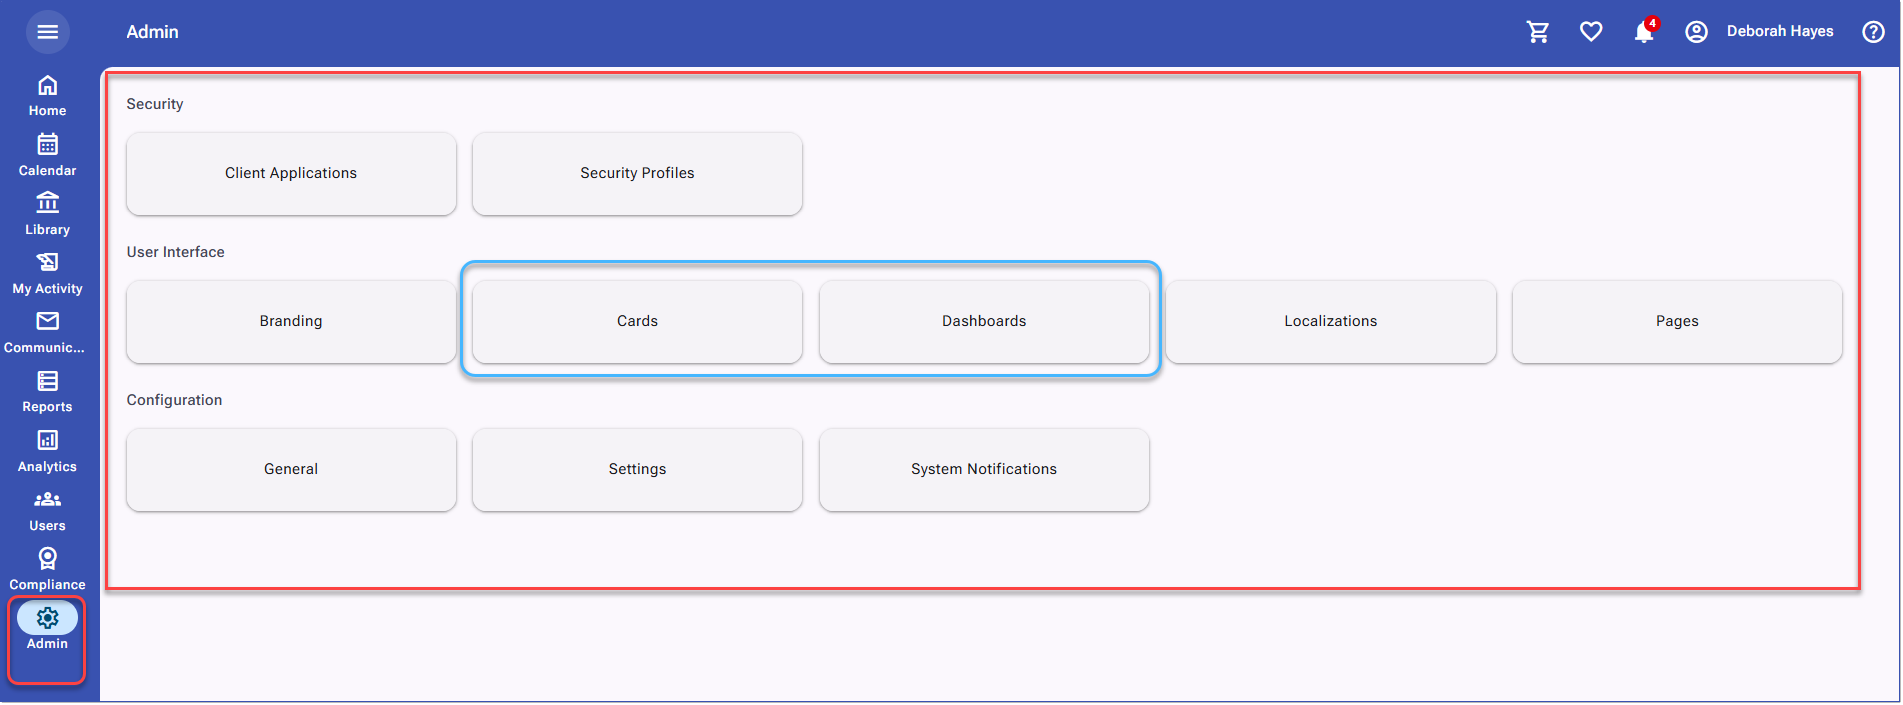
The Dashboard Editor is available from the Admin menu, formerly known as Settings. In addition to all options previously available in Settings, the Admin menu includes the new Card and Dashboard features, which provide the tools needed to create Quick Link cards and design custom dashboards. The Admin menu also reflects the modern user interface introduced in LMS v4.
The Dashboard feature is where you create custom dashboard designs and tailor the Home Dashboard experience for different groups of users. Administrators have the ability to assign Dashboard designs by User Type, User Group, or Security Profile, allowing for granular control over which users see which dashboards.
To create a new dashboard layout:
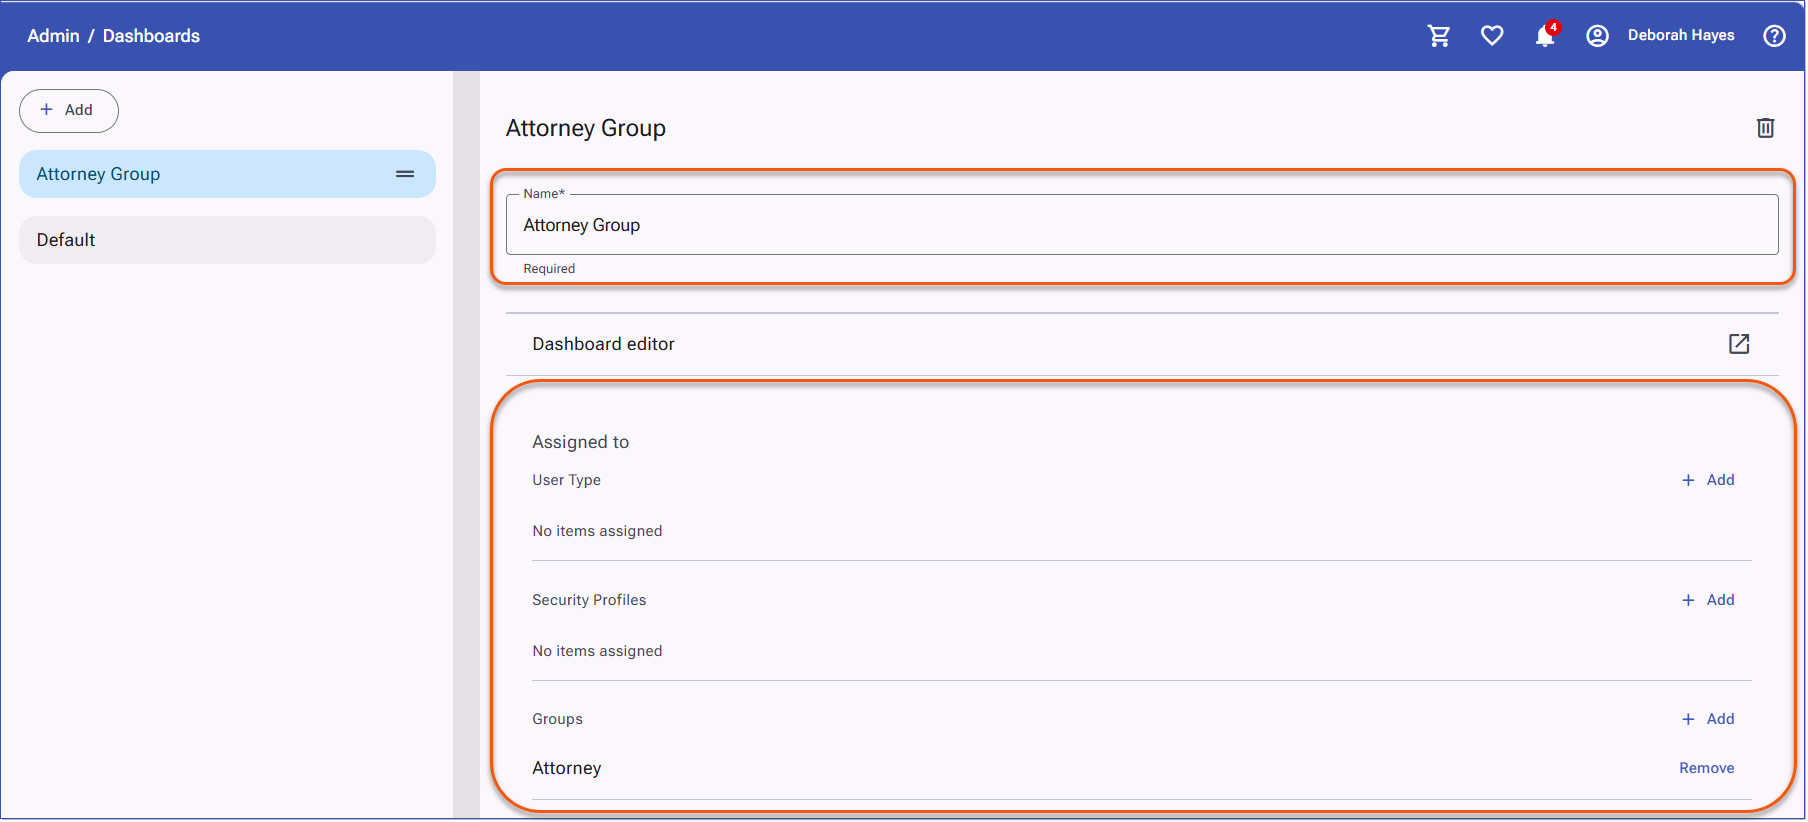
1.Navigate to Admin > Dashboards.
2.Click the +Add button to launch the Create Dashboard page.
3.Enter a Name for your dashboard. Use an intuitive name that will assist in organizing dashboards.
4.Set the Assigned to option to determine who the dashboard will be assigned to. Click the +Add button beside the appropriate assignment choice:
•User Type: to select 'User' or 'Event Contact'.
•Security Profiles: to select the appropriate security profile including any custom security profiles.
•Groups: to select the desired user group.
5.Save the dashboard
Navigate to the Dashboard Editor
6.To design the layout of the dashboard, click the launch button to open the Dashboard Editor
The Dashboard Editor is where administrators will determine the cards and sections/content blocks to be included in their new dashboard design, the placement and size of the cards, and the order the cards are listed. Initially when creating a new dashboard design, the default sections and cards will be listed.
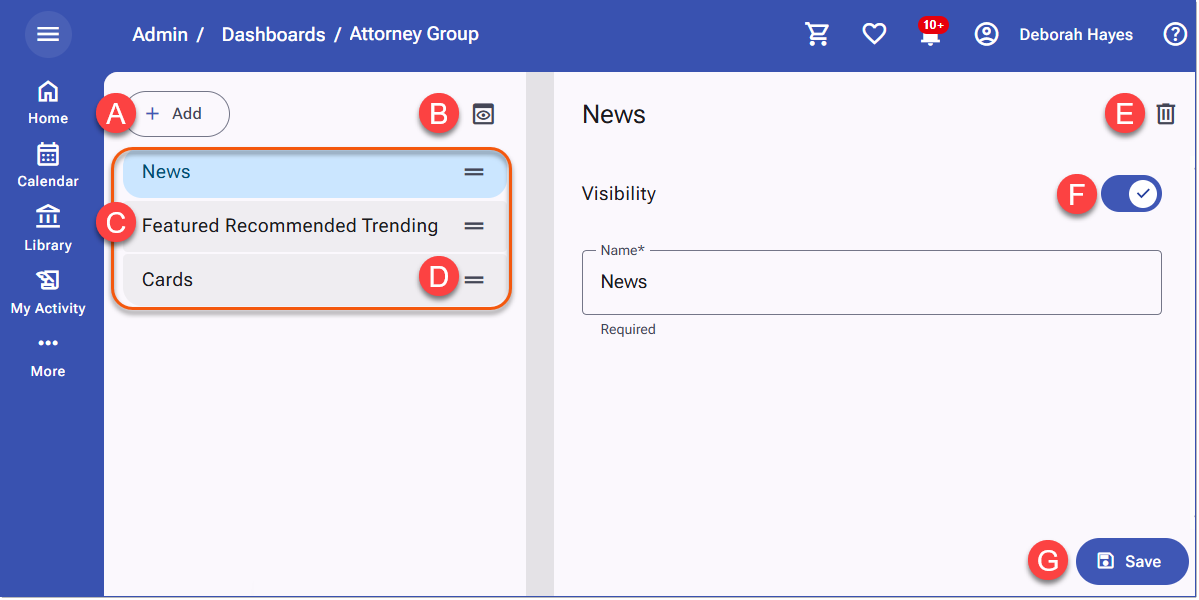
Dashboard Editor Interface Overview
A.Add new dashboard content by selecting from the available types.
B.Preview the dashboard to review the design and user experience.
C.Lists the content blocks selected for the dashboard.
D.Drag and drop content to reorder the display on the dashboard.
E.Delete the selected dashboard content from the dashboard.
F.Control the visibility of the selected content on the dashboard. Use the slider to hide or make visible.
Administrators will add content blocks to the dashboard design and make design decisions regarding order, number of cards, card types etc. Use the following as a guide to work with the various dashboard content blocks available to your dashboard design.
Adding Content Blocks to the Dashboard
1.Navigate to Admin > Dashboard and launch the Dashboard Editor for the desired dashboard.
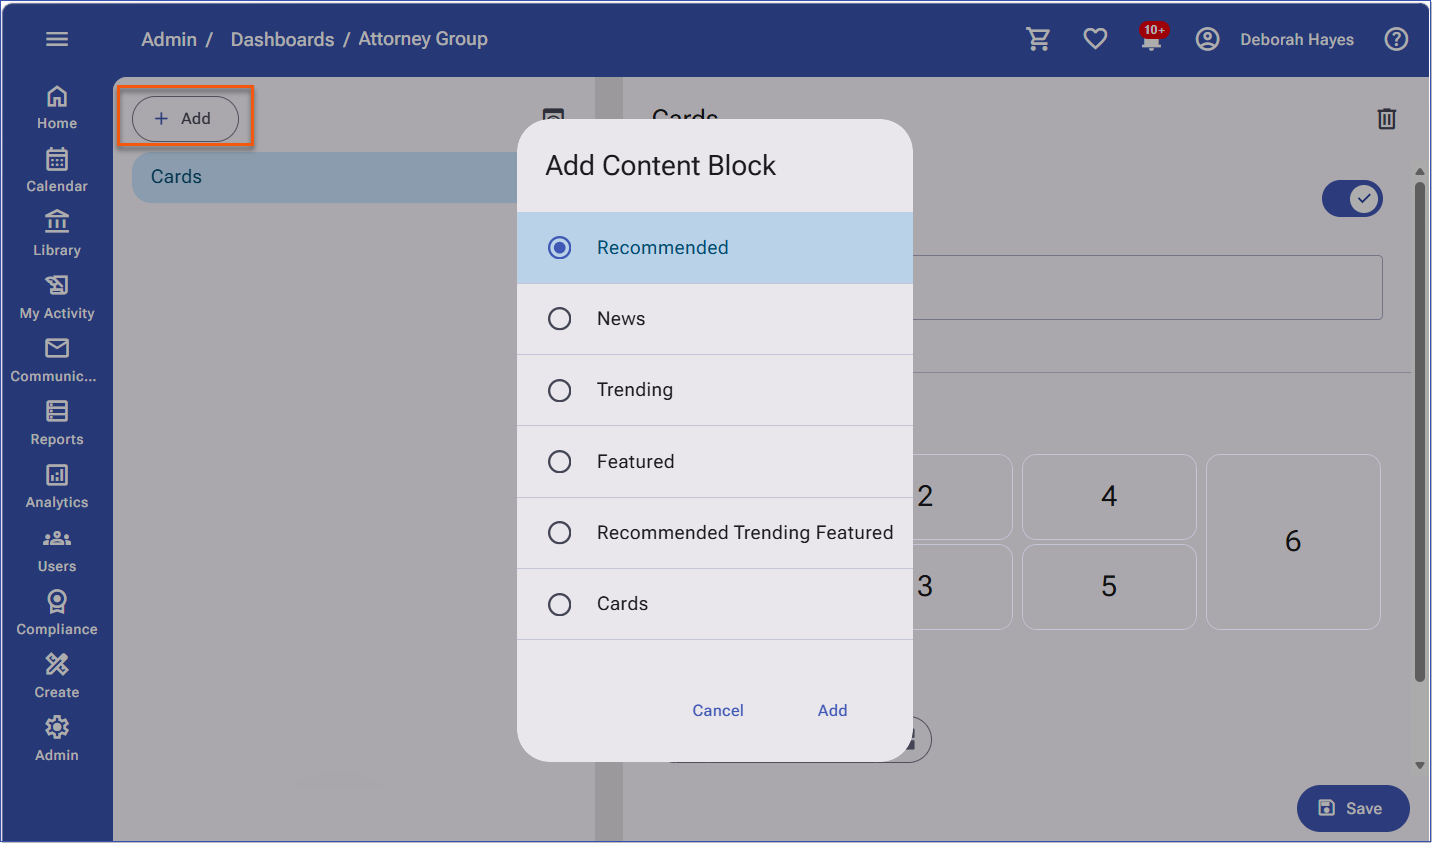
2.Click the +Add button to display the list of available content blocks.
3.Select the desired Content Block and click Add to include the content in the dashboard design.
4.Click .
Add Dashboard Content Block
•Recommended: to add the Recommended carousel
•News: to add News Items/Banners
•Trending: to add the Trending carousel
•Featured: to add the Featured carousel
•Recommended/Trending/Featured: to add all three tabbed carousels
•Cards: to display a section of dashboard cards or quick link cards. (see Cards)
Click the Preview button to display the dashboard design.
Dashboard Cards
LMS v4 introduces several new dashboard card types that provide users and managers with quick access to important information and actionable insights. Combined with the existing card types, these new options give administrators greater flexibility to create meaningful, role-based dashboard experiences for different user groups.
The following new dashboard cards are available:
•My Certificates – Provides direct access to the user's Learning Record and certificates.
•Quick Links – Replaces the v3 Text card and provides easy access to frequently used resources and URLs.
•Incomplete Assignments – Displays outstanding training assignments for managers.
•Hours of Training – Displays training hour metrics for managers.
Add a Card Content Block
Card content blocks can be configured in a variety of sizes and layouts to organize dashboard content effectively. To create a dashboard design, administrators add a card content block, select a layout, and then specify which card type will appear in each area of the layout. Multiple card content blocks can be added to a dashboard, providing the flexibility to create as much content space as needed and deliver the desired user experience.
Card Content Type
A.Add the Cards content block to the dashboard design.
B.Enter a name for the content block as desired.
C.Select a column of dashboard card placeholders.
D.Choose the desired layout for the card placement in the selected column.
E.Click the Edit (pencil) icon to select the card type to display in the dashboard placeholder, for example two card placeholder may display the Calendar and a Quick Link card. Repeat for additional placeholders as needed.
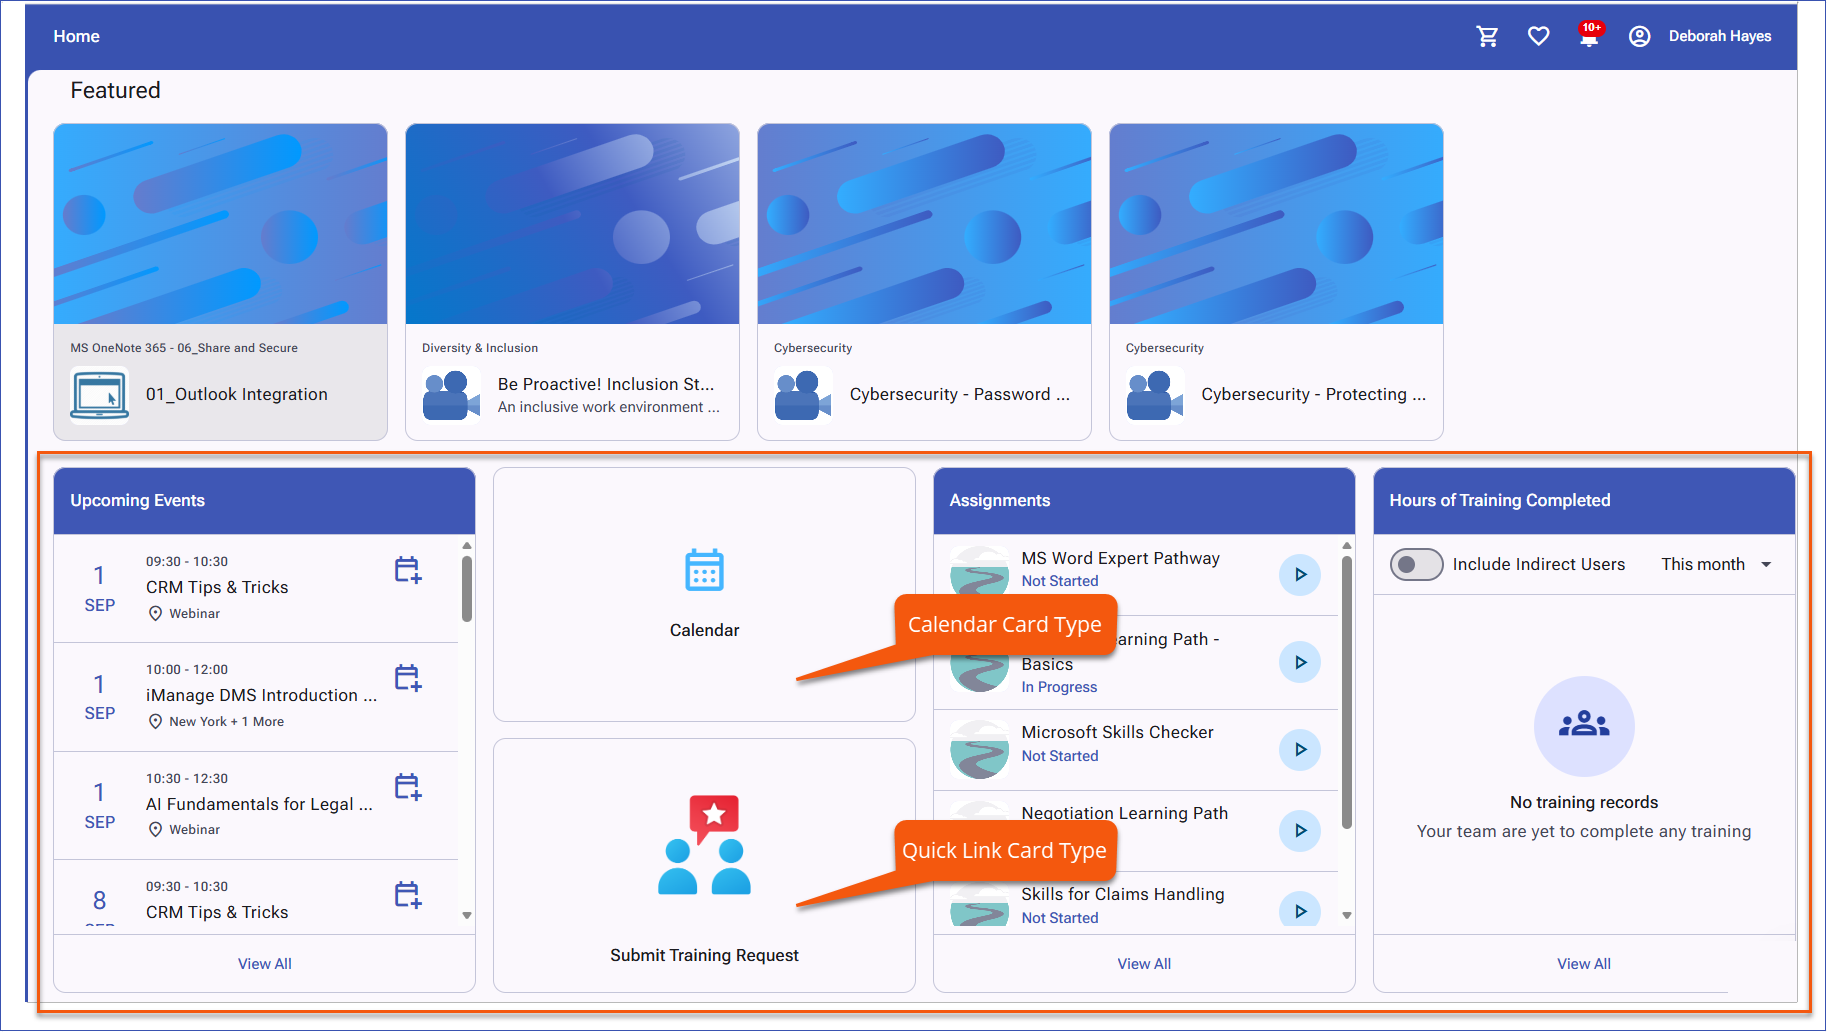
The Quick Link card replaces the Text card and allows administrators to create links to external websites, internal resources, email addresses, or other frequently accessed locations.
Administrators can create and save multiple Quick Link cards for use across different dashboard layouts.
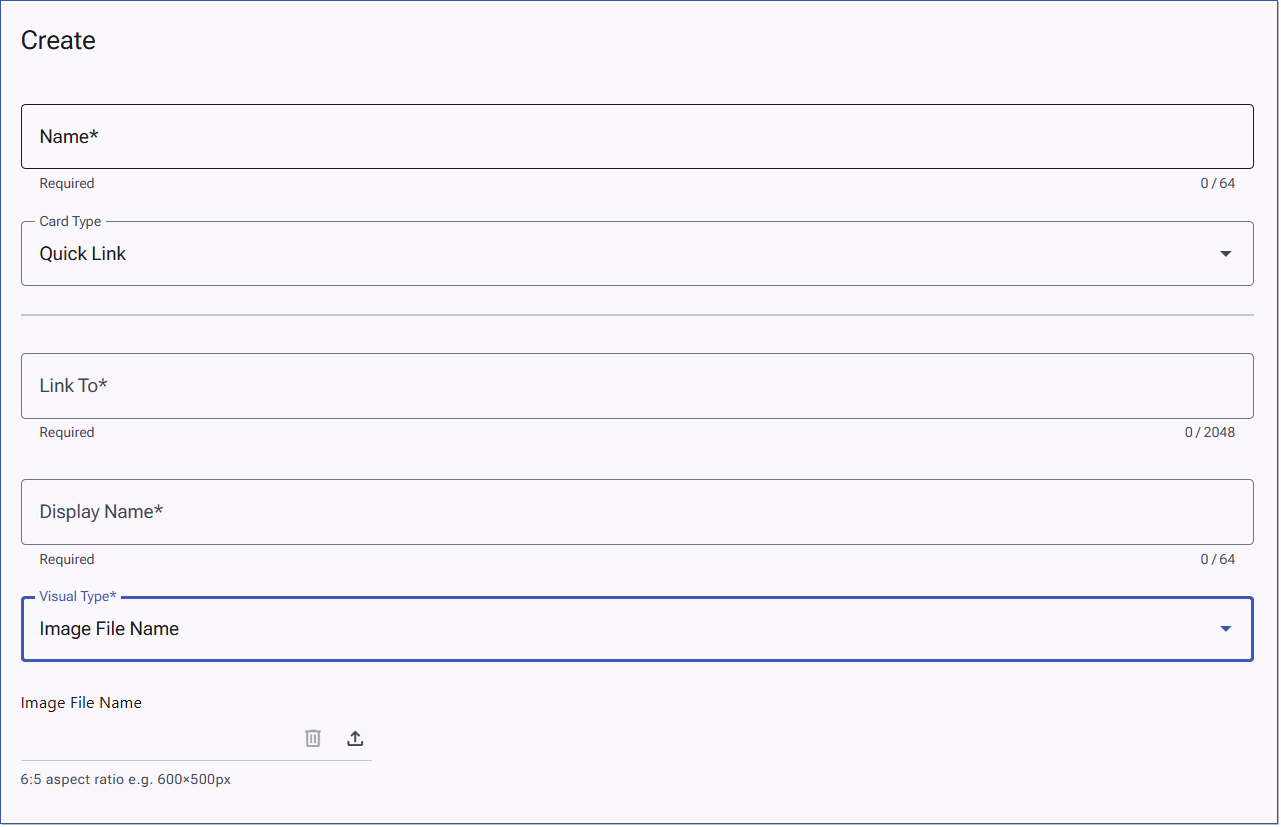
Create a Quick Link Card
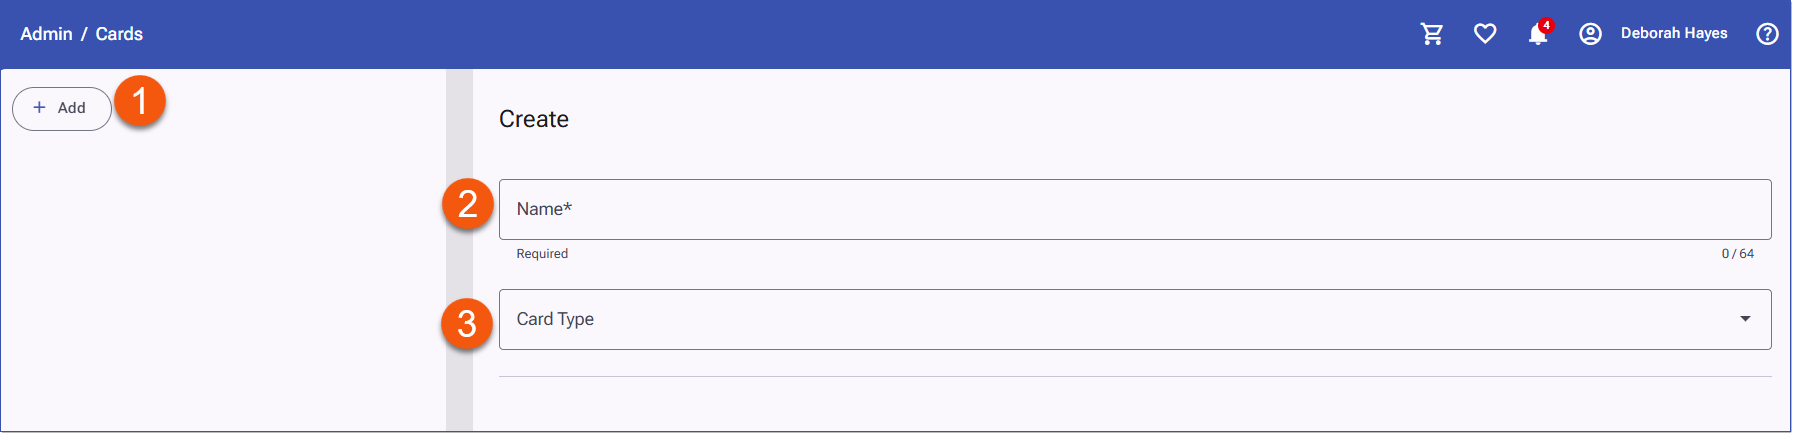
1.Select Navigation > Admin > Card > Add.
2.Enter a name for the card in the Name field.
3.From the Card Type dropdown, select Quick Link.
4.In the Link To field, enter the destination URL. Note: To create a link that opens an email message, enter the email address using the format: mailto:[email protected].
5.Use the Open in New Window slider to determine whether the link opens in a new browser window.
6.Enter a Display Name. This text is displayed on the Home Dashboard.
7.Under Visual Type, choose one of the following options:
•Image File Name: To upload a custom image
•Image Icon: To use a Google Fonts icon. (see Image and Icon Options below for more detail)
8.Click Save.
Quick Link Card - Create
Image and Icon Options
Quick Link cards can display either a custom image or a Google Fonts icon.
Upload a Custom Image
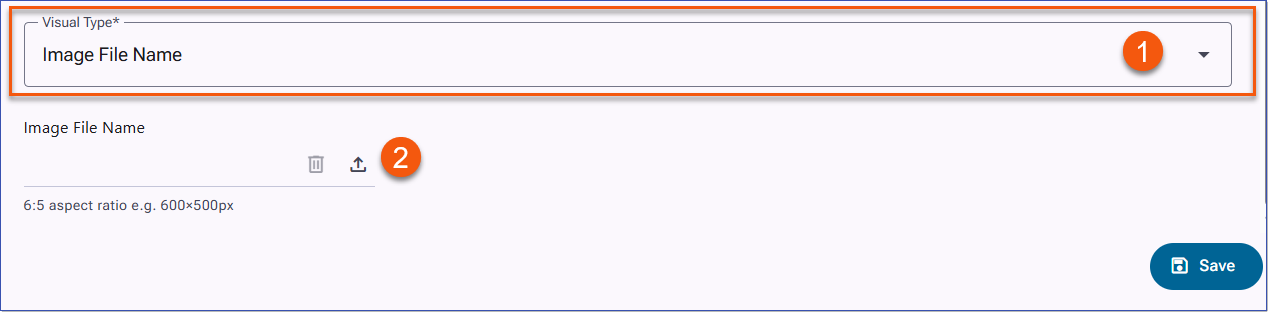
1.Select Visual Type: Image File Name.
2.Upload the desired image.
3.Click Save.
Tip: For a consistent appearance across the dashboard cards, use images with a 6:5 aspect ratio, such as 600×500 pixels.
The system automatically resizes images based on the selected card size. However, using consistent source image dimensions helps maintain the best visual appearance across dashboard layouts.
Custom Image - Click to Zoom
Use a Google Fonts Icon
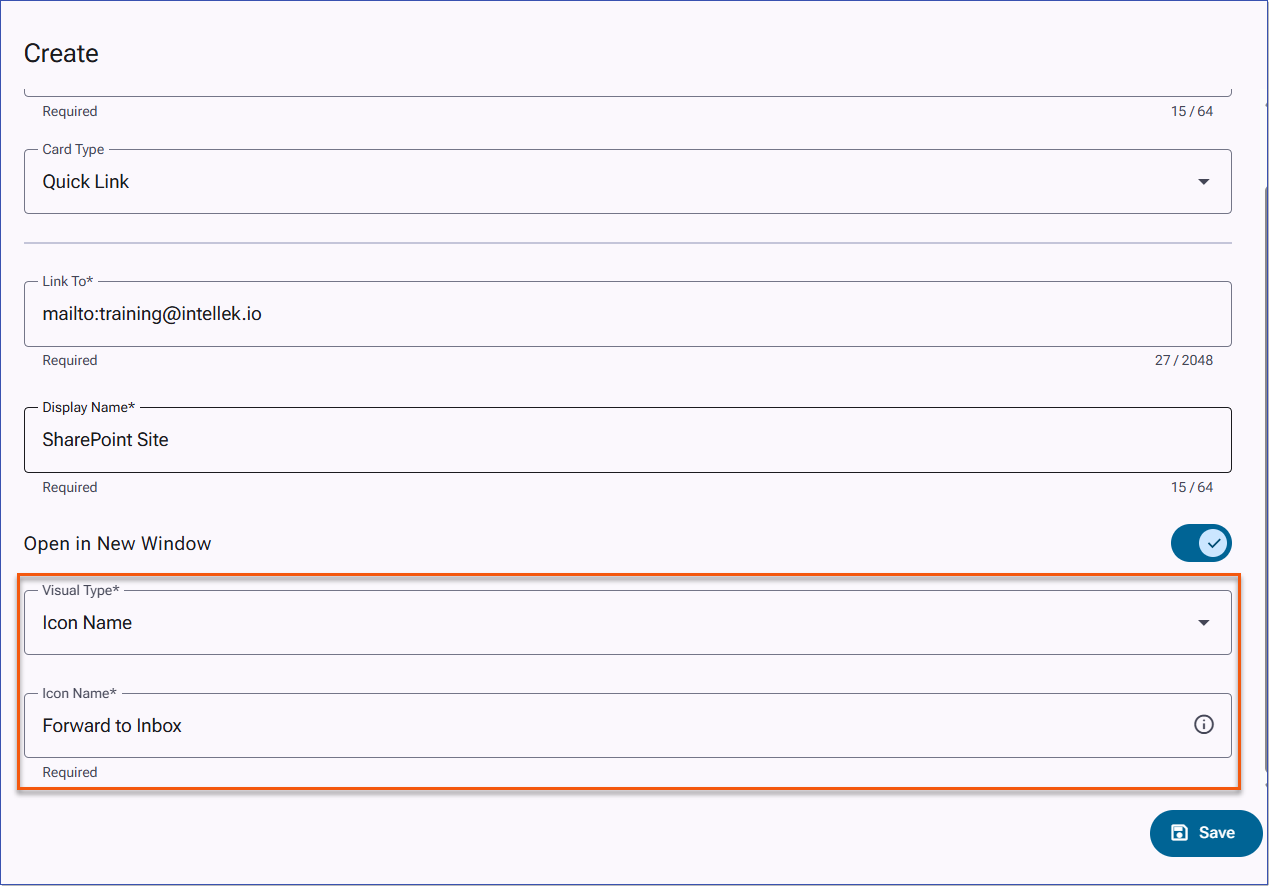
1.Select Visual Type: Icon Name
2.Visit the Google Fonts Icon library and choose an icon. (https://fonts.google.com/icons)
3.Enter the icon's name in the Icon Name field. The icon automatically adopts the colours defined by your LMS branding theme.
4.Click Save.
Example:
The following example shows a configured Quick Link card:
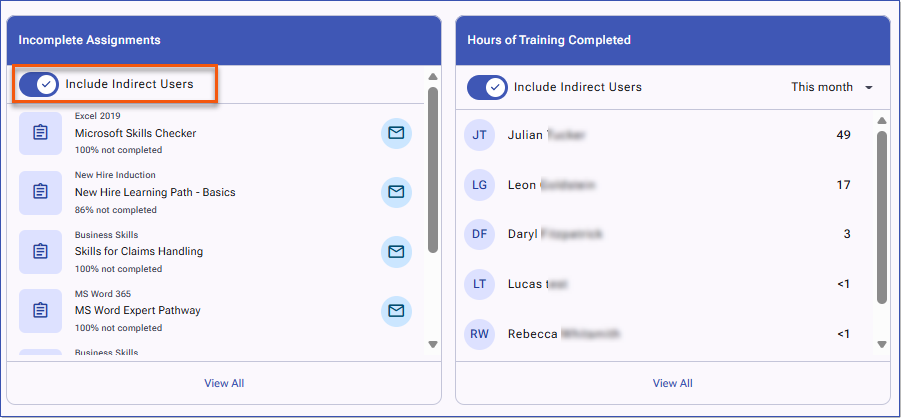
New manager dashboard cards provide visibility into both direct reports and users within a manager's reporting hierarchy. Available manager cards include:
•Hours of Training
•Incomplete Assignments
Indirect User Data and Hierarchy
The Include Indirect Users option allows managers to view data for both their direct reports and all users within their reporting hierarchy. This feature is available on the Approval Requests, Incomplete Assignments, and Hours of Training cards.
Sample Card Content Block
New List View Cards
New list view cards for Certificates, Hours of Training, Incomplete Assignments, and Surveys are designed to provide managers with actionable insights and quick access to relevant information.
Enhanced Assignment and Certificate Management
Managers can perform key actions directly from dashboard cards, including:
•Emailing users from the Incomplete Assignments card
•Setting assignment due dates
•Setting certificate expiry dates
•Downloading certificates
These enhancements help streamline training and compliance management.
Permissions and Visibility Controls
Some dashboard cards and features are only available to users with the appropriate manager or administrator permissions. If a user does not have access to a specific card, that card will not be displayed. Additional user guidance and visibility indicators may be introduced in future updates.


 to
to 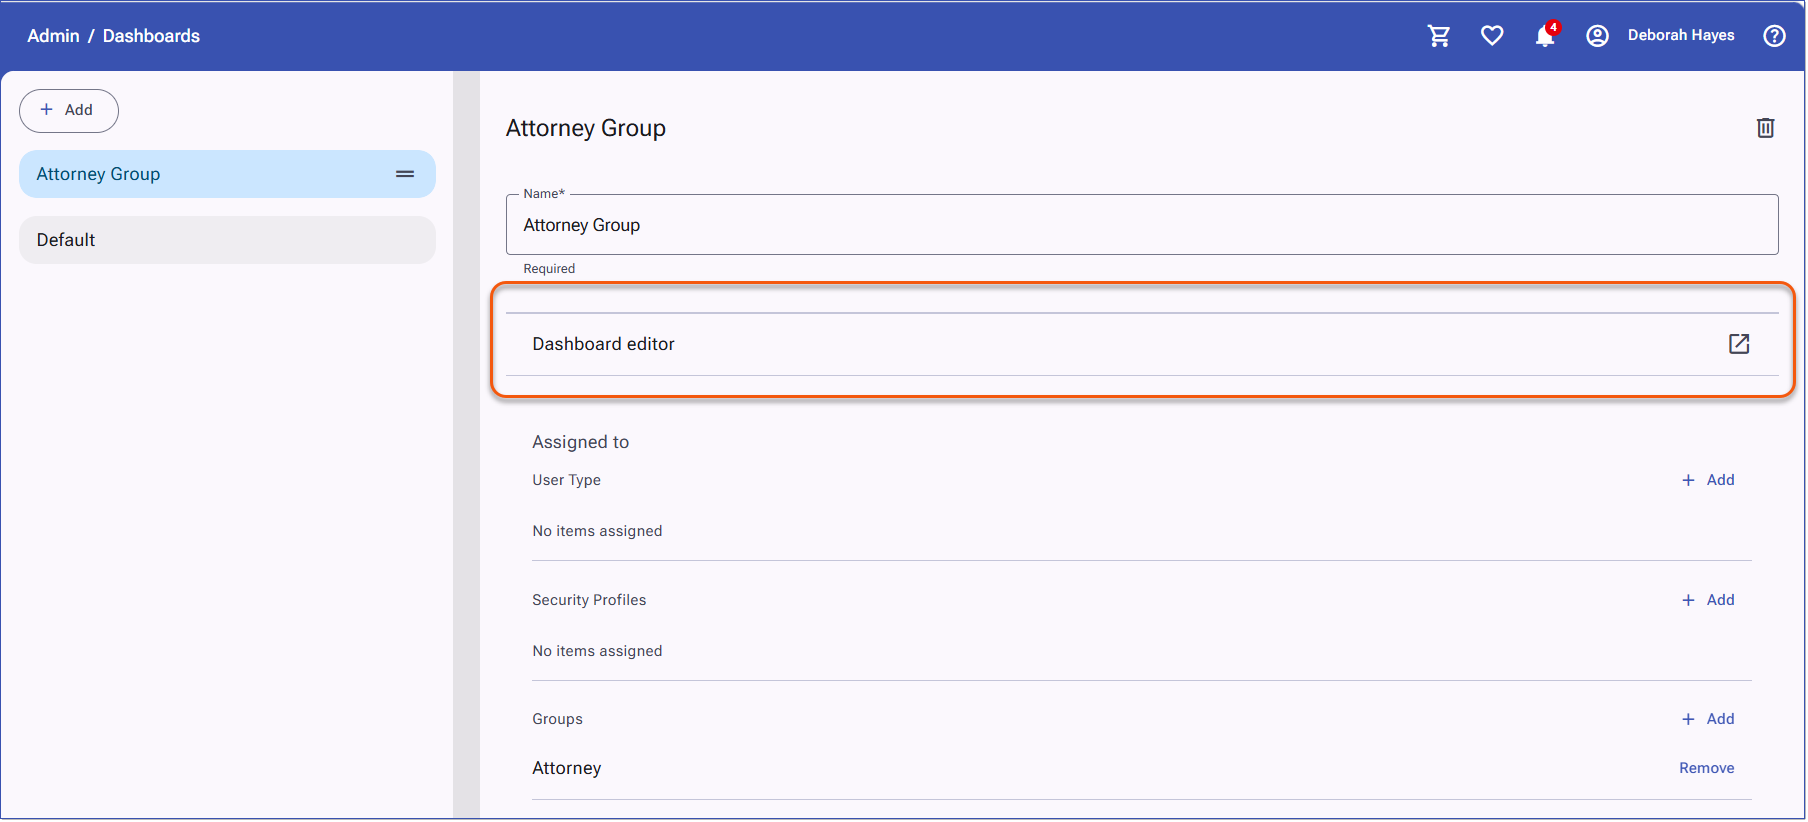
 delete button to remove the content from the dashboard.
  button to display the dashboard design.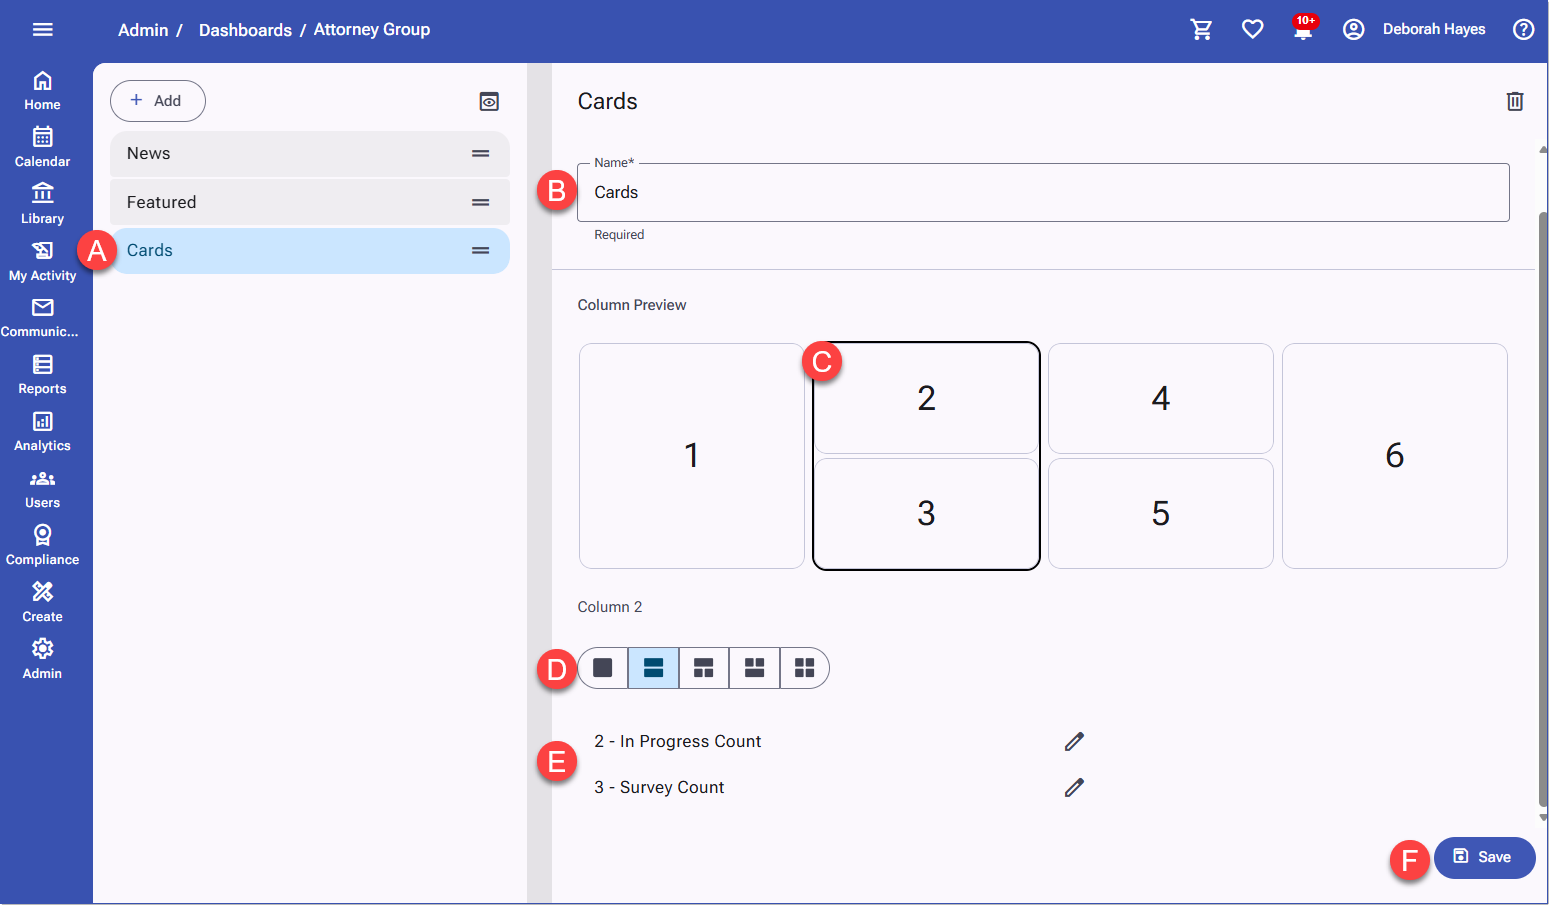
 the desired image.