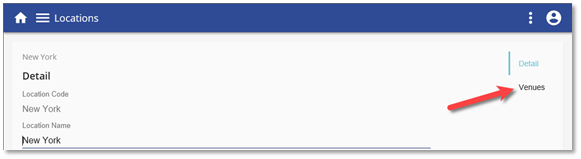
1.From the list of Locations, select your Location and click Edit record ![]() .
.
2.Click the Venue(s) tab on the right side of the page. Any existing Venues will be displayed.
3.Click Add a new record ![]() .
.
4.Complete the form for the Venue.
a.Location Name – The Location Name reflects the selected Location and cannot be edited.
b.Venue Code – Should be a unique identifier for the Venue. An example might be DCR23 or HTR4.
c.Venue Name – This is seen in the Venue drop-down list and in appointments sent to User(s) when they enroll in an Event. An example might be Conference Room 23, or Training Room 4.
d.Record Status – The default setting is Active. It must be Active to be used.
e.Bypass Conflict Check – If selected, allows you to schedule more than one Event in the same Venue at the same time without any notification.
f.Use as default venue when adding Events – If selected, the Venue will be populated as the default for any Events scheduled in this Location/Venue when adding Events to the Calendar. You can override that selection when adding Events to the Calendar.
5.Click ![]() .
.
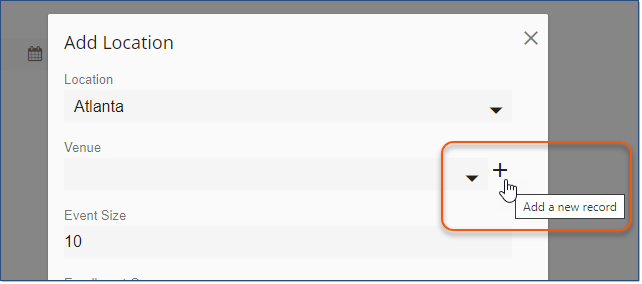
The ability to add a new venue is also available when creating/editing an Event.