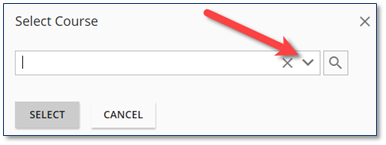
1.Navigate to the Calendar. 2.Click Add Event 3.Click 4.Search for and select the Course. a.To search for the Course: •In the Free text search box, enter the complete or portion of the Course name. •Click Show filters b.Click 5.In the search results, click the Course that you wish to schedule as an Event on the Calendar. 6.Click
7.Complete the Add Event Details. a.Name – Populated from the Course Details. This can be modified when scheduling the Event on the Calendar, if required. b.Event Description – Populated from the Course Description on the Course Details. If required, modify the Description for the Event being scheduled. c.Event Dates – In the Date From and Date To fields, enter the appropriate data or use the calendar The Time Zone displayed in the Event Dates section reflects the Time Zone of the user who is creating the Event until a different Location is selected. If a different Location is selected, it will change to the appropriate Time Zone of the selected Location.
d.Location – Click Add Location i.Click the Location arrow to select the appropriate Location. ii.Click the Venue arrow to select the appropriate Venue. The available Venues are based on the Venues associated with the selected Location. iii.Enter the number of available seats for the Event. Defined by the Scheduled Course Type Defaults. You can override the class size based on the Location/Venue information you have chosen. iv.The Enrollment Opens and Enrollment Closes fields are populated from the Course Details. If required, these fields can be modified when scheduling the Event on the Calendar. v.Click e.Contacts – Click Select Contacts i.To search for and select Contact(s): •In the Free text search box, enter the complete or portion of the Contact name. •Click Show filters ii.Click iii.In the search results, click the check box(es) next to the Contact(s) that you wish to assign to the Event. iv.Click
If you need to change the Contact Type, for example, Jane Doe has been added as a Trainer, but she is the Speaker for this Event, simply Edit To remove an assigned Event Contact, click the
f.Webinar – See the Webinar Events topic to include webinar connection information. 8.Click 9.The Event Detail page will automatically display in order to add or edit the remaining details for the Event. Additional fields that now display on this page are: a.Event Status – Active should be selected. b.Learner Link – Copy this link to send to one or more users in an email message.
c.Certificate – Click the Certificate arrow to select the appropriate Certificate for users to print upon completion of attendance for the Event.
d.Survey – Click the Survey arrow to select the appropriate Survey for users to take and submit upon completion of attendance for the Event.
10.Add or edit additional information, if required. 11.Click
|


If you want to schedule multiple sessions of the same Course, you can only do this when adding new Events. Once an Event has been added to the Calendar, you cannot edit the Event to add Dates and Times. To add Dates and Times when Adding an Event: 1.Click the
2.Select the appropriate Date From and Date To (see Step 7c. in the Scheduling a Single Event topic) for the additional Event. 3.Repeat Steps 1 and 2 for each additional Event. |