Locations that are defined in the Learning Management System (LMS) impact numerous areas of data:
•User Details
•Event Details
•Reporting
Typically, Locations are created in the database based on the information in the Location field in the Import_Learners spreadsheet. They can also be created manually if required. After the initial import of Learner Data, you should review the Locations and complete additional details for each Location.
Your Locations can be accessed from the Calendar or Users three dot Options menu.
If you access Locations via Users, you will not see the Venues tab, as Venues aren’t associated with Users. |
Venues are associated with Locations and define any rooms or areas in which training Events might occur. Adding the appropriate Venue(s) to each Location will make scheduling Events on the Calendar easy and will provide users that have enrolled in Events with the information they require to attend the session. A Location may have numerous Venues.
1.Click Add a new record 2.Complete the form as appropriate for the Location. a.Location Code – Enter a unique code for the Location. This must be unique and cannot be used for another Location. The Code can be the same as the Location name or can contain abbreviated city/state information, such as NYNY. b.Location Name – Enter the Location name that will display in the Location drop-down list anywhere it is available, such as the User Details window, Add Event window, Reports, etc. If you have multiple locations in the same city, you would need to make sure the location names accurately identify the location. c.Time Zone – Select the time zone that is appropriate from the drop-down list. d.Local Date Format – Choose the date format from the drop-down list. The LMS uses this setting when it sends Users emails/calendar appointments. e.Local Time Format – Choose the preferred time format from the drop-down list. The LMS uses this setting when it sends Users emails/calendar appointments. f.Record Status – The default value is Active. It must be set to Active in order to use it. g.Default Paper Size – Choose the paper size to be used for Event Attendance Roster(s). 3.Click |
If you edit the Location details, you are making modifications that will impact any user that has that Location assigned. You may not edit the Location Code once the Location has been created. Modifications made on the Venue(s) tab have no direct impact on a user.
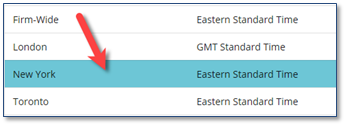
1.Select a Location. To select a Location, click the blank space in the row with the Location name.
2.Click Edit record 3.Edit the appropriate information. 4.Click |
Locations created in error or duplicates can be deleted. It is preferable to change the Status of a Location to Inactive rather than delete it.
1.From the list of Locations, click the blank space in the row with the Location name. 2.Click Delete the selected item(s)
|
1.From the list of Locations, select your Location and click Edit record 2.Click the Venue(s) tab on the right side of the page. Any existing Venues will be displayed. 3.Click Add a new record 4.Complete the form for the Venue. a.Location Name – The Location Name reflects the selected Location and cannot be edited. b.Venue Code – Should be a unique identifier for the Venue. An example might be DCR23 or HTR4. c.Venue Name – This is seen in the Venue drop-down list and in appointments sent to User(s) when they enroll in an Event. An example might be Conference Room 23, or Training Room 4. d.Record Status – The default setting is Active. It must be Active to be used. e.Bypass Conflict Check – If selected, allows you to schedule more than one Event in the same Venue at the same time without any notification. f.Use as default venue when adding Events – If selected, the Venue will be populated as the default for any Events scheduled in this Location/Venue when adding Events to the Calendar. You can override that selection when adding Events to the Calendar. 5.Click
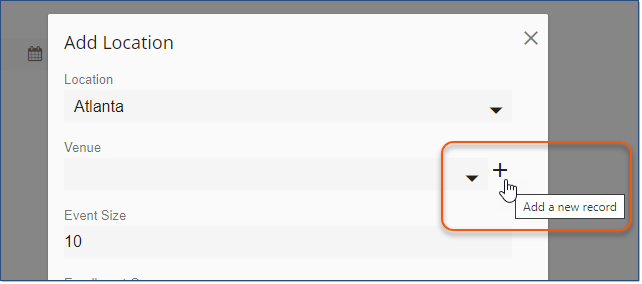
The ability to add a new venue is also available when creating/editing an Event.
|
Venues can be edited to reflect a different Record Status, to set or clear them as a Default for the specified Location, change their display sequence, or include or clear the Venue from checking for conflicts when scheduling Events on the Calendar.
1.From the Locations list, select the required Location, and then click Edit record 2.Navigate to the Venues tab. 3.Select the required Venue, and then click Edit record 4.Edit the appropriate information. 5.Click |
Venues created in error or duplicates can be deleted. It is preferable to change the status of the Venue to Inactive rather than delete it.
1.From the list of Locations, select the required Location, and then click Edit record 2.Navigate to the Venues tab. 3.Select a Venue. To select a Venue, click the blank space in the row with the Venue name. 4.Click the Delete the selected item(s)
|


