About This Feature
The Learning Management System (LMS) allows LMS Administrators to create and manage custom certificates that Learners can receive upon completion of an Event, an eLearning Course, or Learning Path.
Certificates can be customized to meet your organization's requirements, and you can create as many certificates as needed. Sample certificates are also available upon request to help get you started.
Certificate Types are Course or Path. When creating a certificate, select the appropriate Certificate Type:
•Course: For scheduled Courses (Events) and eLearning Courses
•Path: For Learning Paths
Choosing the right Certificate Type ensures that the correct certificate variables are available and that the right information appears, i.e. Course name or Path name.
Certificates are managed from the Library, where you can search and filter certificates and maintain both Active and Inactive certificates.
How to Use This Feature

Certificates are created as templates, allowing you to use the same certificate for multiple Courses, Events, or Learning Paths, as appropriate. By adding variables to the template, the LMS automatically inserts the relevant learner, course, event, or completion information when the certificate is generated. 1.Navigate to the Calendar or Library. 2.From the three-dot Options menu, select Certificates. 3.Click the Add a new record 4.Enter a Certificate Name that clearly identifies its purpose, such as Course Completion, Certificate of Attendance, or Required eLearning Course. 5.Click the Certificate Type drop-down, select whether the Certificate is for Courses or Paths. 6.Set the Certificate Status to Active.
7.Select the appropriate Page Size (Letter for US or A4 for UK/Europe). 8.Select the preferred Page Orientation (Portrait or Landscape). 9.Create and format the Certificate Body. Format the Certificate BodyEnter the text you want to display on the certificate, then use the editor tools to format the content. The toolbar options, from left to right, are described below:
Add a Header or FooterOptionally, use the Header and Footer settings to add logos or other graphics to the top or bottom of the certificate. 1.From the Header Style or Footer Style drop-down, select how the uploaded graphic should be positioned: •Banner: Fits or stretches the graphic across the width of the page. •Left, Right, or Center: Positions the graphic at the selected location. •Left/Right: Allows you to upload two graphics, positioned at the left and right margins. •Left/Centre/Right: Allows you to upload three graphics, positioned across the left, center, and right areas of the page. 2.Click the Upload 3.Click PREVIEW to review the certificate layout, formatting and spacing. Note: If you have unsaved changes, you will be prompted to save them before the certificate preview is displayed. 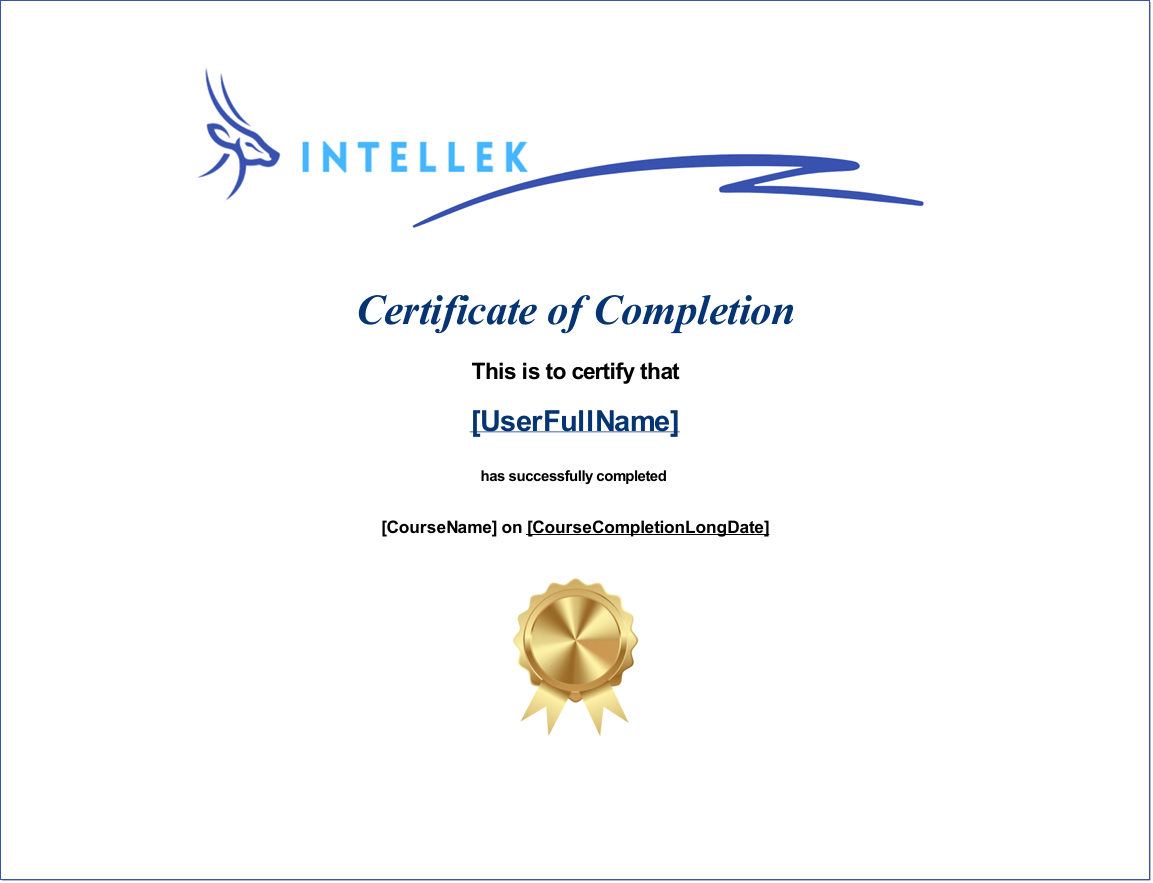 Sample Course Certificate 10.Click SAVE.
|
 button.
 When creating a new Certificate, set the Certificate Status to


 icon, then browse to and select the graphic you want to use.
Once Certificates have been created, they can be applied to Courses in the Library, Events on the Calendar, and/or Learning Paths. The selected Certificate will be applied when a user prints the Certificate from their Learner Record page. Adding a Certificate to a Course or Learning Path1.From the Library, display the Course or Path Details. 2.On the Detail tab, click the drop-down arrow in the Certificates field. 3.Select the appropriate Certificate for the Course or Path. 4.Click Adding a Certificate to an Event in the Calendar1.Navigate to the Calendar and click on a previously saved Event to display the Event Details. New/Unsaved Events must be first saved to modify the Certificate drop down. 2.On the Detail tab, click the Certificates drop-down. 3.Select the appropriate Certificate for the Event. 4.Click
Course Completion - Email Certificate There are two options for notifying the User via email about availability of a Completed Course/Path/Event Certificate. The Certificate will be automatically emailed to the User on completion, instead of the user having to go in to their Learning record and download. •Turn ON the Global Communication > Automated Notification and align an email template to send notifications to all Users completing ALL courses aligned with a Certificate.
•Course/Path/Event-Specific Certificate Notifications - this option overrides any automated certificate notifications settings.
Certificate Documents TemplatesUse Communications > Templates to create the exact emails you'd like to send to notify users about Course, Event or Path-aligned Certificates. Include Certificate-related variables in your templates. Create a template to notify users that they've got a certificate available for completing a Course/Path/Event and include a link to their certificate from the email notification. 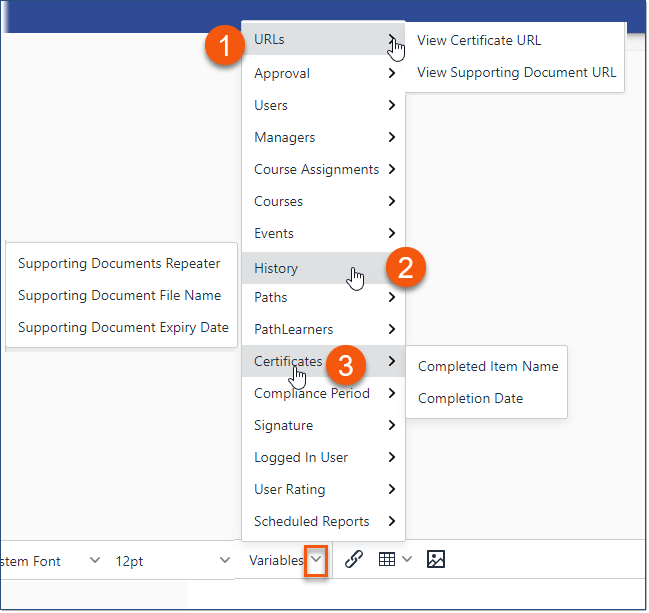 Certificate Email Template Variables
Template variables for Course/Path/Event-aligned certificates Use this template to populate the Communications > Automated Notifications > User Notification - Certificate Assigned - Turn ON to automatically send a notification to users based on the date a certificate was assigned (User has completed the aligned Course/Path/Event). Will not be sent if OFF or if a Course/Path/Event-Specific notification is set up instead in the Course/Path/Event > Notifications tab. •1 - URLs oView Certificate URL - Provides a link to download the certificate •3 - Certificates oCompleted Item Name - (course name) oCompletion Date |
 .


End-users can print Certificates by clicking the Print •A Certificate has been applied to a Course, Event, or Path. •The user has been marked as Finished or has a Passing score. |
 icon from the Action column of the Courses or Paths tab on their Learning Record page. A user can only print a Certificate, provided: