Feature Enhancements & Bug Fixes
Available April 10, 2025
NEW
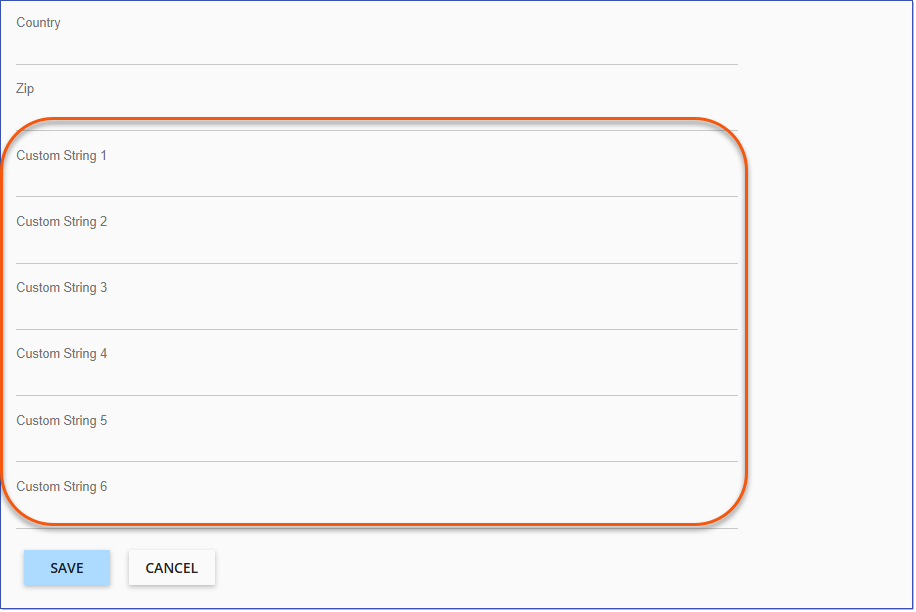
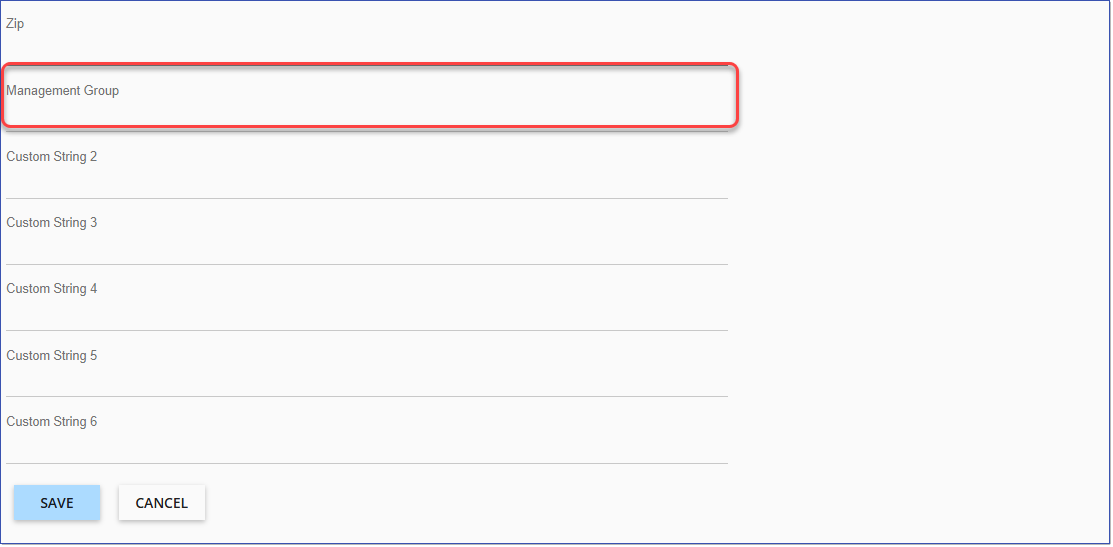
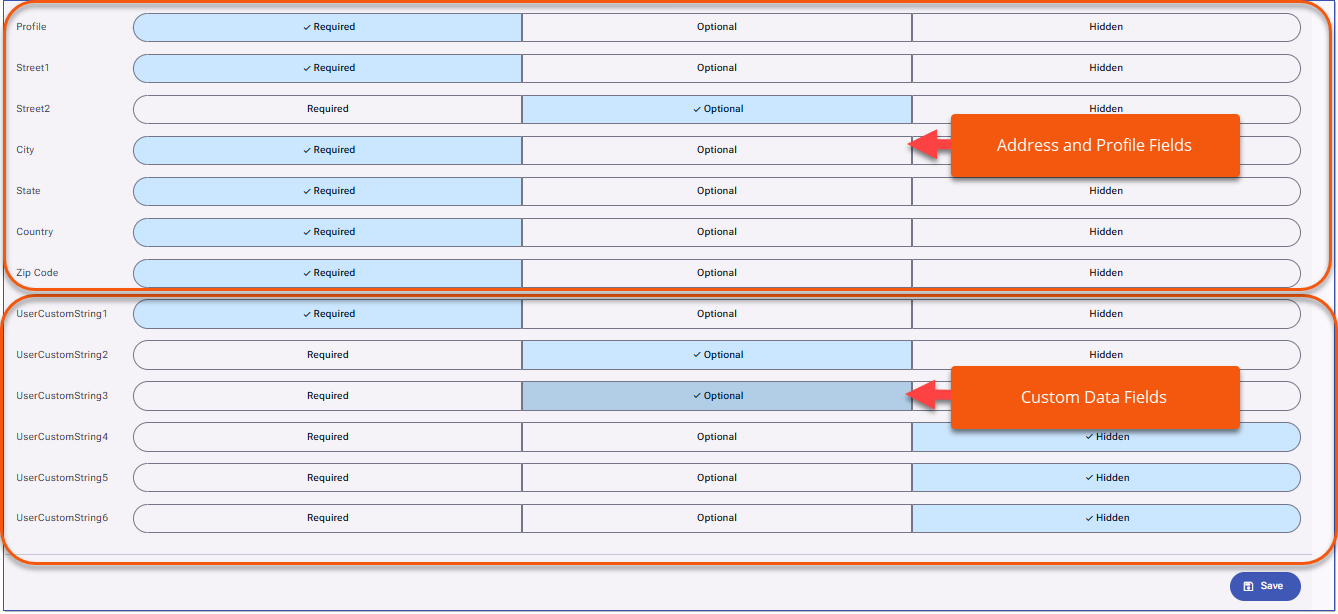
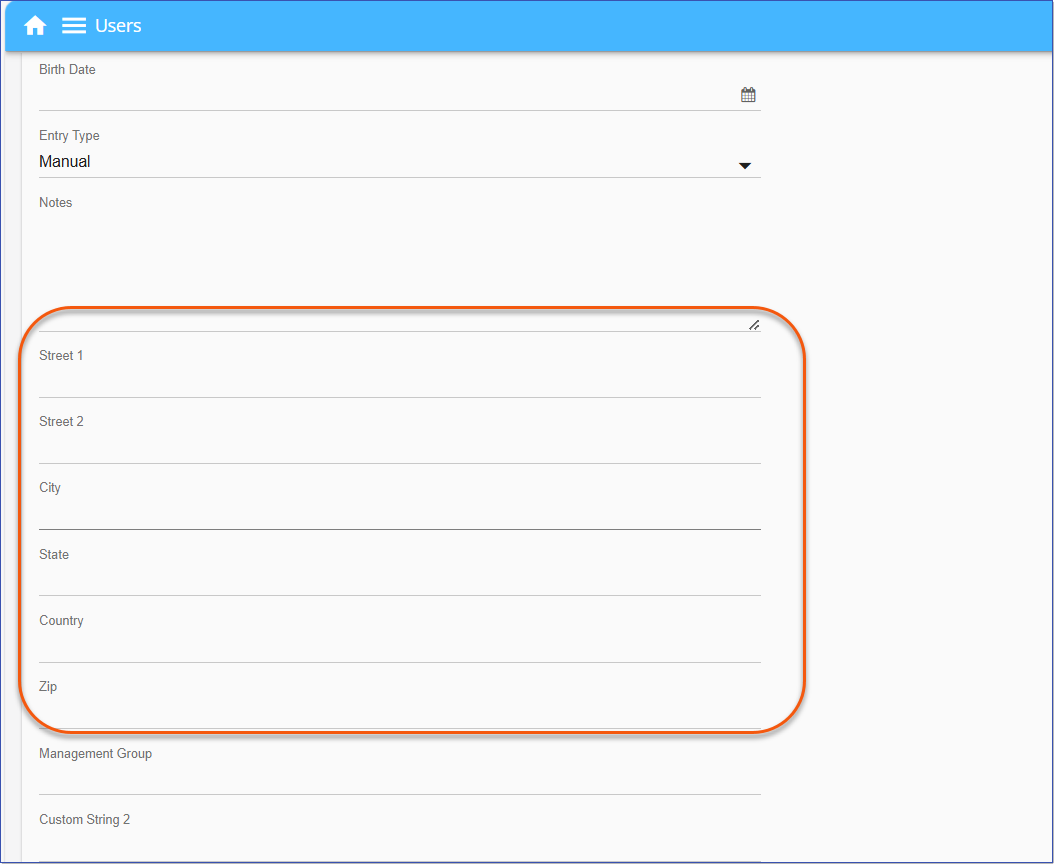
Six additional free text fields, "Custom String 1" through "Custom String 6", are available from the User Detail page to store additional User data. These fields can be custom labeled through Localization settings to provide more descriptive labels. For example, "Custom String 1" can be modified to display "Management Group". The six fields are also included when exporting data and running various reports and can be included with a User import. Display and StorageThe new custom data fields can be accessed via the User detail page. 1.Navigate to Users > and select a User's Last, First name in the grid to open the User detail page or select a row in the Users grid and click Edit Record 2.Scroll down to view the Custom String fields listed below the address fields.
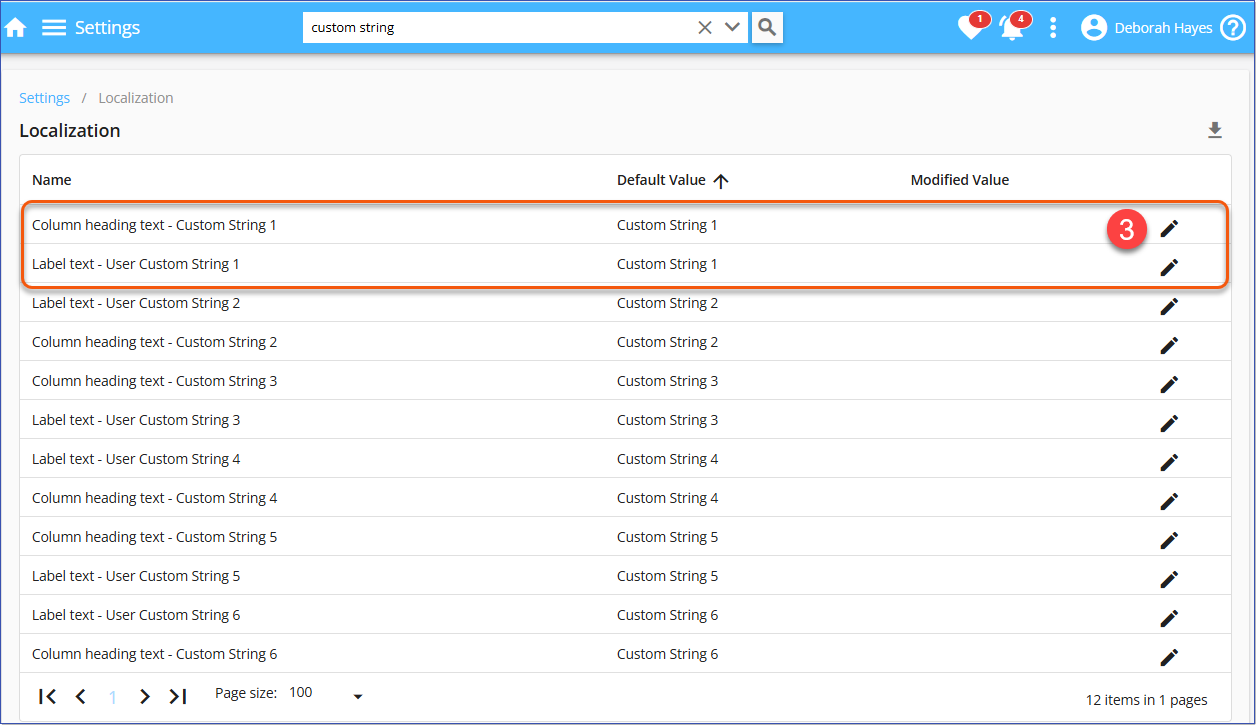
These free text custom fields are string only fields (NVARCHAR(256)) and support a maximum length per field of 256 characters. LocalizationYou can modify the display name of the custom fields through Settings > Localization to match your preferences. 1.Navigate to Settings > 3-dot menu > Localization. 2.Search for the names (labels) of the custom fields, i.e. enter custom string in the Search bar and click the Search button.
3.Select the pencil beside the custom field.
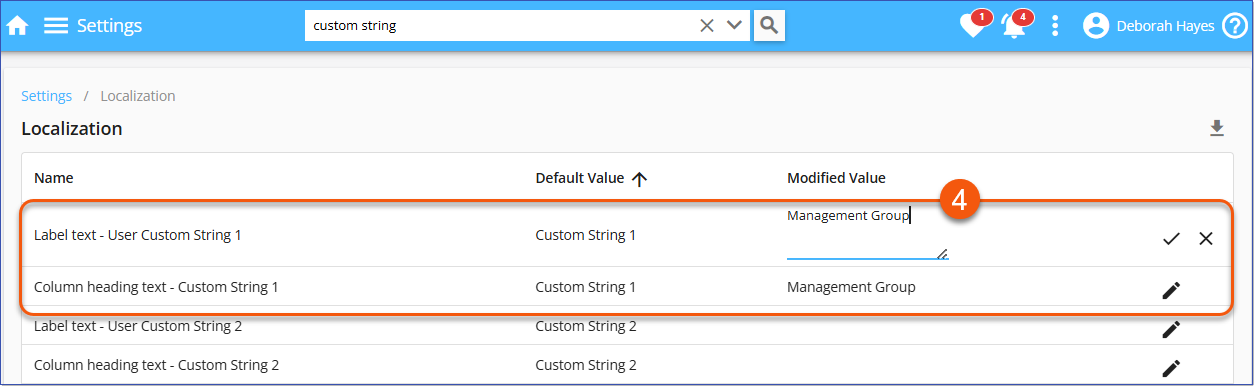
4.Enter the revised display name in the Modified Value column and click the
After making changes, ensure that any updated labels are correctly reflected in the User detail page.
User ExportThe free text custom fields are included in the User > Export file. The data will appear after the Address columns and be labeled as Custom String 1, Custom String 2, etc., or with the modified name specified through Localization, such as Management Group.
Import Learner DataAdministrators using the Import_Learners spreadsheet to import User data will have the new free text fields included as optional in the Import. Additional API FieldsThe new free text fields are now available in the API. When calling the 'Users' endpoint with a GET request via the Import Learners API, all six new free text fields are included in the returned JSON object. Each field is assigned a value based on the corresponding database entry, with property names such as `custom_string_1`, `custom_string_2`, etc. If a field has no data, it will be set to `null`. For POST requests, these new free text fields are optional and can be included in the JSON data sent to the API, using the same property names: `custom_string_1`, `custom_string_2`, etc. See API Reference ReportingThe new free text fields are included in the exported data of the Training Tracking, Course Assignments, Path Progress and Event People reports. 1.Navigate to Run a Report and run the desired Report. 2.Select the Export The new free text fields and data are always included in the report Export. |


|
|
ISSUES RESOLVED:
•Declined Note is not included in notification sent to declined User. (19550, LitUni)
•Validate User Import - not validating First Name.
•Course Assignment Email. (19984, ShepW)
•Calendar User Menu scrolling. (20086, HughJ)
•Security Profiles. (20038, PWright)
•Unable to select and apply an Access Group to a Course. (19943, TCoburn)
•Unique identifier included in attendance list. (19553, FieldF)
•Context not disposed when running content.
•Multiple completion notifications (20070, ShepW)
----------------------------------------------------------------------------------------------------------------
Any Issues listed below this line were added after April 2, 2025 when LMS v4.0.2.0 Release Notes were originally made available.
----------------------------------------------------------------------------------------------------------------