 What are the recommended image sizes to use in the LMS?
Graphics must be in .png, .jpg, or .jpeg format. Below are the required aspect ratios and recommended image sizes for the various LMS elements. Maintaining the correct aspect ratio is crucial to prevent images from appearing distorted. To achieve the best quality and results, we recommend adhering to the dimensions of the Recommended Image Size.
|
 What are some ways to present a set of courses or paths, outside of a Path, to learners?
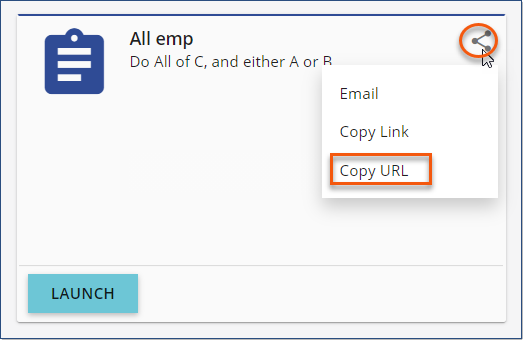
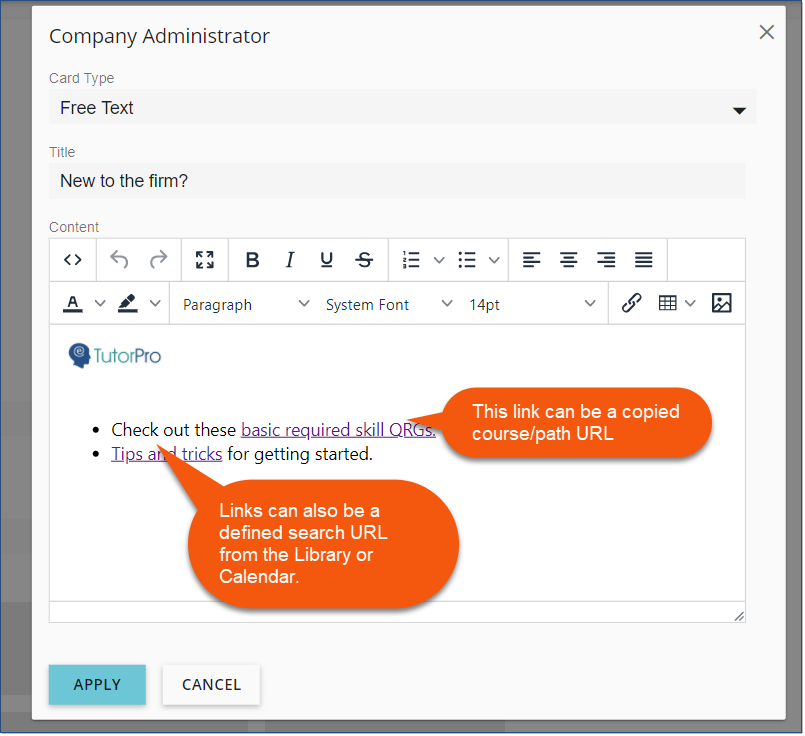
Consider adding one or more learner links to a News Banner or a free text dashboard card to highlight availability and offer speedy access. News Banner1.Copy a Course or Path Learner Link from the Library.
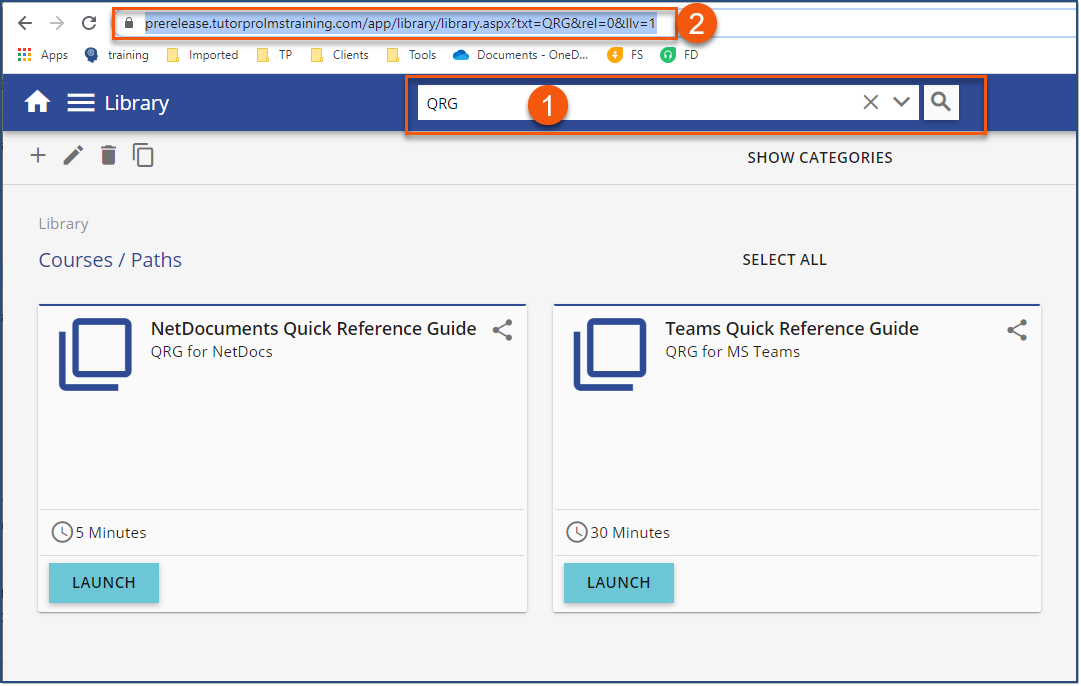
or create a defined search in the Library or Calendar and copy the URL.
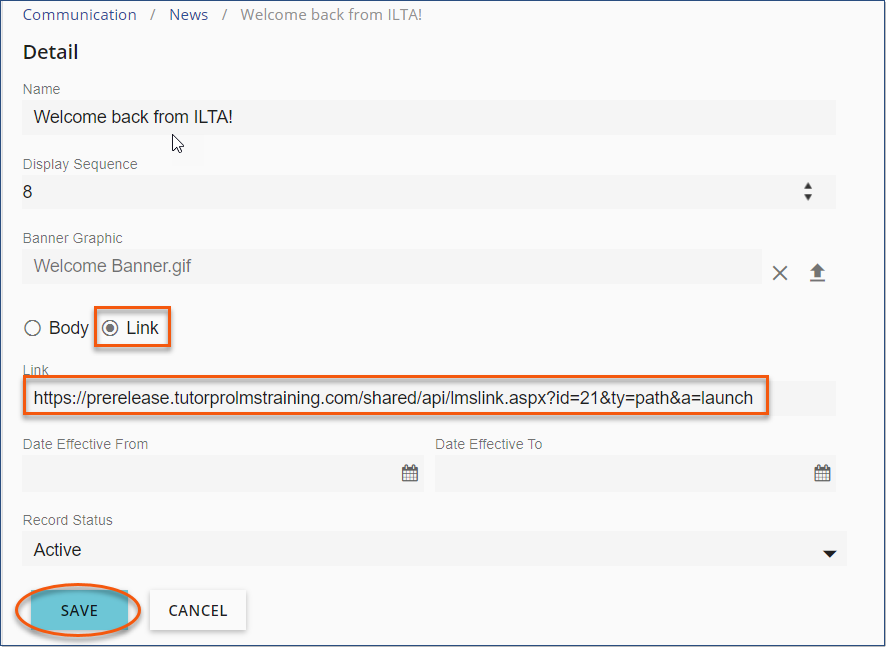
2.Prepare a News Banner to display for the relevant Users. 3.Choose to: a.link the entire banner heading and image to a single URL
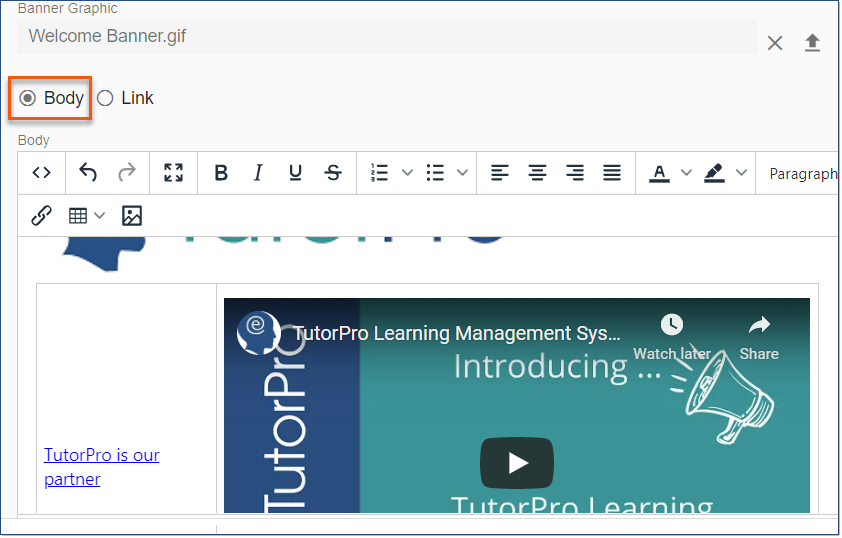
b.or use the News Banner body to create a listing of selections and hyperlink as many as you'd like made available.
Dashboard - Free Text Cards1.Copy a Course or Path Learner Link from the Library.
or create a defined search in the Library or Calendar and copy the URL.
2.Navigate to Settings > 3-dot options > Pages. Select the LMS roll for which you'd like to define the dashboard layout. Click each of the 5 cards and choose from the drop-down menu that type of content the card should display. You can select Free Text for multiple cards if you wish. 3.Free text cards can be configured with images, text, hyperlinked text (see step 1 above), tables, etc. Keep in mind the constraints of the space on the dashboard.
4.APPLY the Layout 5.SAVE |
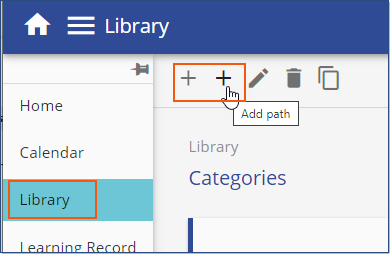
Here are detailed instructions for creating a Learning Path, but paths are as simple as you want them to be. Here is a 1-2-3 how-to guide for the most basic Learning Path. Set-up•Make sure all of the courses you wish to include in the learning path are set up correctly. •Any included scheduled courses should have future events available so your users can enroll. •Correctly set up any groups of users you might ultimately like to auto-assign to this path. •Add a Communication > Email Template that would serve as an acceptable, initial path assignment notification. Or, plan to use the established template labeled User Notification - Assigned to Learning Paths. Steps•Navigate to the Library. •Hover over the Add Course + icon to reveal the Add Path + icon. •Click Add Path +.
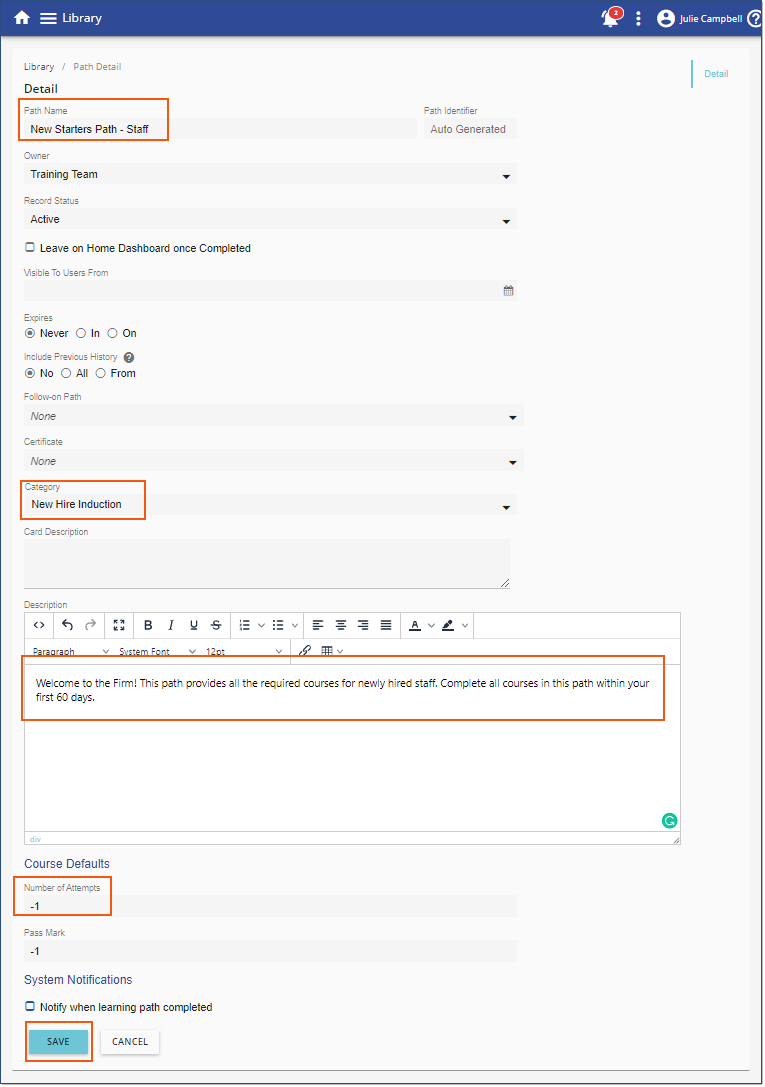
•At a minimum, complete the required and highly recommended Path details: oPath Name oCategory oDescription oCourse Default - Number of Attempts. This field is pre-populated to allow 1 attempt for each course in your path. If you'd like coursed added to the path to have unlimited attempts, use our code: -1. Once courses are added, attempts can be customized for any specific course if the default set here isn't appropriate. •SAVE
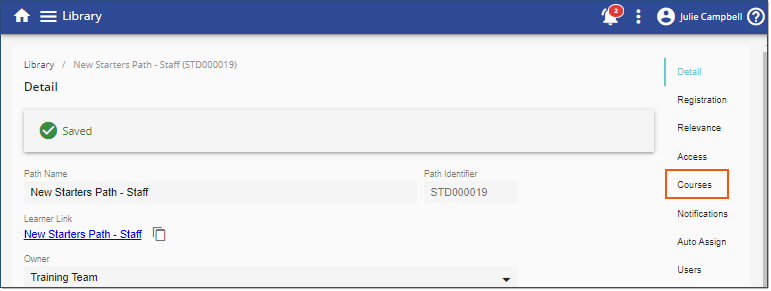
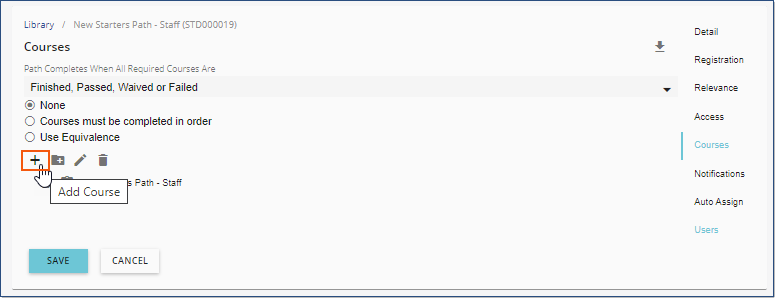
•Once saved, open the Courses Tab
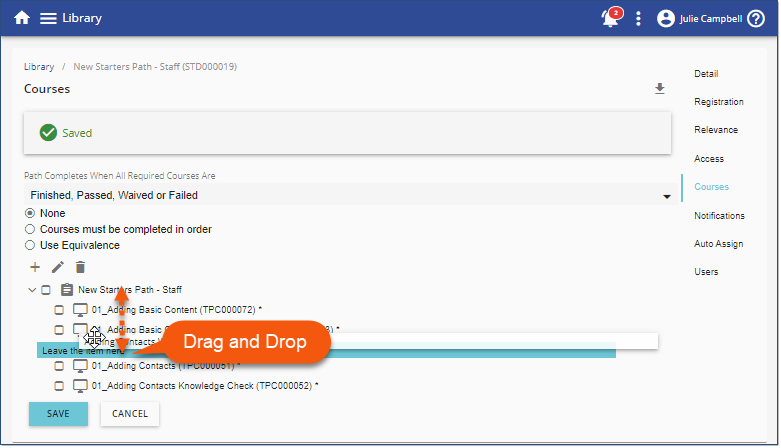
•Add Course + to the Path •Repeat to add multiple courses
•SAVE
You've successfully saved your Learning Path. It is now available in your defined Category in the Library for everyone. Distribute your new Learning Path to users using any/all of the following methods.
Before assigning users, setup Path Notifications if you want automated notifications to apply to this Path. |
Make sure that you have pop-ups enabled according to the LMS documentation. If pop ups are not enabled you will not be able to open the PDF as the pop up will be blocked. |
|
That is correct, live content uses Windows-based technology which cannot be launched on a mobile device. |
Please go to Settings > Safari and turn OFF Block Pop-ups. |
While Intellek LMS is web responsive it is not optimized for mobile use especially for an administrative functionality within the LMS. |
Yes, but you will need to have SSO (ADFS v 4.0, Azure, Okta) access from your mobile device as our Legacy SSO solution will force a rejection on the user's first attempt to reach the LMS. |
Your LMS will detect if a user is using an Apple touch device when trying to open a PDF and will launch in a separate window regardless of the setting on the Course's Structure tab. |
We are not currently planning to create a mobile app. We are open to hearing feature-related suggestions that will help with mobile access and mobile quality improvement, including the way the LMS looks and responds in all environments. |
Intellek Client Family Members can provide pre-hire (recruitment phase) and new hire assessments/skill tests as well as training through the LMS. You have a few options: 1. You can add the new hires manually to the LMS and set their Entry Type to ‘Manual’, and this won’t impact your other learner data. You could also allow them to create their own account via the Self Account Creation form, which has an optional approval process that can be activated. Either of these would give new-hires access to the LMS and the resources, IF you’re happy for them to be inside the primary LMS. 2. You could add a subsite LMS to your subscription, which some clients use for this purpose but it can also be used to give your clients access to any resources. A subsite has all the same functionality as your primary LMS instance, but the data is separate from your LMS and it can be branded differently. Please reach out to [email protected] for pricing. With a full library subscription, you not only have access to the Knowledge Checks as a great option but it also includes 5 Office Assessments created with Live Content Studio. The difference between Knowledge Checks and Assessments are as follows: a. Knowledge Checks are ‘simulations’ used to confirm knowledge was retained after a user has completed the associated lesson, or to “test-out” of a lesson. b. Live Content Assessment workflows are completed in the ‘live’ application. You could send these to any employee, new hire or even pre-hire, and they could open up MS Word, for example, and complete the assessment. These Assessments are automatically scored and you get to see where training is required and where there are gaps in knowledge. Assessments can reside in the LMS or outside of the LMS as HTML files and there is no functionality loss either way. |
