Check out what's new in v3.33.0.0 related to Categories!
![]() Categories and Subcategories are used to organize the Library. Both Courses and Learning Paths can be associated with Categories and Subcategories. Courses and Learning Paths can be associated with one or more Category/Subcategory or nothing at all to appear un-categorized on the root Library page.
Categories and Subcategories are used to organize the Library. Both Courses and Learning Paths can be associated with Categories and Subcategories. Courses and Learning Paths can be associated with one or more Category/Subcategory or nothing at all to appear un-categorized on the root Library page.
Some examples of how you might want to create your Categories include:
•Applications/versions
•Skill Level (Basic, Expert)
•Audience (Attorneys, Staff)
•Workflow/Competency
You can have as many Subcategory levels as you need; however, please consider:
•When users open the Library they will initially see the top-level Categories and any un-categorized Courses or Paths. All levels are searchable. Use expanded search to filter your search to a specific Category > Subcategory level.
1.Navigate to the Library. 2.From the three dot Options menu, click Categories. 3.Click Add a new record a.Type the Category Name. b.Select the Category Status (Active or Inactive). c.To overwrite the default Category card image, upload a new image. (See LMS Image Guidelines). d.Choose if subcategories associated with this category should adopt the uploaded image above. e.Enter any description you'd like displayed in the category card. This description will not be adopted in sub-categories. f.Click 4.To add additional Categories, repeat steps 3 through 6. 5.When finished adding Categories, click |
1.Navigate to the Library. 2.From the three dot Options menu, click Categories. 1.Click Add a new record a.Type the subcategory Name. b.Select the subcategory Status (Active or Inactive). c.To overwrite the default Category card image, upload a new image. (See LMS Image Guidelines). d.Choose if any subcategories associated with this subcategory should adopt the uploaded image above. e.Enter any description you'd like displayed in the subcategory card. This description will not be adopted in associated sub-categories. f.Click 3.To add additional Subcategories, repeat steps 3 through 7. 4.When finished adding Categories, click
|
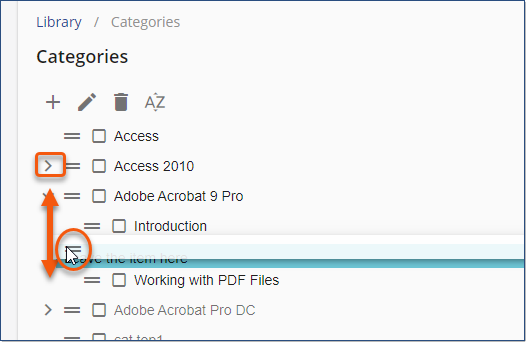
The order in which Categories and Subcategories are displayed in the Categories page determines how they will be displayed in both the Category/Subcategory drop-downs and also in the Library. Therefore, you should arrange the Categories and Subcategories in the order you want them displayed. 1.From the Categories page, if necessary, expand the appropriate Category. 2.Drag the Category or Subcategory you want to move to the desired location and level.
|
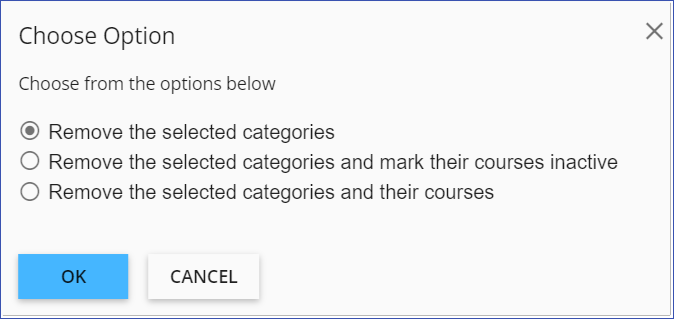
From the Categories page, locate the Category or Subcategory to be deleted and select the check box. 1.Click the Delete 2.Select the appropriate option:
•Remove the selected categories – Deletes the Category, removes the Category from all associated Courses, user history is retained, and the Courses remain active, but uncategorized. •Remove the selected categories and mark their Courses inactive – Deletes the Category and marks all associated Courses inactive. user history is retained. •Remove the selected categories and their Courses – Deletes the Category and all associated Courses. user history is retained. 3.Click OK. |