* An Internet Connection is required. Note that bandwidth requirements vary depending on the number of simultaneous users and type of content. ** Used for reports and various data imports. |
There is minimal preparation required on the client side for cloud-based LMS instances, as your LMS instance is hosted and maintained on one of Intellek 's secure data centers. However, for the LMS to operate correctly there are several important settings which need to be applied to User's systems to ensure a seamless connection to the LMS.
|
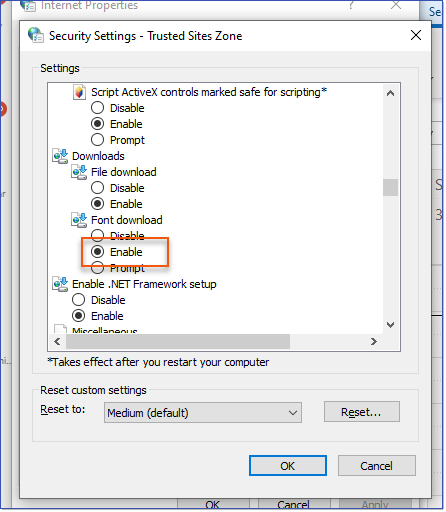
•The web address for the Client’s LMS instance must be added to the Trusted Site Security Zone on all workstations. •For clients on LMS v4, add the SSO callback URL to the Trusted Site Security Zone and Pop-up Blocker Settings Exceptions. •The web address for the Client’s LMS instance must be added to the Pop-up Blocker Settings Exceptions. •IT will need to whitelist the following URLS for ALL users. This ensures they can see the icons throughout the LMS. o//maxcdn.bootstrapcdn.com/font-awesome/4.7.0/css/font-awesome.min.css ohttps://fonts.goOgleapis.com/icon?family=Material+Icons ohttps://fonts.goOgleapis.com/css?family=Open+Sans:300,300i,400,400i,600,600i,700,700i,800,800i •Make sure Font download is enabled in your browser. o(Microsoft Edge: Navigate to Control Panel > Internet Settings > Security tab > Select Zone > Custom level).
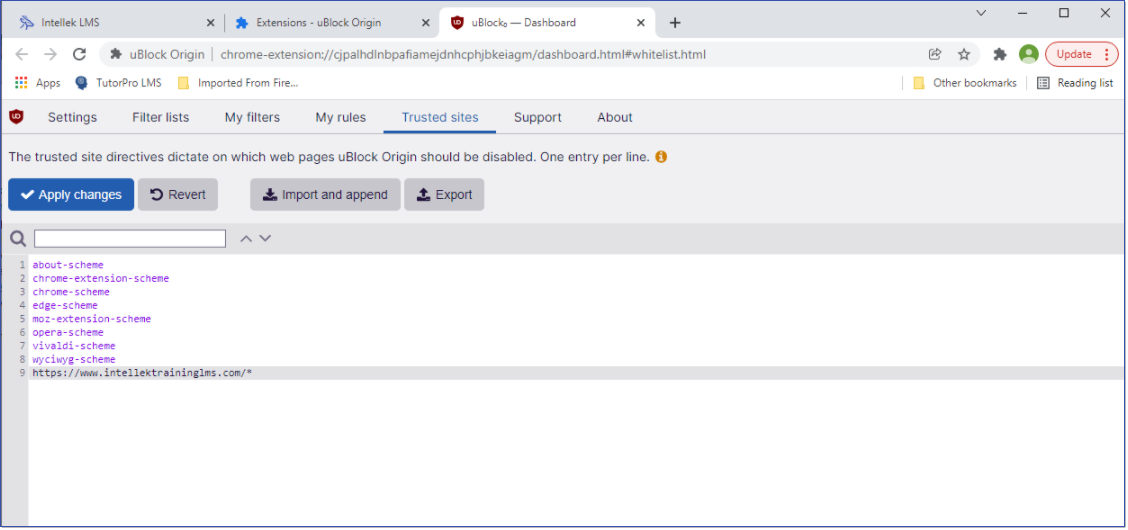
•Users will need to whitelist the LMS URL in their uBlock Options (in the Trusted Sites tab as shown in the screenshot below) 1.This is achieved by pasting your LMS URL into the box and clicking Apply changes.
2.In the example below we've whitelisted our LMS testing instance. Once Apply changes is clicked, content will correctly launch. Also note the asterisk mentioned above.
|
The Outlook Decline feature is currently supported in single-domain environments only and requires specific configuration within your organization. It is not supported in the following environments: •On-Premises Exchange Server Outlook Decline Integration - Technical RequirementsTo enable the Outlook Decline feature, the following configuration is required: 1.An Entra ID Application is required for integration. Verify whether an existing Entra ID Application is already in use. If not, create a new Entra ID Application. Note: This may need to be created by your organization but is often the same as used for SSO. 2.Provide the following Entra Application Details to Intellek: oTenant ID oClient ID oClient Secret Value 3.Ensure Proper Permissions. Grant the Entra Application the following Application permissions (not Delegated) with Admin consent: oMS Graph - User.Read.All oMS Graph - Calendars.Read Notes for Technical DepartmentMicrosoft Graph Permissions for LMS Decline Event FeatureBelow is an overview of the requirements and data flow for enabling the Outlook Decline Event feature within the Learning Management System (LMS). This functionality allows end-users to cancel their attendance by declining the corresponding calendar invitation in Outlook (desktop, web, or new versions) and Teams (desktop and web). Required Microsoft Entra Application PermissionsThis functionality is enabled by subscribing end-users to Microsoft Graph Events. To establish this subscription capability, the following Microsoft Graph Application (not Delegated) permissions must be granted to the Intellek Entra Application with Admin Consent:
Event Data FlowThe process for subscribing to and handling an end-user's decline action involves the following steps: 1.Subscription: Intellek subscribes the relevant users to Microsoft Graph Events. During this process, the Intellek Webhook API address is registered as the callback URL for any events raised by Microsoft Graph. 2.Event Creation: An LMS calendar event is created, and registered users are added to the event. 3.Unique ID Storage: The Intellek Webhook API recognizes that the event is an LMS Calendar event for a registered user and securely stores a unique event identifier in a simple Azure online Data Table. 4.Decline Action & Cancellation: When an end-user declines the calendar event in Outlook or Teams, the Intellek Webhook API is triggered. The Webhook API then retrieves the unique event identifier from the Azure Data Table and calls the LMS to process the user's cancellation for that specific event.
If you have any questions, please contact [email protected].
|
|
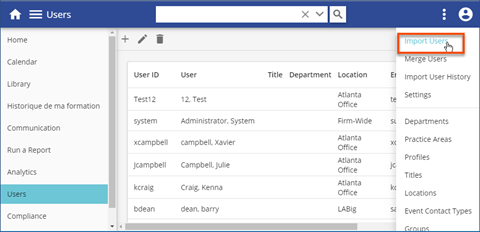
Learner (User) data is the foundation of your LMS. Accurate and consistently formatted data is essential for reliable reporting and effective learning assignments. Learner data can be imported using the LMS API, which is the preferred method. The API provides the greatest level of control and aligns with your internal processes by fully automating the synchronization of user records, minimizing manual effort while maintaining data accuracy. Alternatively, learner data can be imported using a spreadsheet file (.xlsx or .csv) on a scheduled basis, such as daily or weekly. Intellek can work closely with your HR and IT Teams to implement a recurring daily or weekly user feed into the LMS. This file is securely uploaded to our servers via SFTP, where a background process automatically ingests and updates the learner data within the LMS. See details below for learner data import options. Learner Data Import Options1.For Clients with IT resources and a solid understanding of API protocols, we recommend using the Intellek LMS API to fully automate the Learner import process. This approach eliminates the need for Import_Learners Sheets or SFTP file transfers. If this option is of interest to you, please review the API details/Instructions. After reviewing the API documentation, email your Request Body JSON object (pasted into a .txt file) to [email protected] for validation and approval before testing in your sandbox or live environment. 2.As an alternative, learner data can be provided using the Import_Learners.xlsx file via SFTP as frequently as needed (e.g. daily or weekly). Intellek schedules imports to run at least two hours after the file is placed on the SFTP server to ensure it is included in that day's import. Please let us know your scheduled time for file placement. 3.You may also automate this process by writing scripts to collect and transfer learner data to the SFTP folder. If this is your preferred method, please submit a correctly formatted Import_Learners.xlsx file (see the Required File Format for the Import Learners Sheet topic) to [email protected] for review. Once the file format is confirmed, we will connect you with a team member to assist with completing the SFTP setup steps. 4.Finally, learners data can also be imported manually by uploading a correctly formatted Import Learner Sheet (see the Required File Format for the Import Learners Sheet topic) via Users > Three Dot Options > Import Users.
|
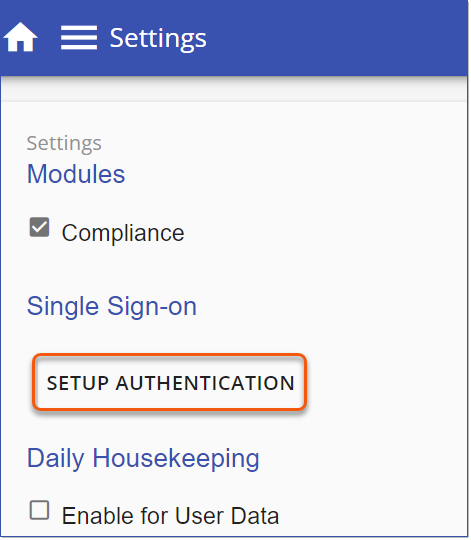
The LMS supports several authentication methods, (Username/Password, SSO, Both). When your system is upgraded to LMS v4, Intellek will migrate your existing authentication settings from LMS v3. In LMS v4, you will have access to the Setup Authentication tool, which allows your organization to update and manage authentication methods at any time. We recommended assigning a designated technical team member to manage this function within the LMS and ensure they have the appropriate administrative rights.
LMS v4 Authentication Overview
|

|
SFTP OverviewIntellek will set up an SFTP area for you and provide the server details, login credentials, and SSH key. This SFTP area can be used for bulk course imports and for user imports if you choose to automate spreadsheet uploads via SFTP. We recommend using Filezilla or WinSCP as your SFTP client. For automated user imports, WinSCP is the preferred option, as it supports scripting and can be triggered by a scheduled task or cron job. For more information or to schedule a technical call, please reach us at [email protected]. |
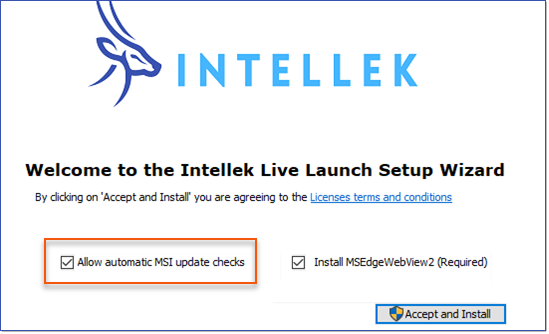
If you have a subscription to Intellek Learn, all users launching Intellek Learn Live Content from the LMS must have the Intellek Live Launch MSI installed. We recommend deploying the MSI across the entire organization. See detailed information below. Our standard MSI package includes MicrosoftEdgeWebview2, as it is required on all machines running Live Content.
|
|||||||||||||||||||||||||||
|
||||||||||||||||||
Live Content Launcher MSI prior version - v5.80 available September 21, 2021 Live Content Launcher MSI current version - v6.0 available June 8, 2022 Live Content Launcher MSI current version - v6.1 available July 1, 2022 Live Content Launcher MSI current version - v6.2 available January 26, 2023 Update: Upgrade to .Net 6.0, removal of Splash Screen. Intellek Live Launch MSI current version - v6.3 available May 4, 2023 Intellek Live Launch MSI current version - v6.4 available May 30, 2024 Intellek Live Launch MSI current version - v6.5.6 available November 18, 2024 Update 1: .Net 8 update from .Net 6 (now out of support) for Intellek Create Live Content Update 2: Updater.exe now digitally signed in C:\Program Files (x86)\Intellek\Intellek Live Launch Intellek Live Launch MSI current version - v6.5.7.2 available March 5, 2025 Applocker is blocking Launch – Launch will no longer dynamically generate and execute a batch file Intellek Live Launch MSI current version - 6.6.1.0 available January 6, 2026 C++ runtime now installs
|

If you are using Intellek Live Content assessments, including Microsoft Office 365 off-the-shelf assessments, Custom, or LTC4 assessments, the Live Content assessment results will be hosted on Intellek Azure Servers and accessible via the Intellek Create website. You will require either a license for Intellek Create or a Results User account to access individual assessment results via the Intellek Create website. A licensed User or Results User can view individual assessment results, review the steps taken during the assessment, and modify the scores as needed. With a license for Intellek Create, assessments will be available in your Intellek Create Library. Intellek will also publish your assessments to your LMS. Inquire at [email protected]. |
For clients using the updated Live Content Launcher, Live Content will run via any Windows-based browser. |
XenDesktopNo plugin is required for Live Content to run in a XenDesktop session. XenApp - Accessed from server (typical)To use Live Content support for applications delivered to the user via the XenApp Accessed From Server model, the Intellek Virtualization Server Plug-in for the Citrix ICA Client must be installed on the XenApp Server and the Intellek Virtualization Client Plug-in for the Citrix ICA Client must be installed on each end-user’s machine.
|