![]() News is accessed via the Communication page. You can create and edit items to display in the News banner on the Home Dashboard or Communications > News. It is important to keep the News section relevant for end-users and up-to-date.
News is accessed via the Communication page. You can create and edit items to display in the News banner on the Home Dashboard or Communications > News. It is important to keep the News section relevant for end-users and up-to-date.
Initially, it is a good place to offer your users a brief tour of the system or provide them with information to help them get the most from the LMS. You should also define how you plan to use the News section going forward.
![]() When uploading a News Banner image, see the LMS Image Guidelines for recommended image size.
When uploading a News Banner image, see the LMS Image Guidelines for recommended image size.
1.Navigate to Communication > News
2.Click + to add a new News item
3.Complete the News Details
a.Name - give your Banner a title. This will display below the banner and a hyperlinked heading.
b.Display Sequence - define in what order you what this banner to appear relative to the other banners
c.From the Banner Graphic > Upload option, browse to upload an image file. See LMS Image Guidelines for recommended image size.
d.When the banner is clicked, decide if you'd like the user to navigate to the News area with aligned Body content or to a URL Link.
i.Body - Use formatting, cc/paste, Source code to complete the text you'd like displayed
ii.Link - provide the URL you'd like to navigate users to when clicked
e.Date Effective From & To - Optionally establish start and stop dates for the banner
f.Record Status - Keep Active to continue displaying or Inactivate to terminate banner display
4.SAVE
5.Relevance -using Groups, define specific user relevance to limit display of a banner to certain groups of users.
News Item Settings
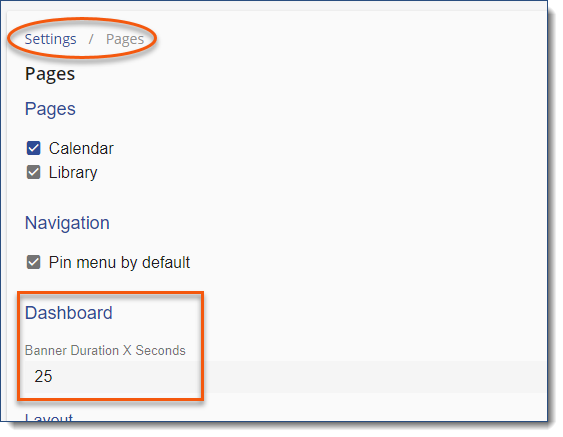
Communication > News banner auto-advance duration setting
Define the duration between each News banner auto-advance.
▪Settings > 3-dot option > Pages