Feature Enhancements 
Available January 13, 2025
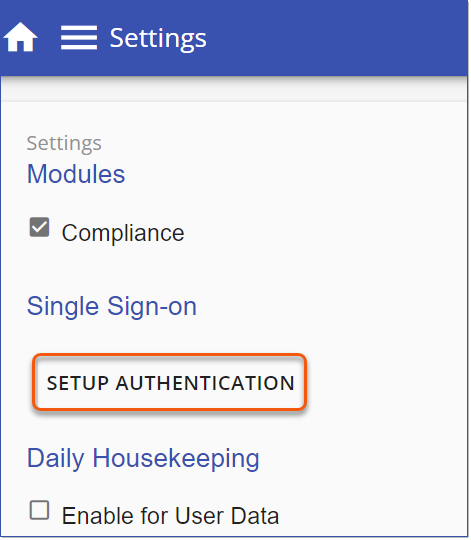
LMS v4 features a Hybrid Authentication Model, enabling clients to support multiple authentication methods for their Users. Administrators can now configure supported authentication methods: Single Sign-on (Entra ID (Azure AD), ADFS, or OKTA), Username and Password, or Both using the Setup Authentication option. The Authentication method can be configured directly from the Settings page. 1.Navigate to Settings > and select Setup Authentication.
2.Select Authentication to display the Authentication Methods page.  Authentication Methods 3.Select the desired authentication method: Username and Password, Single Sign-on, or Both. 4.Click Save, and complete the configuration for the selected method. |
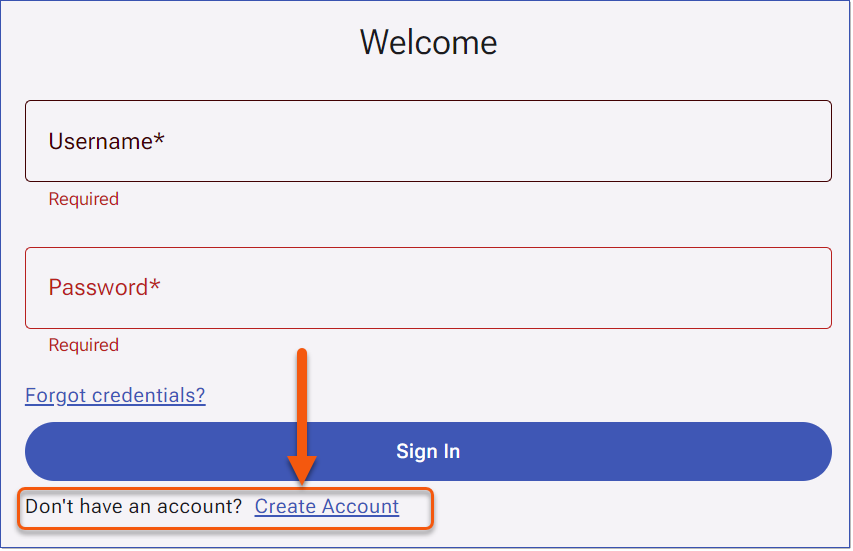
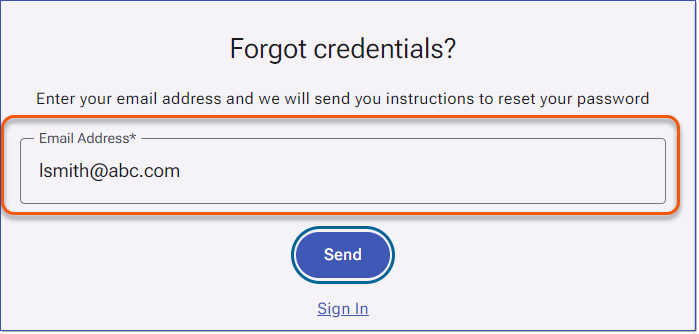
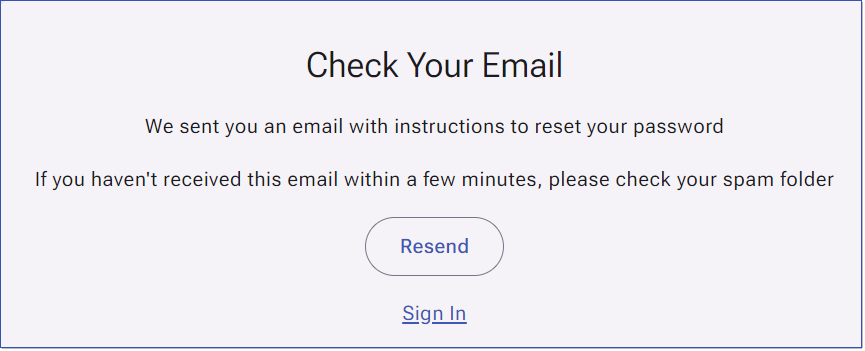
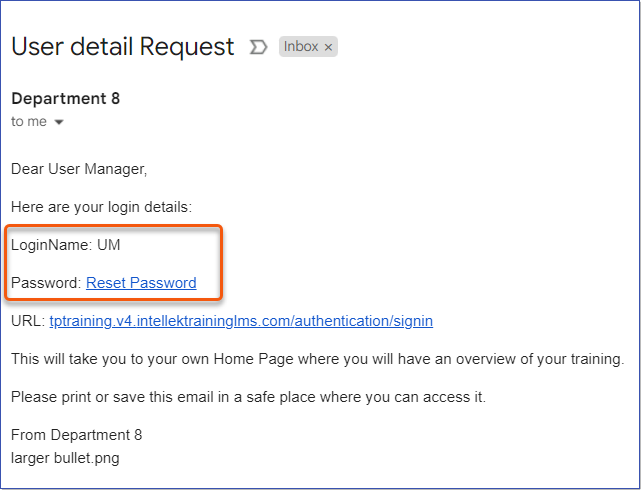
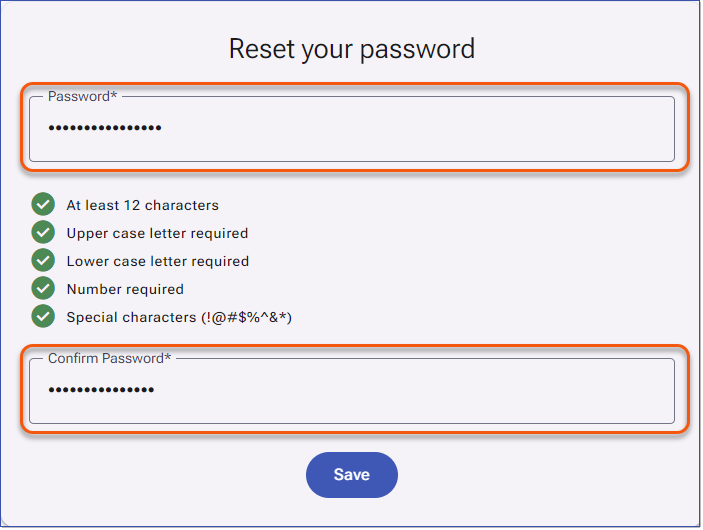
When the Username and Password authentication method is enabled, Users will sign in using the credentials created directly in the LMS. These accounts are authenticated by the LMS itself, not through your organization's network or SSO. Users will be prompted to sign in with their LMS Username and Password. This authentication method is commonly used for external Users who do not have a network account but still require access to LMS content.  Username and Password Sign In Users can click the Forgot credentials? link to reset the password. See Password_Requirements Account Self-Creation Setup
|
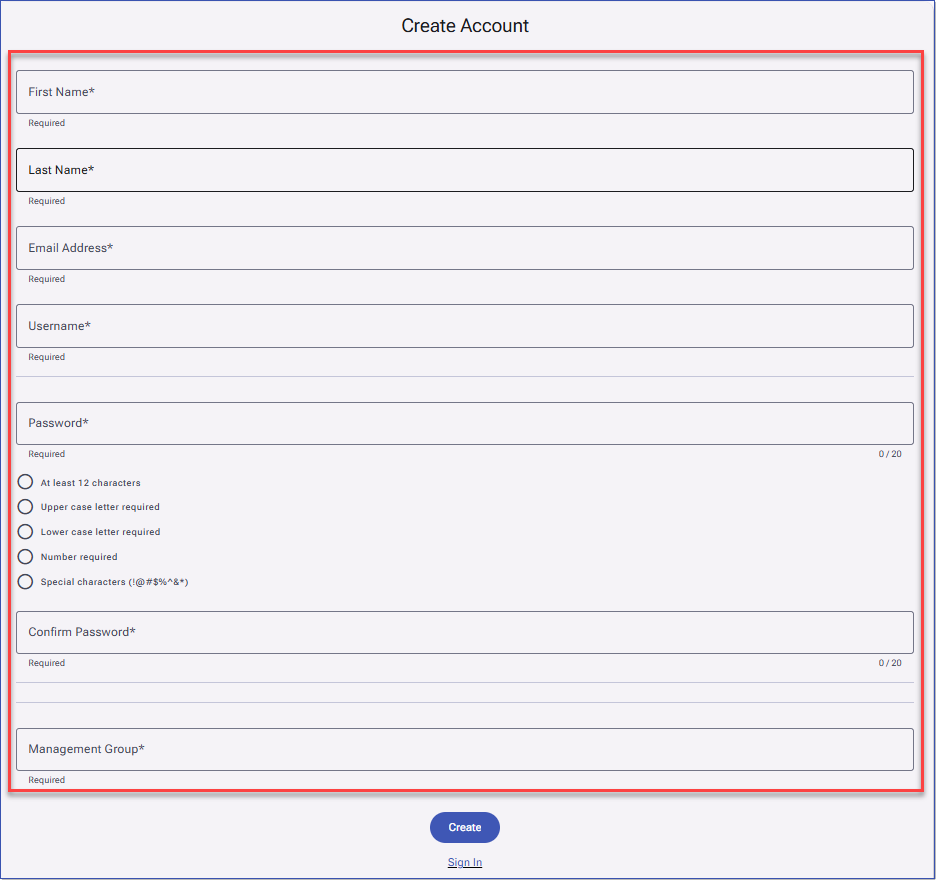
With the Username and Password Authentication method, Administrators can allow Users to create their own account through self-registration. When this option is enabled, Users will see a Create Account link on the Sign In page.
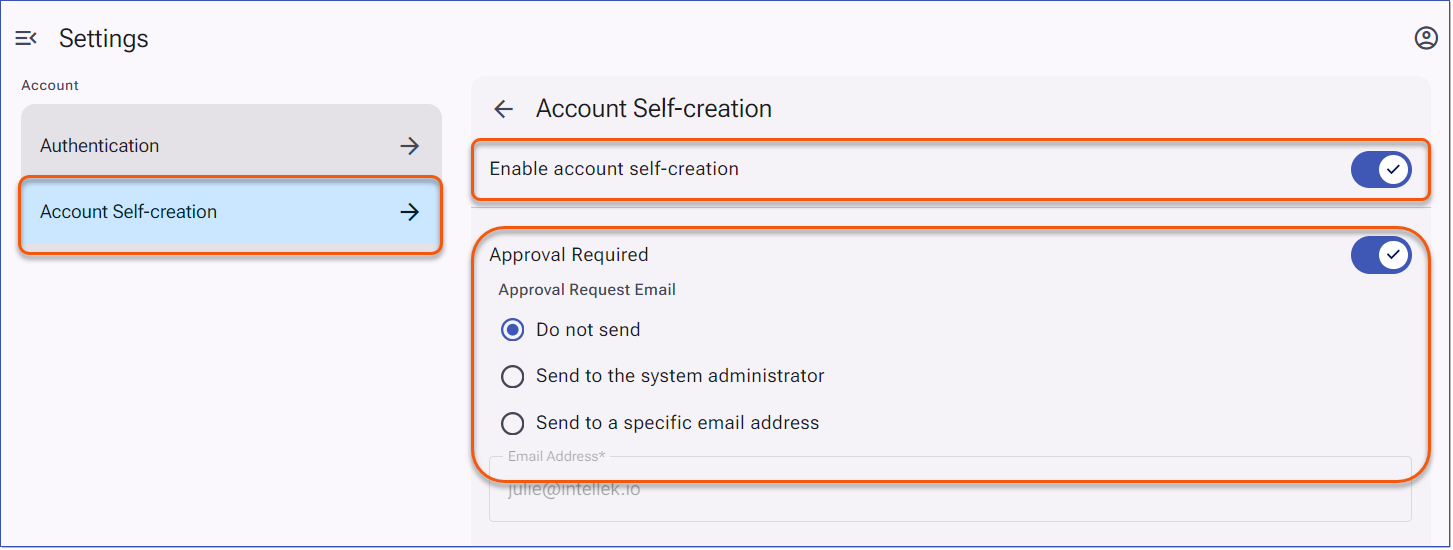
Administrators enable Account Self-creation in the Setup Authentication settings. They can then choose whether self-created accounts require approval and use Form Configuration to define which fields users must complete during account setup.
|

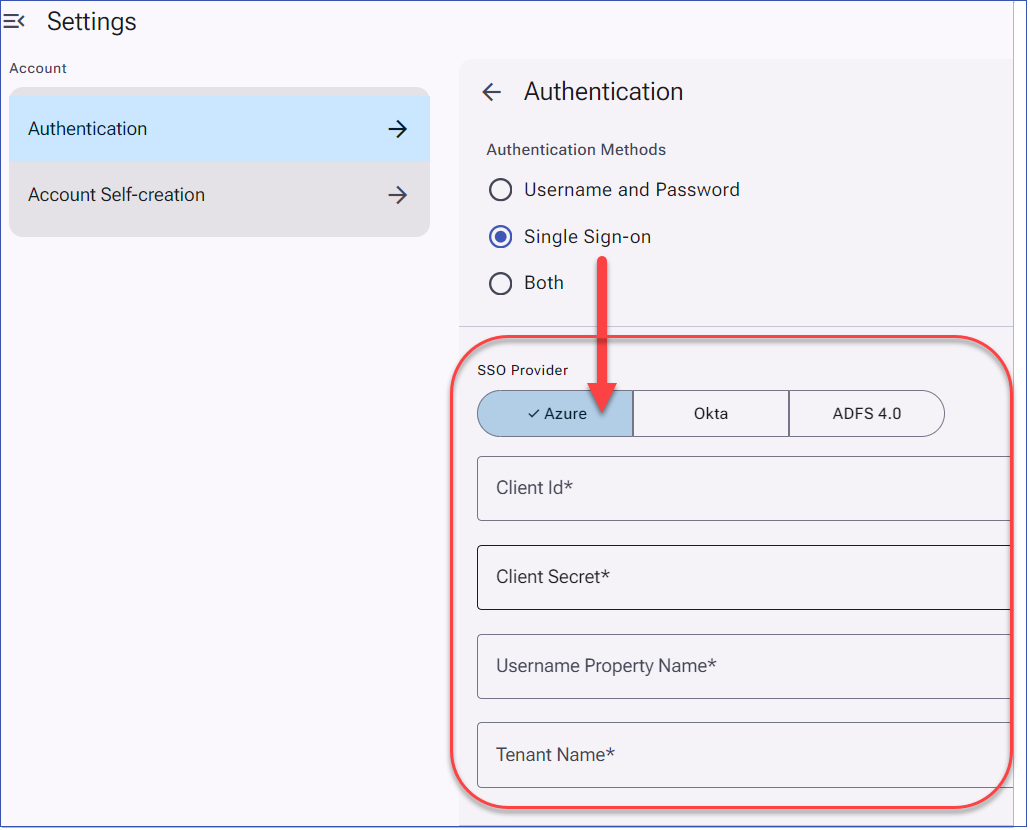
Clients who have upgraded to LMS v4 can now configure and manage their Single Sign-On credentials directly within the SSO Provider tab (Azure, Okta, or ADFS) of the Setup Authentication tool. For clients still on LMS v3, SSO details are provided to Intellek and the configuration is handled on your behalf. 1.Navigate to Settings > and select Setup Authentication.  Setup Authentication 2.Click Authentication to expand the menu. 3.Select Single Sign-on and complete the desired SSO Provider details. oFor Azure (Entra ID) SSO Provider enter the details as follows: •Client ID: Enter Application (client) ID •Client Secret: Enter Client Secret Value •Username Property Name: enter the user property for log in (for Entra ID this is usually "UPN" or "unique_name") •Tenant Name: Directory (tenant) ID 4.Click Save, then use the left navigation menu to return to the Home page or any other page to exit Settings.
|
|

|
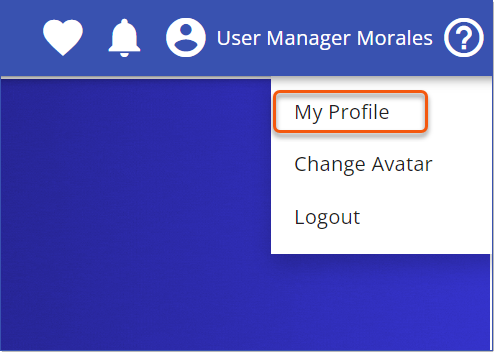
LMS Administrators can access another User's account using the Assume Identify feature, available from the My Profile page. This feature enables administrators to view the LMS as if they were another User, helping with tasks like troubleshooting or testing Course and Path assignments, dashboard configuration, and more. LMS Administrators are granted this permission by default, and other Users can be granted access through a custom Security Profile that includes the Users - Assume Identity permission.  Security Profile - Users - Assume Identity Permission Assume Identity1.Navigate to the My Profile Page.
2.Click the Assume Identity button to open the Select User dialog.  My Profile - Assume Identity 3.Enter search terms for the User in the Select User search field. Administrators can search by first name, last name, user identifier or email address. The LMS filters the Users displayed to match the search terms. 4.Select a User from the list. 5.The LMS changes the Identify Section to show the administrator has assumed the identity and displays the Revert identity banner. Revert IdentityWhen an administrator assumes the identity of a User, the LMS displays the Revert identity banner.  Revert Identity 1.Click the Revert Identity button from the banner to close the User Session for the assumed User. 2.The LMS will hide the Revert Identity banner and reload the LMS page with the Administrator information. |
----------------------------------------------------------------------------------------------------------------
Any Issues listed below this line were added after January 13, 2025 when LMS v4.0.0.0 Release Notes were originally made available.
----------------------------------------------------------------------------------------------------------------