1.From the Library, or Users page, click the three dot Options menu, and then select Groups or Access.
2.Click Add a new record ![]() on the toolbar.
on the toolbar.
3.Complete the Group Name field.
4.Select the Available for option(s).
Select both options (Relevance and Learning Path Auto Assign) if they are appropriate for the Group being created. The Group name will be listed when you view the Relevance tab of a Course or News message and the Auto Assign tab of a Learning Path. Once you have selected the Available for options and saved, you cannot edit this setting later. |
5.Click ![]() .
.
6.By default, All Users will be specified as the criteria. Click Add a new record ![]() on the toolbar to add the appropriate criteria to define the members of the Group.
on the toolbar to add the appropriate criteria to define the members of the Group.

7.Select the appropriate criteria in the Add Parameter(s) dialog box:
a.Parameter Name – click the arrow to display a list of fields that are available in the User Details.
b.Value(s) – click the arrow to display the list of associated values for the selected parameter. You can select more than one.
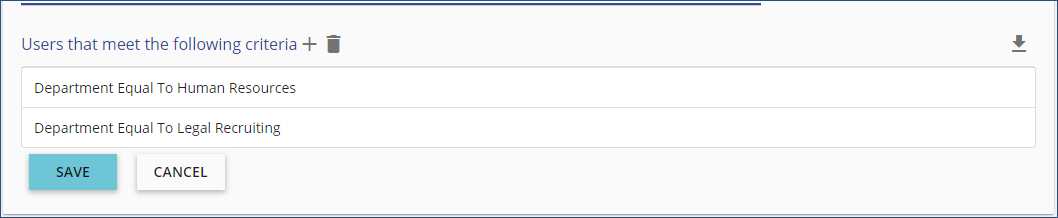
| Example: | Parameter Name = Department Value(s) = Human Resources, Legal Recruiting |
This group will include anyone in EITHER the Human Resources Department OR Legal Recruiting Department.
a.Click ![]() .
.
8.You can add parameters to the Group by repeating Steps 5 and 6. When you add a parameter to a Group, you are setting an AND statement.
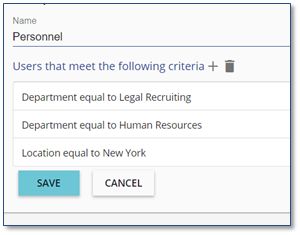
| Example: | Parameter Name = Department Value(s) = Human Resources [OR] Legal Recruiting |
AND
Parameter = Location
Value(s) = New York
The group will now consist of anyone in EITHER the Human Resources OR Legal Recruiting Departments in the New York Location.
In other words:
Multiple VALUE(S) for a Parameter = OR
Multiple PARAMETERS (with one or more Values) = AND
Important! We do NOT recommend using the User Identifier Parameter when creating Groups, unless you have a very specific reason to do so. This parameter specifies the single User Value you select. Instead, select other general parameters, allowing Group members to be dynamically maintained by the LMS. |
9.When all parameters have been added, click ![]() .
.
Once the Group criteria has been saved, the Group will be available for use on either the Relevance tab for Courses and News messages, and/or the Auto Assign tab for Learning Paths, based on the options selected in Step 4.