To view Results Files, you must use either the licensed product, Live Content Studio, or the Results Viewer for Live Content Studio. The Results Viewer is not licensed, but is created with the Live Content Studio.
The Results Viewer enables those without a licensed version of Live Content Studio to view the Assessment results.
1.Launch an empty project in Live Content Studio.
2.In the Main Interface, click the Results tab on the ribbon.
3.Click the Results Viewer button on the ribbon.
Use the applicable instructions depending on the selection you made when setting up your results file.
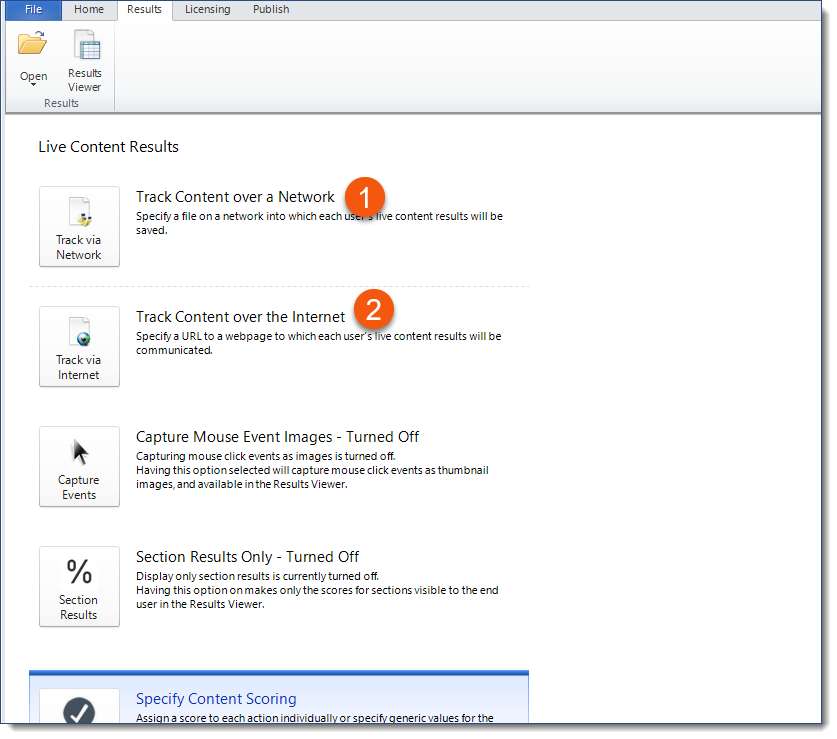
| Configuring the Results Viewer for - Option 1, Track Content over a Network |
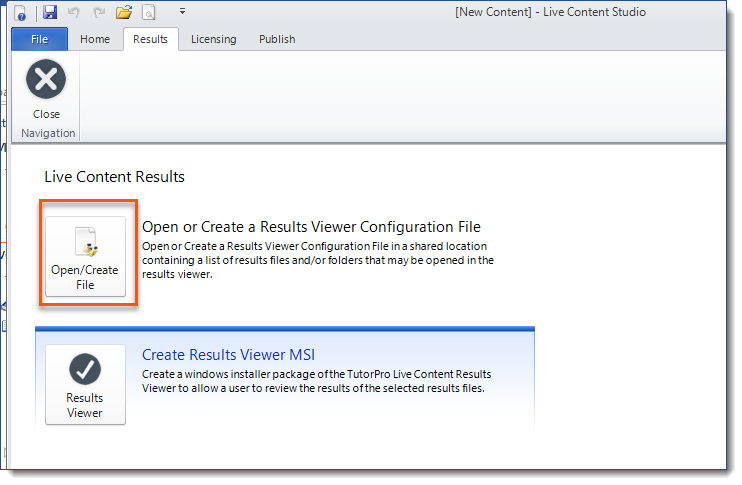
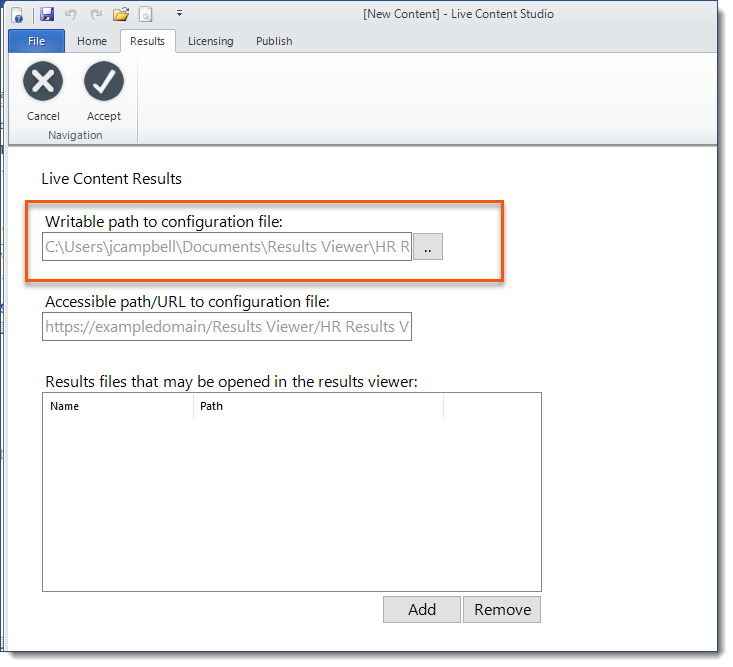
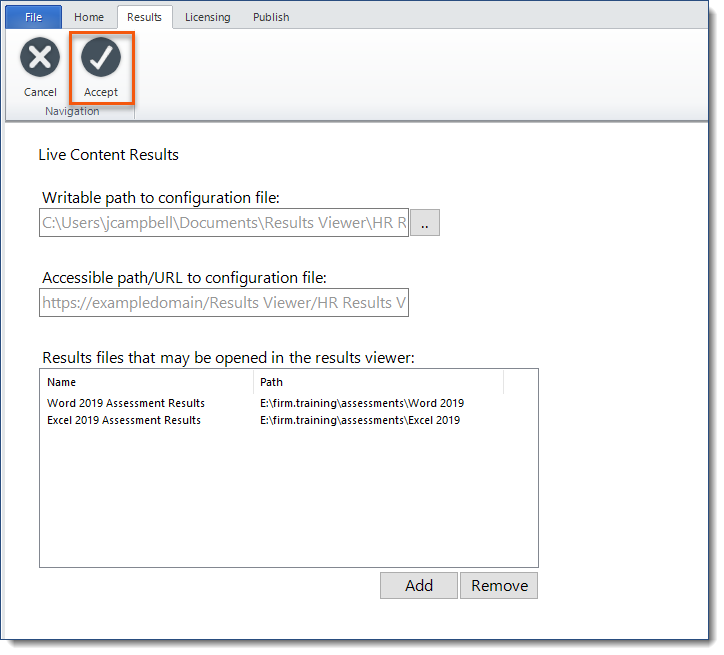
1.Click Open/Create file or Change Results
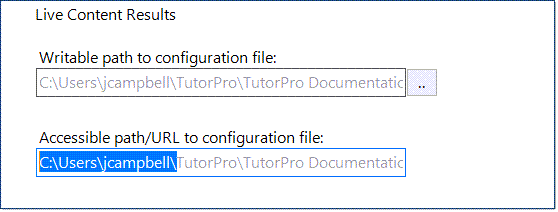
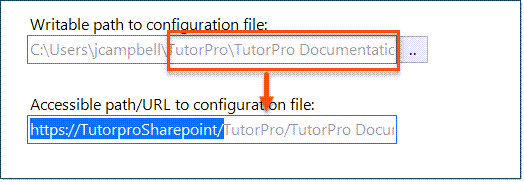
2.On the next screen you will see three fields: •The Writable path to configuration file is the location where you will store the Results Viewer Configuration (.tlcv) file which will be created in this process. •The Accessible path/URL to configuration file could the same location as the one specified in the Writable path, however the path/URL MUST be accessible by the person using the Results Viewer. i.e. if you save the file to your mapped E drive and that is not the same for the other people accessing the Results Viewer, this will not work. The Accessible path/URL must be a shared path or a HTTPS path. •The Results files that may be opened in the results viewer, is where we will point to the Assessment Result files that you created in Create a Results File.
Step 1. Define the Writable path a)Click the Browse button ‘…’ to the right of the Writable path to configuration file field. This is a location where you will store the Results Viewer Configuration (.tlcv) file. If you have created a ‘Results’ folder on your network, you could create a ‘Results Viewer’ folder at the same location, to keep the files together. i.Navigate to the location where you will store the file. ii.Name the file, Results Viewer Configuration.tlcv. for example, and iii.click Save.
Step 2. Define the Accessible path/URL to configuration file a)If the pre-populated path is not accessible by the user(s) of the Results Viewer, then the path must changed to a path or HTTPS location that those user(s) have permission to access.
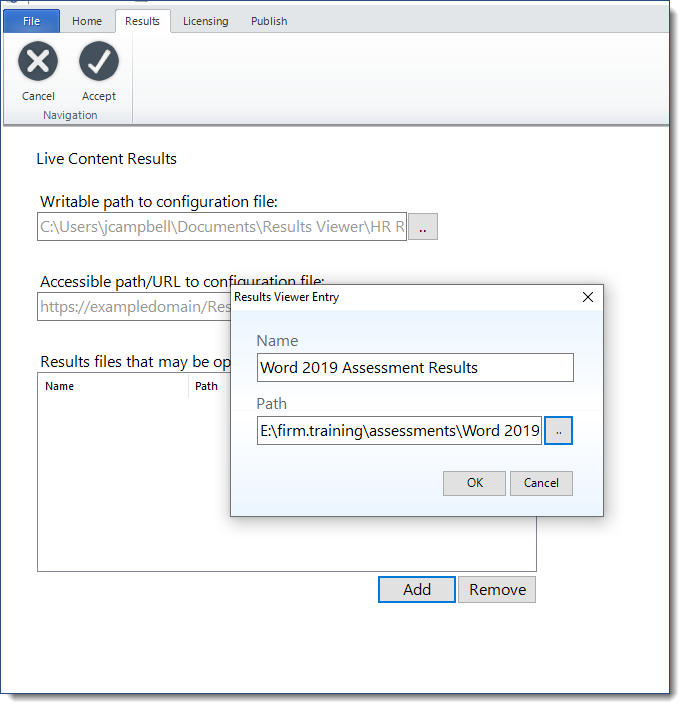
Step 3. Point to the Assessment Results file(s) created in Create a results file The final step in completing the configuration is to add the paths for the results that will be reviewed. If you have multiple assessments and the results are in separate folders you can point to each assessment results path in one results viewer. (see example below) a)Click the Add button at the bottom of the page. b)Enter a Name that will be seen by the reviewer only. Example: Word 2019 Assessment Results c)Browse to the folder where your results are stored.
d)Click OK.
Repeat steps a-d if you would like to add multiple assessments to your results viewer. e)Click Accept in the ribbon once you have completed adding your results paths.
See the Creating the Installation (.msi) file section (below) for next steps. |
||
|
| Configuring the Results Viewer for - Option 2, Track Content over the Internet |
1.Click Open/Create file or Change Results
2.On the next screen you will see three fields: •The Writable path to configuration file is the location where you will store the Results Viewer Configuration (.tlcv) file which will be created in this process. •The Accessible path/URL to configuration file could the same location as the one specified in the Writable path, however the path/URL MUST be accessible by the person using the Results Viewer. i.e. if you save the file to your mapped E drive and that is not the same for the other people accessing the Results Viewer, this will not work. The Accessible path/URL must be a shared path or a HTTPS path. •The Results files that may be opened in the results viewer, is where we will point to the Assessment Result files that you created in Create a Results File. Step 1. Define the Writable path Click the Browse button ‘…’ to the right of the Writable path to configuration file field. This is a location where you will store the Results Viewer Configuration (.tlcv) file. If you have created a ‘Results’ folder on your network, you could create a ‘Results Viewer’ folder at the same location, to keep the files together. i.Navigate to the location where you will store the file. ii.Name the file, Results Viewer Configuration.tlcv. for example, and iii.click Save.
Step 2. Define the Accessible path/URL to configuration file If the pre-populated path is not accessible by the user(s) of the Results Viewer, then the path must changed to a path or HTTPS location that those user(s) have permission to access.
Step 3. Point to the Assessment Results file(s) created in Create a results file The final step in completing the configuration is to add the paths for the results that will be reviewed. If the results are in separate folders with separate communication wrappers (.asp) files, you can narrow down the results to be seen by the reviewer. (see example below) a.Click the Add button at the bottom of the page. b.Enter a Name that will be seen by the reviewer only. Example: Word 2019 Assessment Results c.Enter the path to the .asp file for that folder. Example: https://server02/results/Word/Word_2019.asp. d.Click OK
Repeat steps a-d if you would like to add multiple assessments to your results viewer. Click Accept in the ribbon once you have completed adding your results paths.
See the Creating the Installation (.msi) file section (below) for next steps. |
|||
|
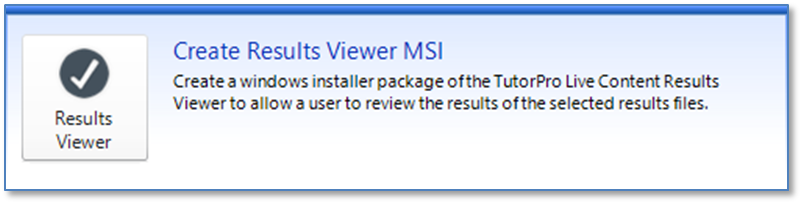
Now create the installation file, or .msi, for the Results Viewer. This file will be distributed to anyone that should have the application installed.
1.If necessary, click the File tab. 2.Click Results in the left panel. 3.Click the Results Viewer button.
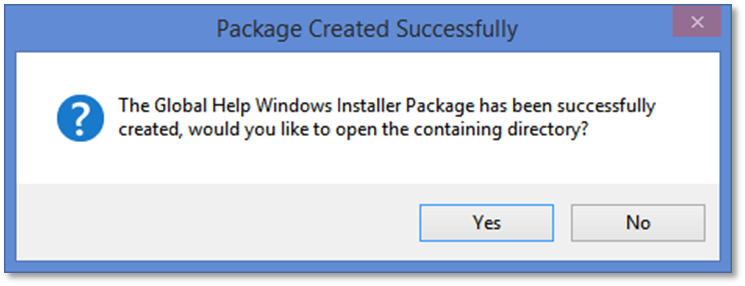
4.Navigate to the desired location to save the .msi file. 5.Click OK. 6.When the Installation .msi package has been created, the following message will display:
7.Click the appropriate response as needed. 8.Click the Close Navigation button in the ribbon. 9.Share/Send the file to anyone who will be using the Results Viewer.
|