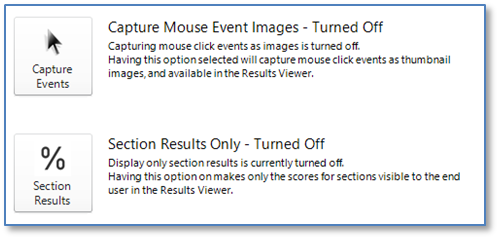
There are some applications that because of the way controls have been identified (or not, as the case may be), it is often useful to see exactly what or where a user has clicked while taking the content. To provide this capability to both managers and users, the Capture Mouse Event Images option can be activated.
![]() This feature is turned OFF by default. For existing assessments, in order to see these images, you would need to turn on the feature and then republish.
This feature is turned OFF by default. For existing assessments, in order to see these images, you would need to turn on the feature and then republish.
When activated, this feature captures and creates a thumbnail screen shot of where and what the user clicks for each step performed.
The Results tab of the Main Interface has two options that can be activated which impact the way end-user results can be viewed by both user and manager. Both options are turned OFF by default.
1.Launch Live Content Studio and open the required content file. 2.Click the Results tab.
3.Click the Capture Events button.
|
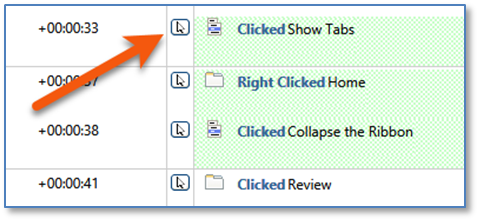
The captured thumbnail images display are accessible in the click-by-click level of a Results File. Keep in mind the following: •For managers, you must first open the appropriate Results File, and then drill down to the click-by-click Results for the selected user(s). •Captured Mouse Event images are not included when exporting user results to Excel from the Results File. •For end-users, once the user reaches the last Instruction or Score Sheet, the Results button will display on the Content Navigation toolbar. When the user clicks the Results button, the Click-by-Click Results Report (read-only) is displayed.
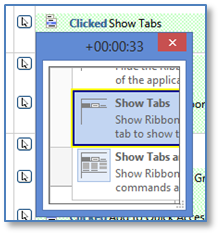
•If end-users print the results (to a printer or .pdf file), Captured Mouse Event Image buttons are not included. •If end-users save the report, the buttons are visible (but not active) in the saved file. Once the click-by-click Results is displayed: 1.Click the
2.The captured image thumbnail displays:
3.Click the red X in the top right corner of the thumbnail to close the window. |