Results Files can be opened and reviewed using Live Content Studio, a licensed product, or by using a Results Viewer. The Results Viewer can be created to allow specified members of staff to view results and revise scoring, if necessary. It is not a licensed product. If you are a hosted assessment client and do not have a Live Content Studio license, you will need a Result Viewer. If you have a Live Content Studio license, you can create Result Viewers for your internal staff.
|
Whether using a Results Viewer or Live Content Studio, viewing results is the same. 1.Open a Results File: •In the Results Viewer, the Recent tab displays on launch. There may be one or more items listed. Click the appropriate item to begin. •In Live Content Studio, click the Results tab and select Open Results File. a.There are three layers in a Results File: •Summary layer – shows the available Result File(s) in the defined location.
•User Summary – shows a list of end-users that have launched and/or completed the content, the date/time taken, time spent and can also show a score if the content has scoring associated with it.
•Detailed Results – shows the detailed actions of the end-user while the content was running. It shows all actions completed with the keyboard and mouse.
b.In both of the first two levels, click the 2.Review Scores. See Understanding Row Colors in the Results File for tips on interpreting the Results.
•Any items that have a score assigned can be modified when reviewing the Results File. •When assigning a score to a task or question, you cannot assign a score higher than is defined in the assessment itself. The scoring buttons will not allow you to go over the maximum score for the task. The maximum score is listed to the right of the learner score for each step.
3.When viewing has been completed: •From the Detailed Results level, click the Back •From either the Summary or User Summary levels, click the Close
|


•Green – Any rows shaded in Green indicate the end-user performed the preferred action.
•Red – Any item shaded in Red indicates that the action requires review. This could be for several reasons:
oIn many cases, the end-user did not perform a defined step to complete the action. They may have used a method that was not defined in the assessment. oIn some cases, the end-user may have been instructed to click NEXT. oIn others, end-users may have completed a task, but the content did not advance. In this case, you need to review the steps the end-user took and assign the appropriate score, if applicable. In any of these instances, the reviewer can choose to apply a score or not by using the Score field and spin buttons. |


The results can be exported to Word or Excel by using the appropriate command in the Export group of the ribbon. You can export results to Word or Excel from either the Summary or User Summary layers of the Results File.
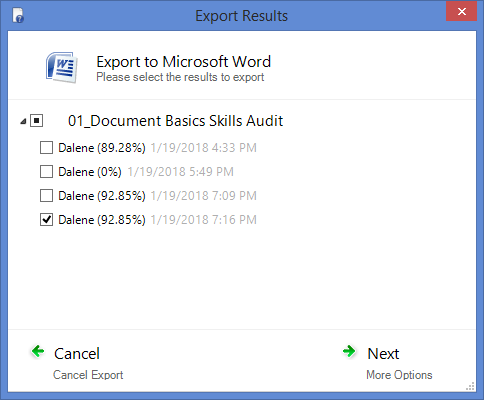
Once exported, you can print, modify, or save the contents to provide the results to an end-user or place them in the necessary location. 1.From either the Summary or User Summary layers of the Results File, click the Microsoft Excel or Microsoft Word button on the ribbon. 2.Select check box(es) next to the learner results to be exported.
3.Click Next.
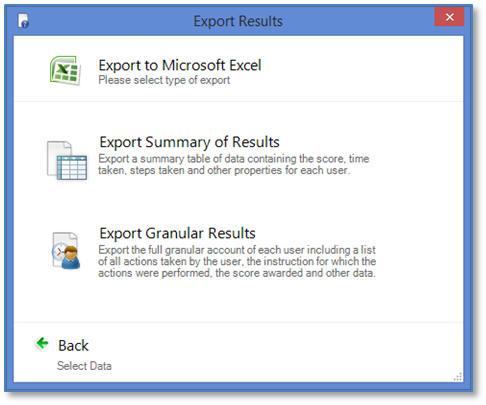
4.Select or clear the check box(es) next to each type of data to be exported. 5.Click Next and continue until all required data options have been selected. 6.Click Export. 7.Modify, print, and/or save the exported results as appropriate. |