When a new content file is created, the New Content dialog box completes the Details tab of the Edit Content Properties dialog box. The Content Name is the only required property. The Content Description and/or Content Objectives and content type (Lesson or Assessment) can be completed or changed at any time when editing the content file. The Content Properties determine the defaults for all instruction frames, BalloonTips, and scoring defaults for Assessment content created in the content file. It is a best practice to review all options in the Edit Content Properties dialog box, and set the options prior to adding any instruction frames.
1.From the Content Library, click the Edit (pencil) icon on an existing content file.
2.Click the Content Settings (cog) icon on the Navigation bar.
3.The Edit Content Properties dialog box contains four tabs to set various details and defaults for the current content file. Each tab is shown and explained below.
4.When finished, click the UPDATE button to save the changes.
Important! Clicking outside the Edit Content Properties dialog box before clicking the UPDATE button will close the dialog box WITHOUT saving any changes, in effect, canceling the changes! |
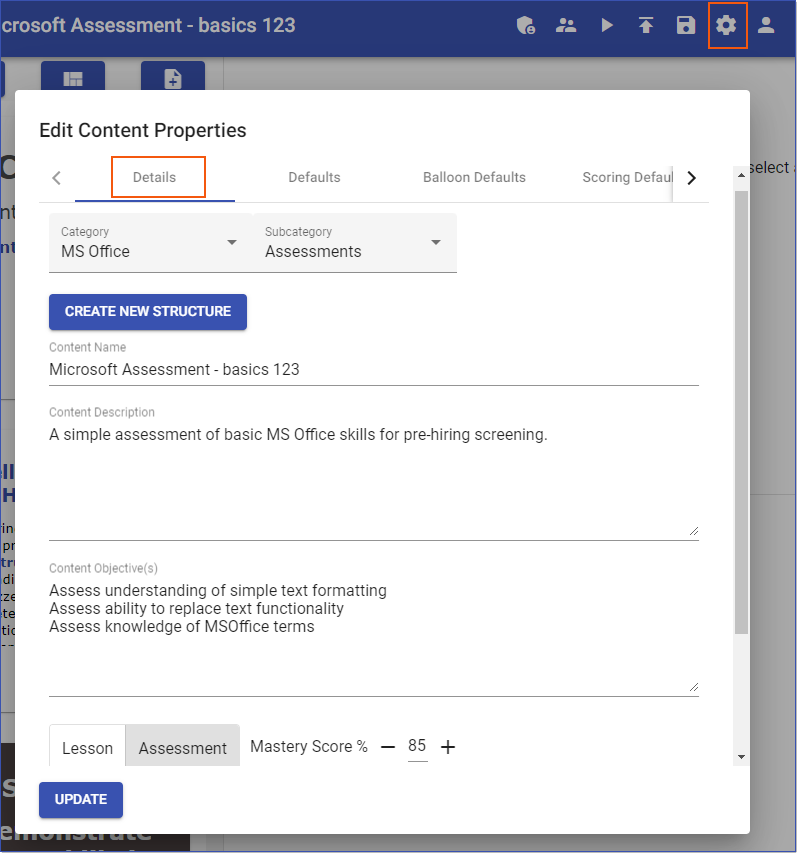
The Details tab displays the Content Name, Content Description, and Content Objectives that were entered when the content file was initially created. If appropriate, edit or enter updated information.
•Content Name. Enter the title of the eLearning Lesson or Assessment. The Content Name field is also used to name the saved file. Insert the %Content_Name% variable into instruction frames to automatically copy the Content Name into the selected instruction frame. •Content Description. Provides users with a brief description of what will be covered in the content. Insert the %Content_Description% variable into instruction frames to automatically copy the Content Description into the selected instruction frame. •Content Objectives. Clear and short statements about the objectives of the content, highlighting the skills covered or assessed. Periods should not be used. Insert the %Content_Objectives% variable into instruction frames to automatically copy the Content Objectives into the selected instruction frame. •Content Type. Click the appropriate button to identify the type of content: oLesson. Learning content which is not scored. oAssessment. Scored learning content. When Assessment is selected, the Show Results slider button displays. To allow users to see their results, click the slider button to activate the Show Results option. •Mastery Score. Enter the passing percentage score for your content here. Mastery Score percentage is the main check for pass or fail when communicating back to the LMS.
|
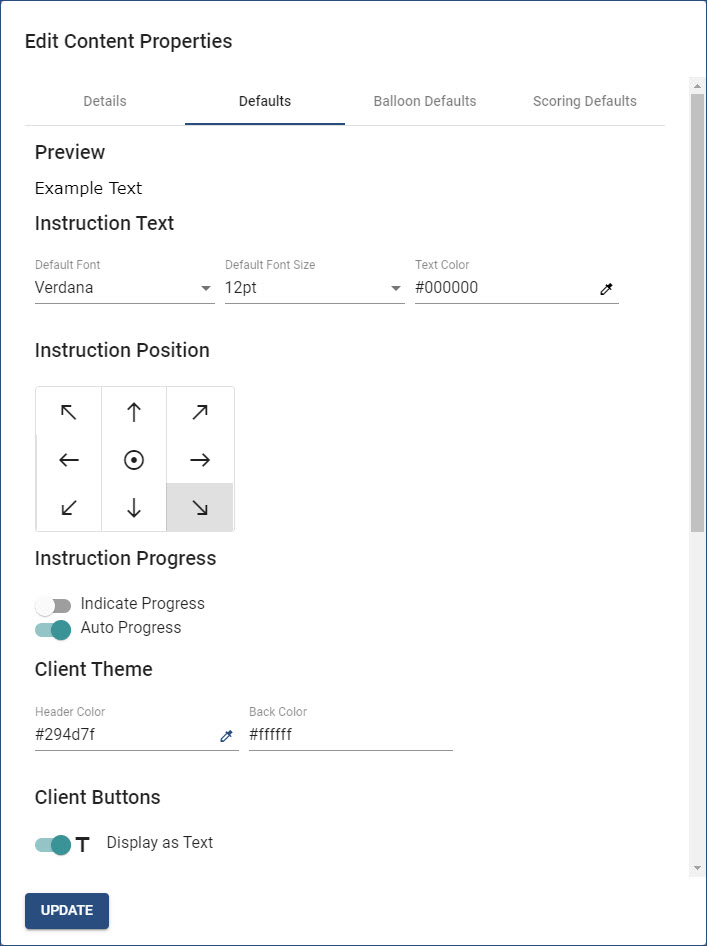
The Defaults tab copies forward the settings from the Content Defaults dialog box accessed by clicking the DEFAULTS button in the Content Library page. Change any appropriate options for the current content file. The graphic has been modified to show all settings. Use the vertical scroll bar at the right side of the Defaults tab to access all settings. The available settings are identified below:
•Preview. Displays a sample of how instruction text will look based on the Instruction Text Settings. •Instruction Text Settings. oDefault Font. Click the down arrow under Default Font to select the appropriate font style. oDefault Font Size. Click the down arrow under Default Font Size to select the appropriate font size. oText Color. Click the eye-dropper icon to set the text (font) color. (See the Setting Colors topic.) •Instruction Position. Select the appropriate location for instruction frames to be displayed when content is running. The default location is the lower right corner of the screen. This setting can be changed within individual content files and/or individual instruction frames. •Instruction Progress. Click the appropriate slider(s) to toggle the setting on/off. oIndicate Progress. Display a Progress bar when content is running. By default, this setting is turned off (inactive). oAuto Progress. When content is running, if an instruction frame has captured steps, content will automatically progress to the next frame when the last captured step has been performed. By default, this setting is turned on (active). •Client Theme. Use these settings to determine the Header bar and Background colors of the instruction frame. Click the eye-dropper icon to set each color. (See the Setting Colors topic.) •Client Buttons. Use the slider to determine how Progress icons/buttons in the Header bar of the instruction frame will display when content is running. By default, the slider is turned on, which will display Progress buttons as Back (Previous), Next, Exit/Finish/Close, etc. When turned off, Progress icons will display as arrow and X icons.
|
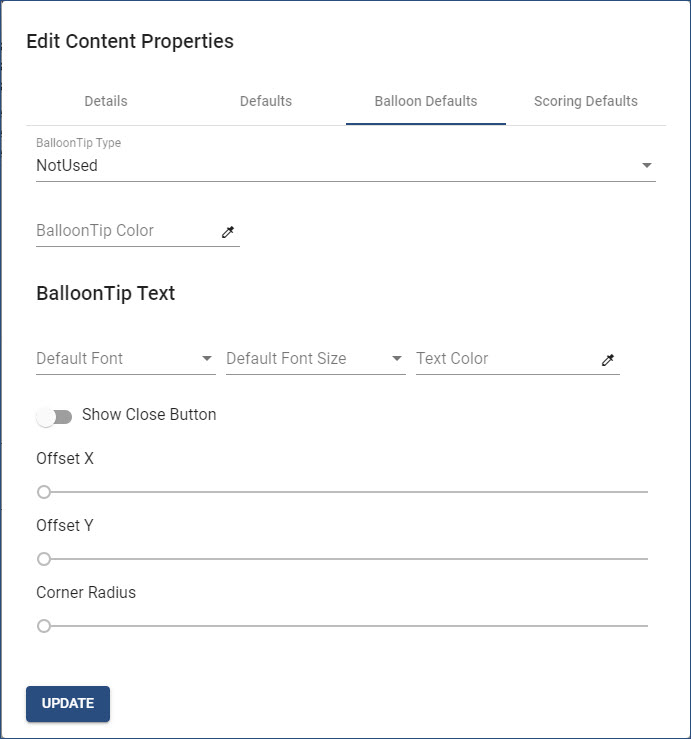
Click the Balloon Defaults tab to set the properties for BalloonTips that may be applied to Lesson (not Assessment) content. Using the graphic for reference, the settings are identified below. (See the Adding BalloonTips topic.)
•BalloonTip Type. Click the arrow to select one of five options: oNotUsed. Choose this option for Assessment content. oNormal. Choose this option to allow BalloonTips to be displayed in learning content next to the captured control. oOutline. oFocus. oHTML. Choose this option for content that only has one instruction frame with multiple captured steps; where the BalloonTip serves as the instruction. •BalloonTip Color. Click the eye-dropper icon to set the background color of BalloonTips. (See the Setting Colors topic.) •BalloonTip Text. Text within BalloonTips will display using the same Default Font, Default Font Size, and Text Color set in the Content Properties Defaults unless changed. If a BalloonTip Color has been set, it is likely the BalloonTip Text Color should be changed. •Show Close Button. If the HTML BalloonTip Type is selected, click the Show Close Button slider to display a Close button when the last BalloonTip is played. •Offset X and Offset Y. •Corner Radius. Use the slider to change the angle of the BalloonTip corners.
|
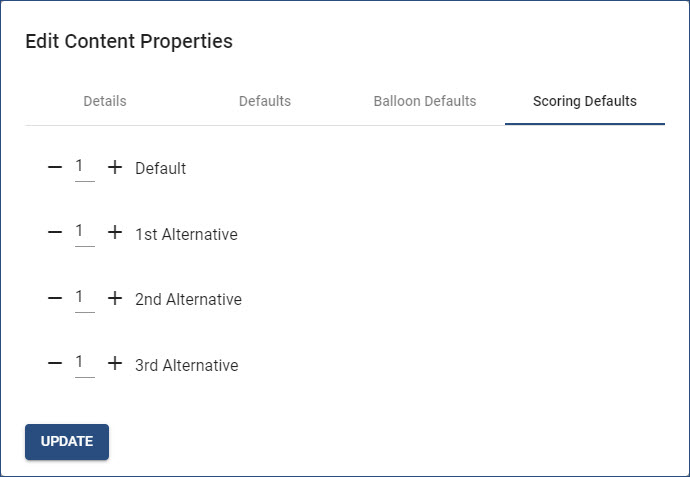
Click the Scoring Defaults tab to set the default point value for captured steps. The tab is only active for the Assessment Content Type. Set the default score for the primary or preferred method (Default) for a user to complete an action, and then a default score for up to three alternative methods to complete the same action. Captured steps can have as many alternative methods as required; however, only the primary and the first three alternative methods will automatically be scored as set in the Scoring Defaults tab.
|