If an Event has enrolled users and needs to be canceled, change the Event Status to Cancelled on the Detail tab of the Event on the Calendar. This will generate a cancellation appointment to any user that is currently enrolled and remove it from their Outlook Calendar. 1.Navigate to the Calendar page. 2.Locate and click the Event on the Calendar. 3.On the Detail page, change the Event Status to Cancelled. 4.Click the Cancel Reason arrow and select the appropriate reason for canceling the Event.
5.OPTIONAL: If additional information for canceling this Event is required, enter it in the Additional field. 6.The Event will display on the Calendar with a strikethrough to users with the appropriate LMS Security Profiles. Standard users will not see the Event on the Calendar.
|
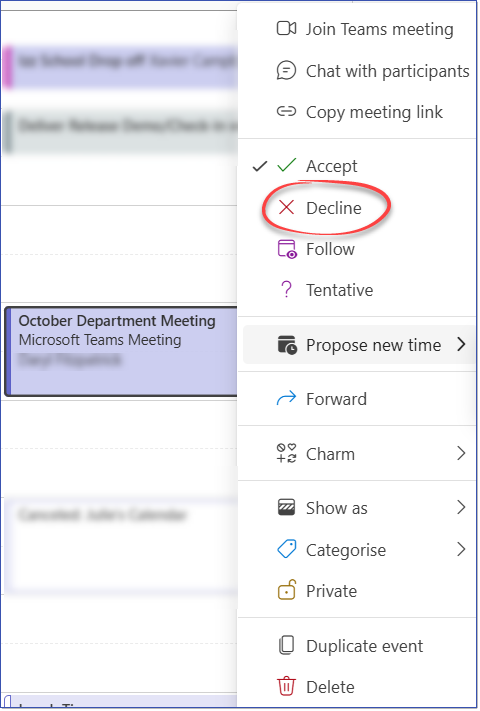
The Outlook Decline feature allows enrolled users to decline LMS event invitations directly from Outlook or Microsoft Teams. When a user declines a calendar invite, the LMS automatically updates their enrollment status to Cancelled for the event. This streamlines the process of having to sign in to the LMS to cancel from the event. The Outlook Decline feature requires specific configuration within your organization. Please share the Outlook Decline Integration - Technical Requirement information with your technical team for review and to confirm compatibility with your environment.
How Users Can Decline EventsOnce enabled for your LMS, Users can decline an LMS Calendar invite using any of the following applications: •Outlook Desktop, Web, or Mobile •Microsoft Teams (Desktop, Web, Mobile) Supported ActionsUsers can use a range of Decline methods across applications, including: •Click Decline in the Calendar invite •Right-click and select Decline •Respond NO via RSVP options in mobile Outlook or Teams apps •Decline from Microsoft Teams Calendar  Outlook Decline  Teams Meeting - Right-Click > Decline When a decline is registered through any of these methods, the LMS will automatically update the User's status to Cancelled for the Event.
|
If you have added an Event to the Calendar in error, you can delete it as long as NO end-users have enrolled in the Event (it is better to Cancel the Event, rather than delete it). To delete an Event from the Calendar: 1.Navigate to the Calendar page. 2.Click the View list
3.Click in the row of the Event to be deleted. 4.Click the Remove selected items 5.Click OK to confirm deletion of the Event. 6.If the Calendar grid (i.e., Month/Week/Day) is preferred, click the View month |
