Username and Password Authentication Method
When the Username and Password authentication method is enabled, Users will sign in using the credentials created directly in the LMS. These accounts are authenticated by the LMS itself, not through your organization's network or SSO. Users will be prompted to sign in with their LMS Username and Password. This authentication method is commonly used for external Users who do not have a network account but still require access to LMS content.

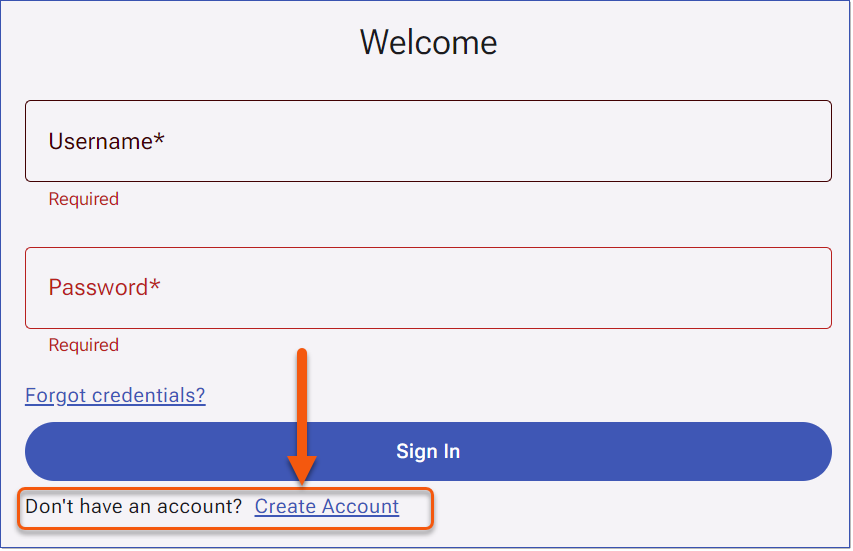
Username and Password Sign In
Users can click the Forgot credentials? link to reset the password. See Password_Requirements
Setup Account Self-Creation
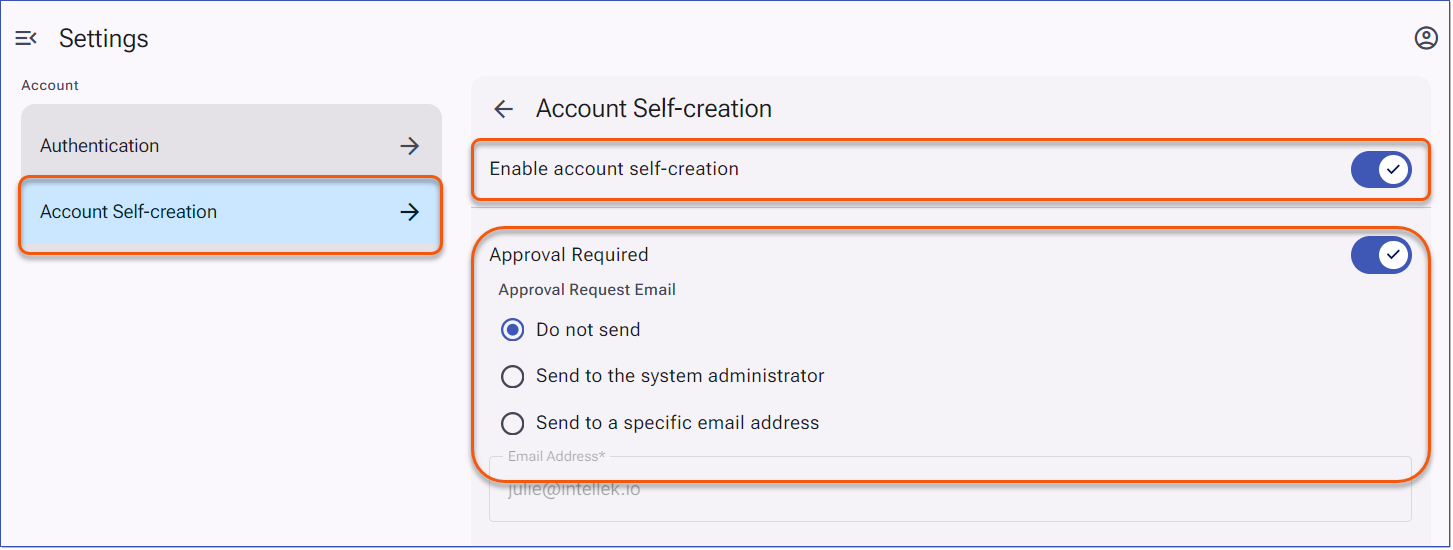
With the Username and Password Authentication method, Administrators can allow Users to create their own account through self-registration. When this option is enabled, Users will see a Create Account link on the Sign In page.

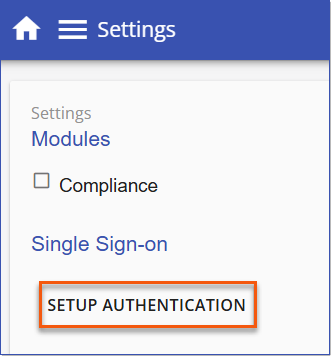
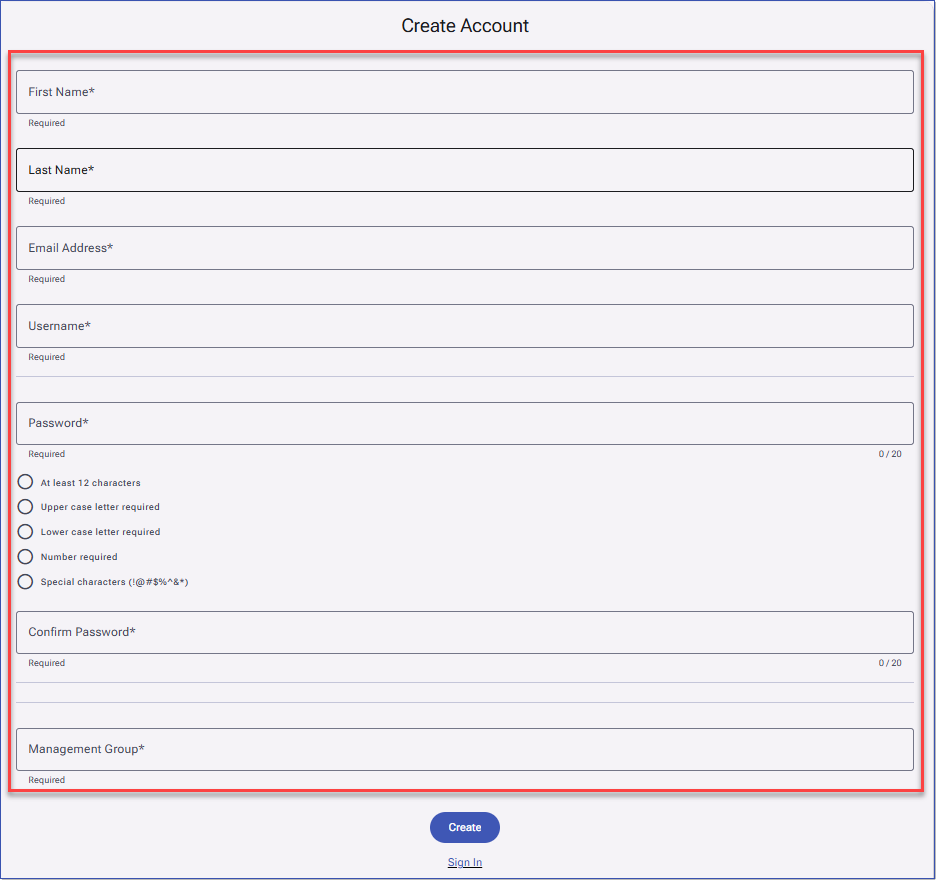
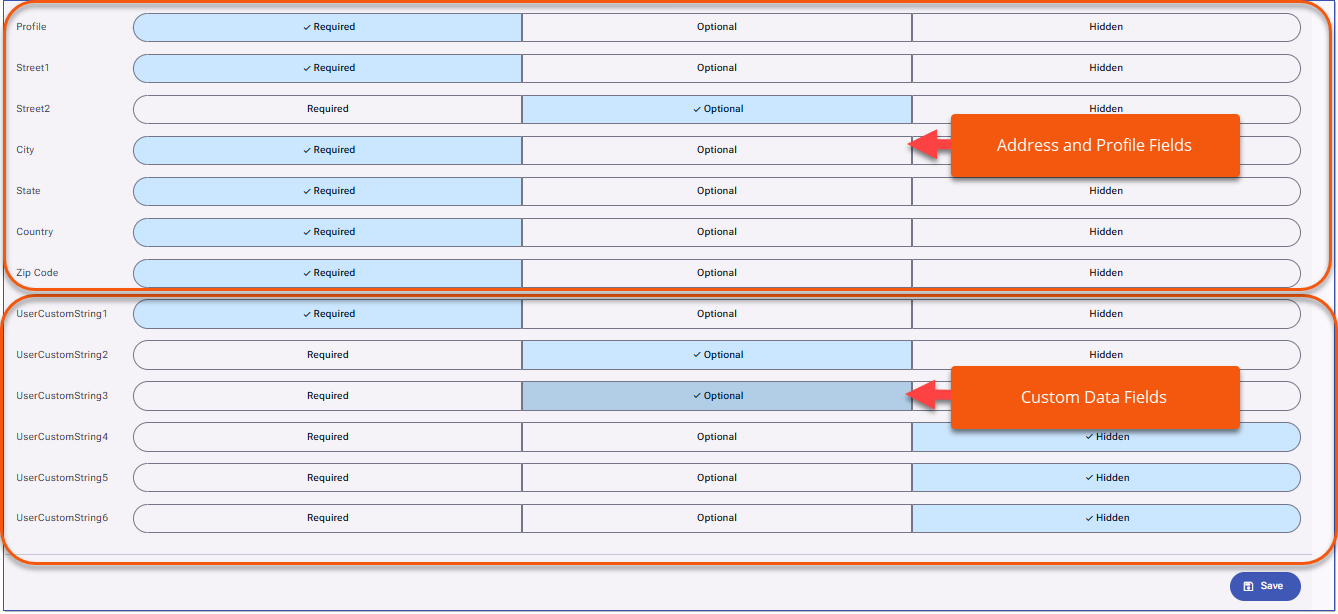
Administrators enable Account Self-creation in the Setup Authentication settings and choose whether approval is required to create an account. new self-created accounts require approval. They can also use Forms Configuration to define which fields Users must complete during account setup.
1.From the left main menu, select Settings > Setup Authentication.

2.Select Account Self-creation then toggle the slider button to the ON position .

|
Modify the Approval Required settings to determine whether self-created accounts must be approved.
1.Enable the Approval Required slider, then configure the preferred Approval Request Email option:
•Do not send - No email will be sent to Administrators; approvals will be managed through the Approvals card on the Administrator dashboard.
•Send to the system administrator - Sends approval notifications to the system administrator.
•Send to a specific email address - Enter an email address to receive approval notifications. |
Use Form Configuration to specify which fields Users must complete during account setup. Fields can be set as Required, Optional, or Hidden. Adjust the defaults as needed, then Save your changes.
1.Check the desired default, (Required, Optional, or Hidden) for each of the listed fields to appear on the account creation form.
2.Scroll down to Save the changes.
 Form Configuration
|
The six new custom data fields are available for those using Account Self-Creation and can be displayed on the Account Self-Creation page to allow for the collection of additional information. Administrations can determine if the fields are display as optional or required. In addition, User Address fields and User Profile is available to the Account Self-Creation page.
Adding Custom fields to Account Self-creation
Administrators determine which of the custom data fields are included on the Account Self-creation page and if the fields display as optional or required.
1.Navigate to Settings > Setup Authentication
2.Select Account Self-creation
a.If required, enable account self-creation.
3.In the Form Configuration section, scroll to the new custom learner data fields and adjust the options to determine if each field is Required, Optional, or Hidden.
Administrators also have the option of including the User Address fields and the Profile field on the Account Self-creation page to collect this information from Users during the account creation process.

|
|
|