Live Content Studio provides multiple methods for advancing content or moving to the next Instruction. When training or testing application knowledge, creating a Step and the appropriate Alternative(s) is the method used to advance the content.
|
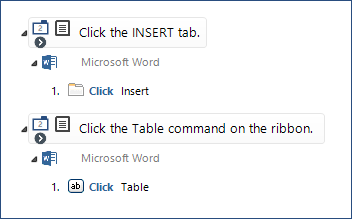
The capture process is the means by which Live Content Studio records the steps you require your users to perform for a particular Instruction. 1.Select the Instruction.
2.Launch the Capture Session using one of these methods: •In the Main Interface, click the Capture button on the ribbon. •In the Main Interface, right-click the selected Instruction, and then select Capture Steps. •In the Add/Edit Instruction window, right-click the selected Instruction and select Capture Steps. |
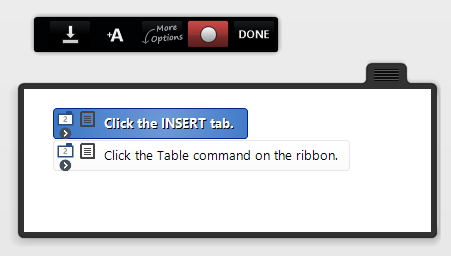
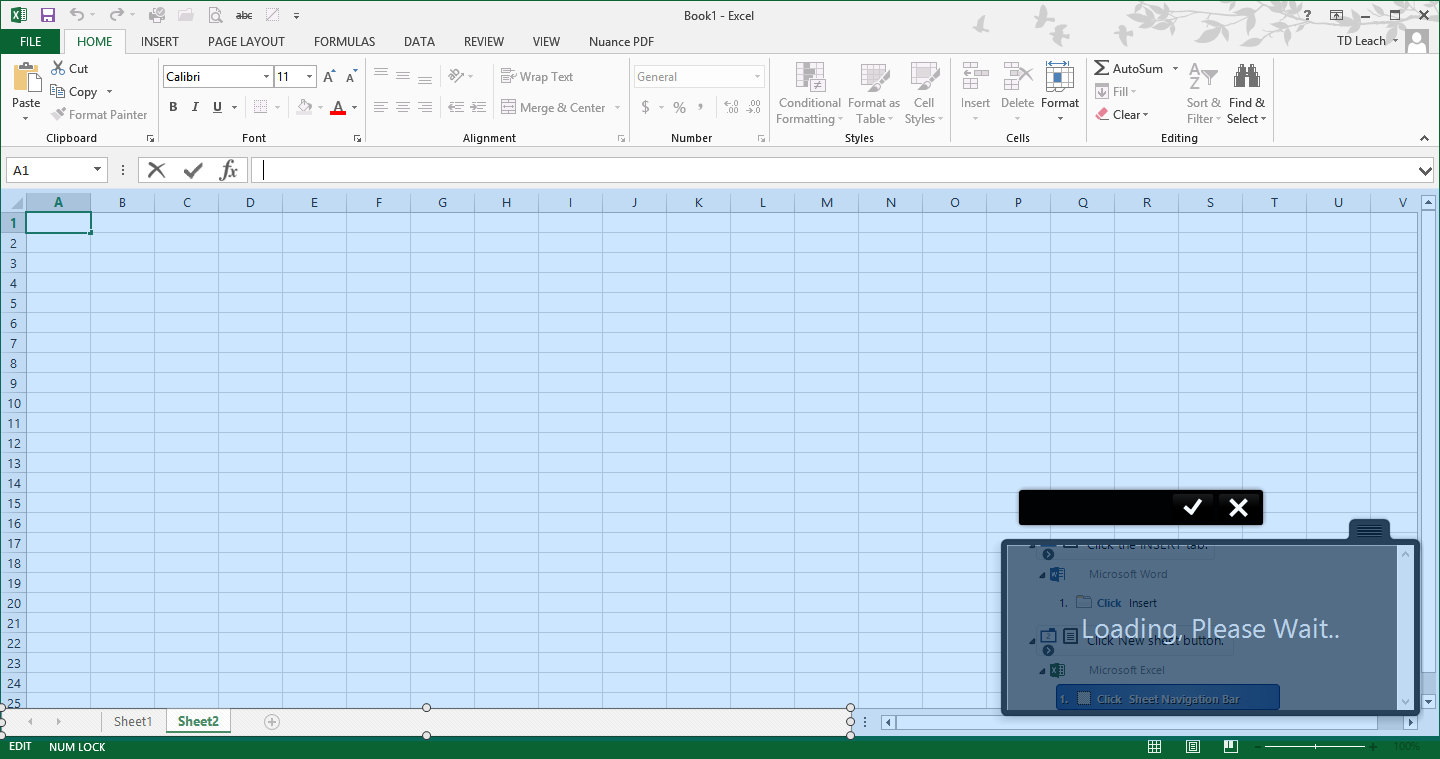
The Capture window will open in record mode. This means that any actions you perform while the Capture window is open will be recorded and added to the selected Instruction as a Step. 1.Click the Pause/Resume button on the Capture toolbar. See Capture Window and Toolbar. 2.Click in the application window (e.g., Microsoft Word) to be captured. Make sure the application window is the focused (active) window and in the appropriate state to begin capturing. 3.Click the Pause/Resume button on the Capture toolbar to start capturing Steps. 4.Click each application control (i.e., ribbon tab, button, right-click, or drop-down list item) or keyboard action in the appropriate sequence for the selected Instruction. 5.To continue capturing for successive Instructions: a.Click the Pause/Resume button on the Capture toolbar. b.In the Capture window, select the next Instruction requiring captured Steps. c.Click the Pause/Resume button on the Capture toolbar. d.Repeat step 4.
6.When finished capturing, click the Done button on the Capture toolbar. 7.The Capture window and the Main Interface or Add/Edit Instruction window will show the Instructions that have Steps recorded and information about those steps.
8.Test your content. Use the Preview button to test. Preview can be accessed from: •The Home tab ribbon in the Main Interface. •The Quick Access Toolbar in the Main Interface. •The Quick Access Toolbar in the Add/Edit Instruction window. |
The Capture toolbar and window containing the list of Instructions will display on top of an application window. Both items can be moved using click and drag if they obstruct the area that you are capturing. The toolbar allows you to control the Capture Session.
From left to right, the toolbar buttons provide the following functionality during a Capture Session:
|
|
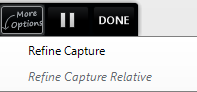
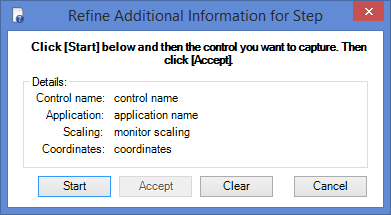
Sometimes you might run into trouble with a control being linked to a specific document property. For instance, you may be asking the user to perform a series of actions in an Excel workbook, but when you preview the steps, the content doesn’t progress as you expect. The capturing tool may have tied itself to the particular document from which you recorded the steps. Editing the Step properties may be necessary. Similar to needing to use one of the Refine Capture options to precisely identify an application control, a captured control may be recorded as "Text (No Name)," "Client (No Name)," or something similar. For authors, renaming the captured step is useful in confirming exactly which control was captured. Additionally, an alternative method of refining the location of a captured step can be performed by editing a Step.
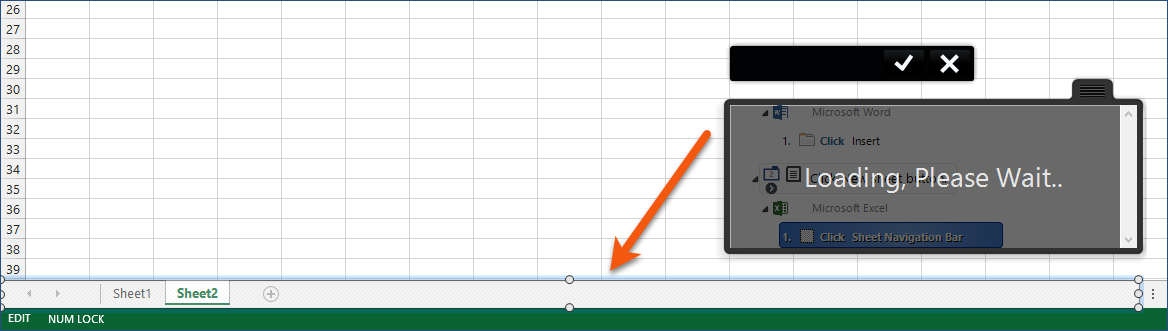
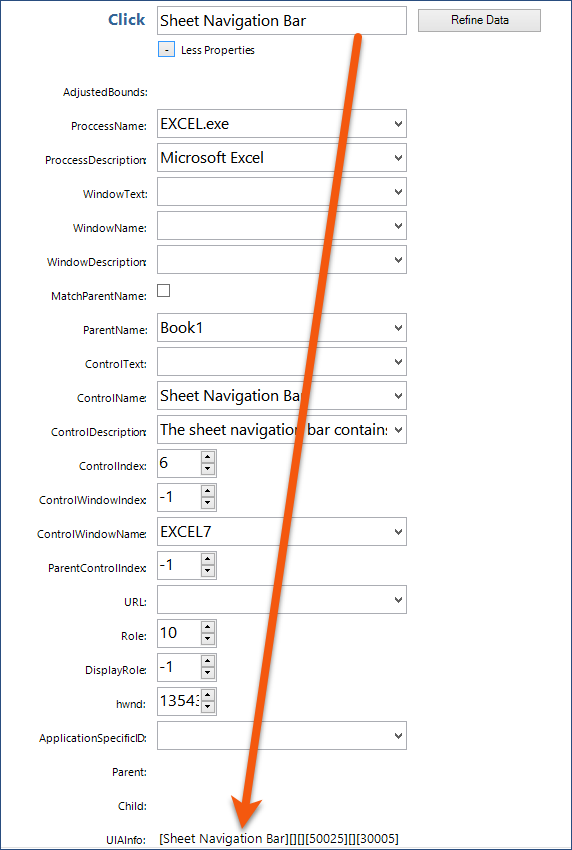
1.Select the captured Step to be edited. 2.Right-click the Step, and then select Edit Step. 3.If necessary, modify the name of the Step as appropriate. In the graphic below, "New Sheet" is the correct name, replacing "Sheet Navigation Bar."
4.Click the More Properties button to review additional applications or document-specific properties. 5.For assistance with which Properties to change, contact [email protected]. 6.When finished editing the Step, click Accept on the ribbon. |

You can delete a recorded Step (or Alternative) from either the Main Interface or Add/Edit Instruction window. There are several methods you can use: •Select the Step, and then press the Delete key (in both the Main Interface and Add/Edit Instruction window). •Right-click the Step, and then select Delete Step (in both the Main Interface and Add/Edit Instruction window). •Select the Step, and then click the X button in the Steps group on the Home tab ribbon (Main Interface only).
|