Before you start creating content for end-users, it is important to define the Content Properties and set the default Themes, Options, and text Templates (i.e., “Styles”) for content. A piece of content must be open in order to access Themes and Options, and create text Templates.
|
To ensure all Live Content Studio authors create consistently formatted content, it is important that you be diligent in following these steps: 1.Document all decisions and settings in your Standards Guide. 2.Create, save, and export the Text and Form Templates. 3.Save the Content Master, Text Templates, and Form Templates in a shared network location or share a copy with each Live Content Studio author.
|
You will require a folder structure on a network drive, or web server, to store and manage your Live Content Studio files. Here is an example of a common setup:
|

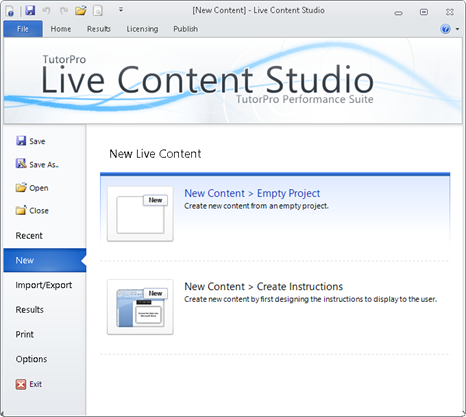
1.From the File tab, click New in the Navigation Pane on the left.
2.The opening View will be determined by the selection you make. Select one of the following: •New Content > Empty Project displays the Main Interface. You can select the action you wish to take from this View.
•Capture Steps will immediately launch the Capture window.
•Add Instructions opens the Add/Edit Instruction window to set your content Theme, Toolbar Options, and start scripting content.
•New Content > Create Instructions displays the Add/Edit Instruction window for immediate scripting of content. 3.Set the Content Properties. 4.Save the Content File. |
The Import/Export option from the File tab allows you to import Instruction text to create a new content file or into a currently open content file. From the File tab: 1.Click the Import/Export tab on the left. 2.Click the Import Instructions button. 3.Select the appropriate type of file: •Microsoft Word
•Text Document (i.e., Notepad)
•Live Content .tlc File
|
Export allows you to export Instructions from the currently open content. From the File tab: 1.Click the Import/Export tab on the left. 2.Click the Import Instructions button. 3.Select the appropriate type of file: •a Microsoft Word document. •a Text Document (i.e., Notepad).
|
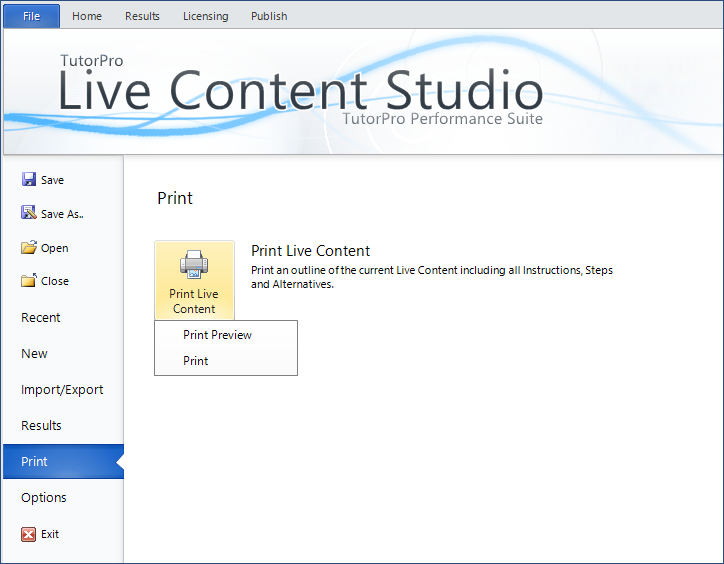
The Print option on the File tab will print the open Live Content Project, complete with all Instructions and captured Steps and Alternatives. The file can be printed directly to a printer or PDF file. This is helpful as a backup or allowing non-Live Content Studio authors the ability to review the content to ensure the proper Instruction wording and captured Steps and Alternatives have been identified prior to final publishing.
|