Feature Enhancement & Bug Fixes 
Available June 15, 2023
NEW
![]() Automated Notification Recurring Timing Options
Automated Notification Recurring Timing Options
Global Automated Notifications include a Recurring Timing Option that can be applied to: •Event Attendee Notification •Event Contact Notification •Compliance User Notification •Path Start/Expiry Notification •User Notification - Start Date •User Notification - Survey Completion Reminder •Course Assignment Notification •User Notification - Certificate Assigned •User Notification - External Documentation Expiry Date
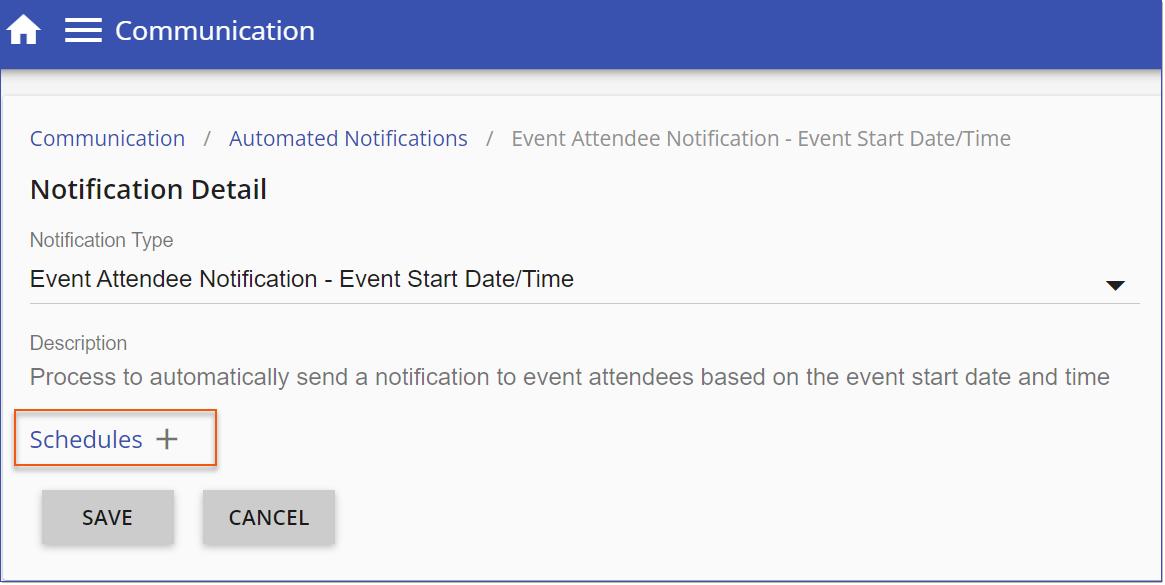 Schedules +
1.Navigate to Global Recurring Notifications via Communication > Automated Notifications > Notification Name 2.Select Schedules + 3.Select one of two timing options, One-Time or Recurring, from the Timing Option Type section. When Recurring is selected, configurable parameters include: •Recurrence Time •Recurrence Pattern •Recurrence Range
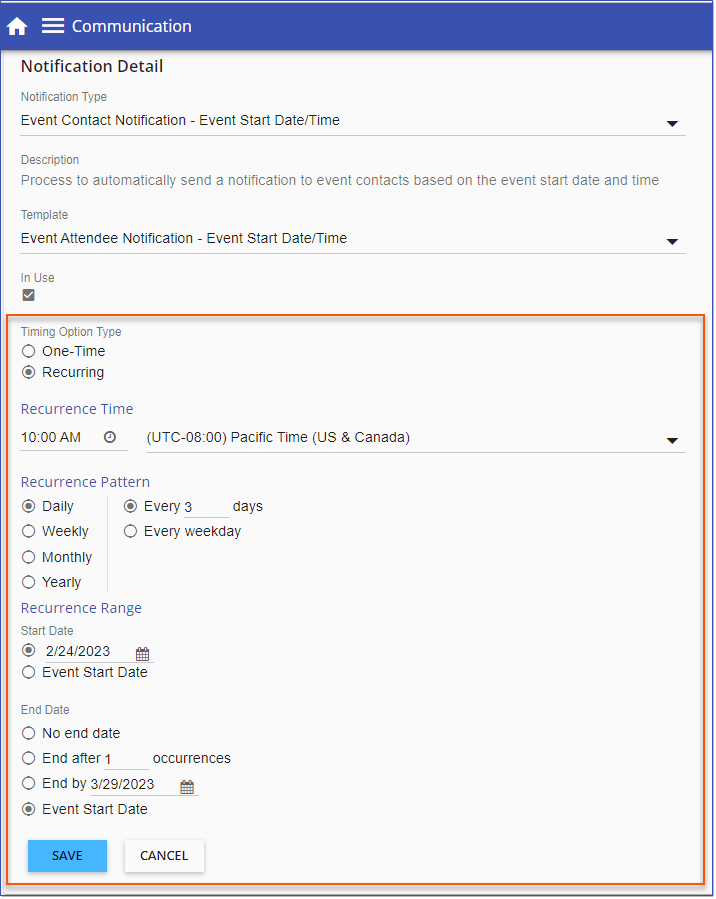 Recurring Notification Configuration Options Global Automated Notifications are intended to be sent out every time the notification is triggered, but can be overridden for specific instances using the following features: •Course-specific Notifications (Certificate Notifications only)
|
![]() Event-Specific Notifications
Event-Specific Notifications
There are 3 types of Event notifications used to communicate with LMS users about their Events. 1.System-generated Event Notifications 2.Automated Notifications – Global (Events) 3.Event-Specific Notifications System Generated Event NotificationsEvent enrollees automatically receive system-generated Outlook appointment emails, updates and cancellation notifications related to their event enrollment. There is no configuration to disable this notification. These notifications rely on default system templates (i.e., Appointment - New, Appointment Update) Automated Notifications – Global (Events)Global Event-related automated notifications must first be enabled to generate email notifications. Automated notifications are configured to send out reminders based on your defined email templates, timing options and are dependent on users’ Event History status (i.e., Enrolled, No Show, Cancelled). When enabled, Automated Notifications are intended to be sent for every event and every time the notification rules are triggered. Event-Specific Notifications – New FeatureEvent-specific notifications can be added directly to a specific Event via Calendar > Edit/Event Detail > Notifications. Event-specific notifications can be used to send reminders regarding timing and details relating to an event or post-event information. Configure and enable Event-specific notifications to send out notifications based on your defined email templates, timing options and dependent on users’ Event History status (i.e., Enrolled, No Show, Cancelled). Event-specific notification(s) override any previously configured Global Event Notification(s). Adding an Event-Specific Notification to an Event in the Calendar•Navigate to Calendar > Edit/Event Details > Notifications. •Select Notifications + •Identify the Notification Type •Event Attendee Notification – Event Start Date/Time (for notifications to users related to event enrollment and can be based on Event Enrollment status) •Event Contact Notification – Event Start Date/Time (for notifications to the Event Contacts) •User Notification - Certificate Assigned (only eligible when a Certificate has been aligned with the Event) •Select Schedules + •Select a relevant template (created in Communications > Email Templates), for your notification. •Enable the notification by marking In Use •Select and APPLY one of two timing options from the Timing Option Type section. •One-Time •Set to Send Notification xxx Before/After Start Date •Recurring •Recurrence Time •Recurrence Pattern •Recurrence Range 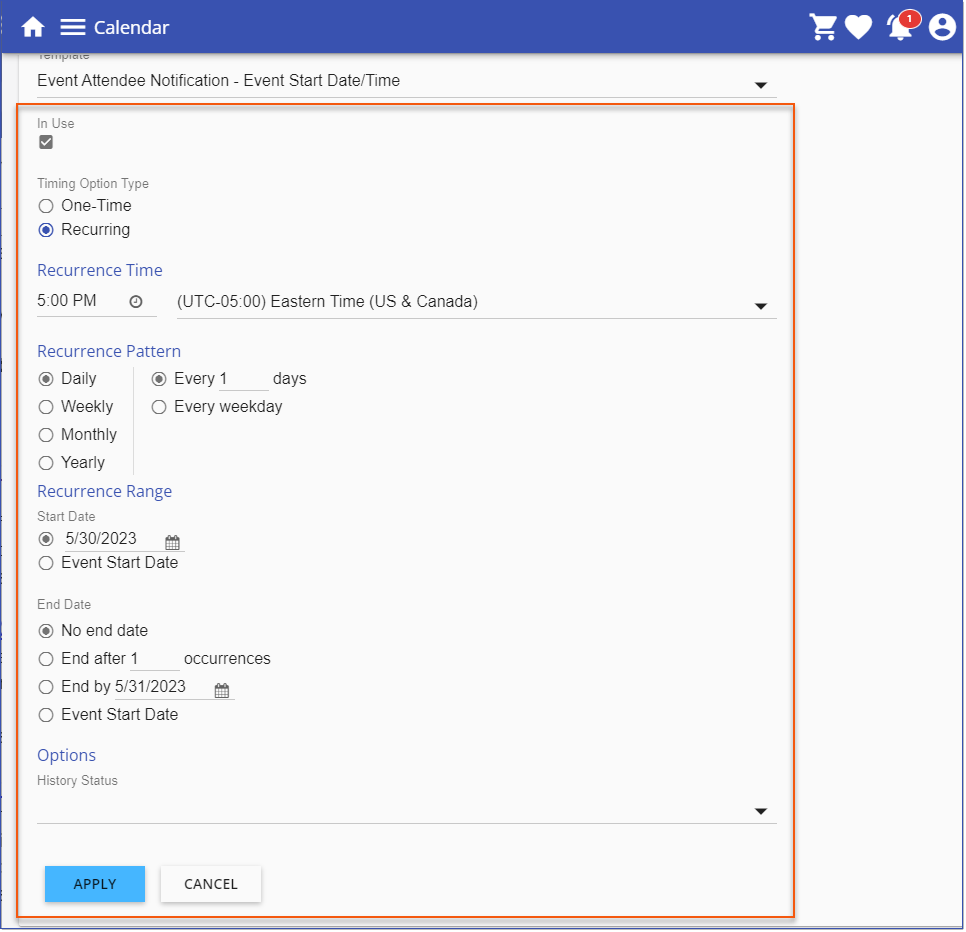 Event-Specific Notification
Event Notification Templates The message text included in the event-specific notification is provided by your specified template (created in Communications > Email Templates). Create as many templates as you need for your Event-specific notifications. There are several Event variables that can be used to craft a personalized and relevant notification. See Course/Path/Event-Specific Notifications related to certificates
|
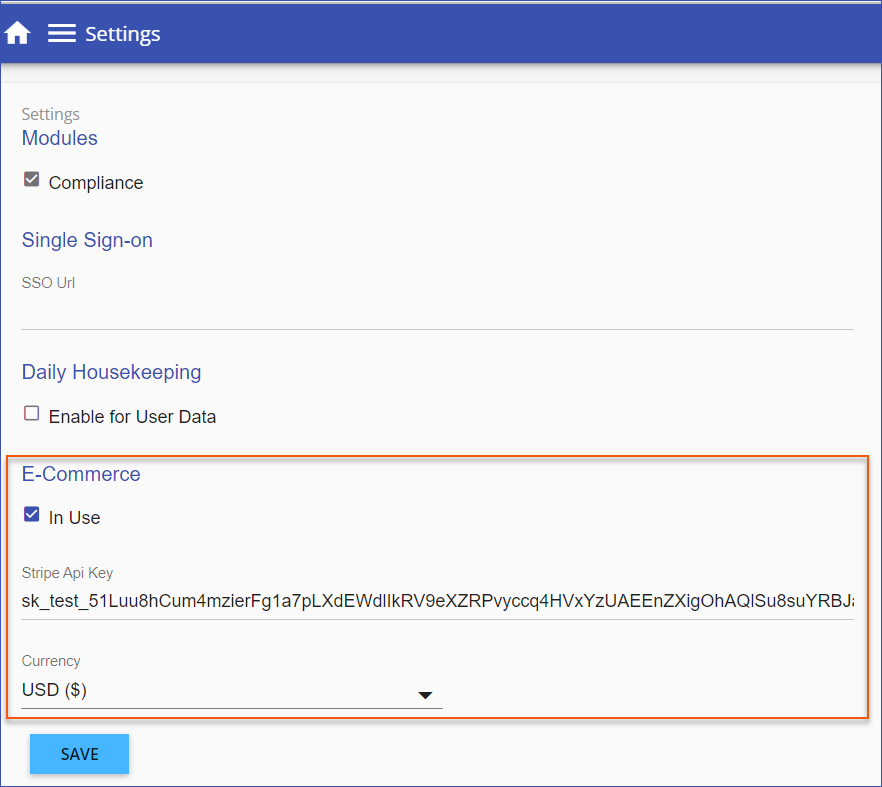
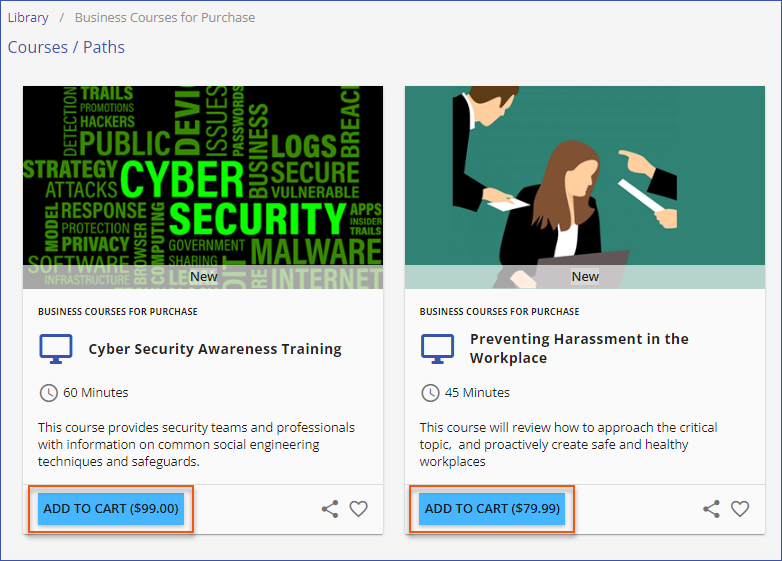
The eCommerce module is a fully integrated solution that allows clients to place courses/paths for purchase on the LMS. Once eCommerce is enabled by a company administrator in the LMS, all courses/paths will have the option of associating a cost and licensing model with them. Courses/paths configured for eCommerce will display a price and an Add to Cart option on the course/path card. Company AdministratorEnable and Configure the eCommerce ModuleCompany Administrators can enable and configure the eCommerce module via Settings > 3-dot option > Settings > eCommerce. 1. Check In Use to enable eCommerce. 2. The eCommerce module integrates with your Stripe payments account. Specify your Stripe Business Account's unique Stripe Api Key. 3.Select your preferred transaction Currency to be used for transactions. 4.SAVE.
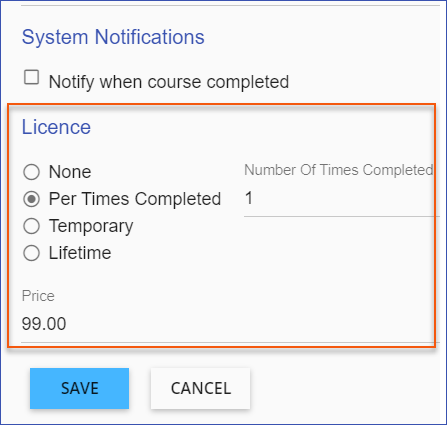
Set Course/Path Eligibility for ECommerceOnce the eCommerce module is marked In Use, two fields are added to Course/Path Detail pages that will determine the course/path eligibility for purchase: License is used to specify how the course/path will be licensed for use after purchasing. Set the licensing as follows: •None if the course/path is not available for purchase. Note: this is the default for all courses/paths. •Per Times Complete if the course/path can be completed a set number of times per purchase. •Temporary if the course/path will have unlimited access for a certain number of days. •Lifetime allows unlimited access to the course until you revoke the license. Price establishes the price of the course/path based on the currency selected for the LMS and the licensing model selected for the individual course/path.
View PaymentsLMS Company Administrators can view a listing of all purchases made in the LMS via Settings > 3-dot option > Payments. Administrators can revoke a license from the Payments page to make a course accessible again if a license has expired and it is deemed necessary. Refunds and payment adjustments must be done manually at this time.
Purchaser (User)Purchase a Course/Add to CartAn eligible course/path with pricing and licensing specified includes an Add to Cart button on the course/path library card. The purchaser clicks this button to add the course/path to their Shopping Cart.
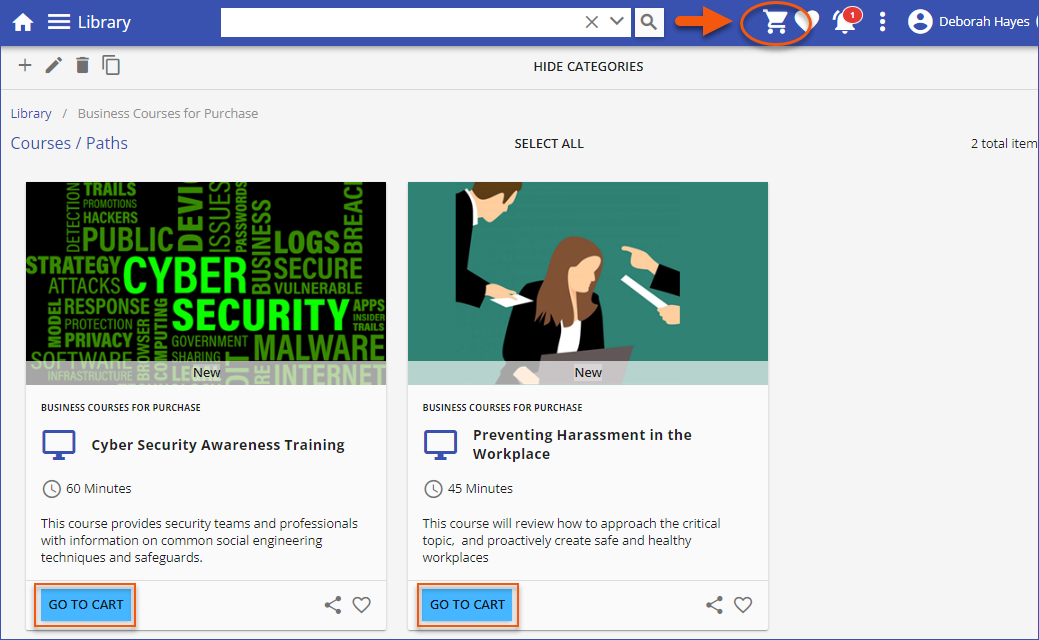
Go To CartWhen eligible course(s)/path(s) are added to the Shopping Cart the Go To Cart button displays on the course/path card in the library. Purchasers click the Go To Cart button or the Shopping Cart icon in the top right of the window to view the contents of their Shopping Cart and proceed to the Checkout.
The Shopping Cart lists items added to the cart for purchase and displays the Order Summary. Purchasers select the Checkout button to continue to Stripe Checkout and to complete the purchase.
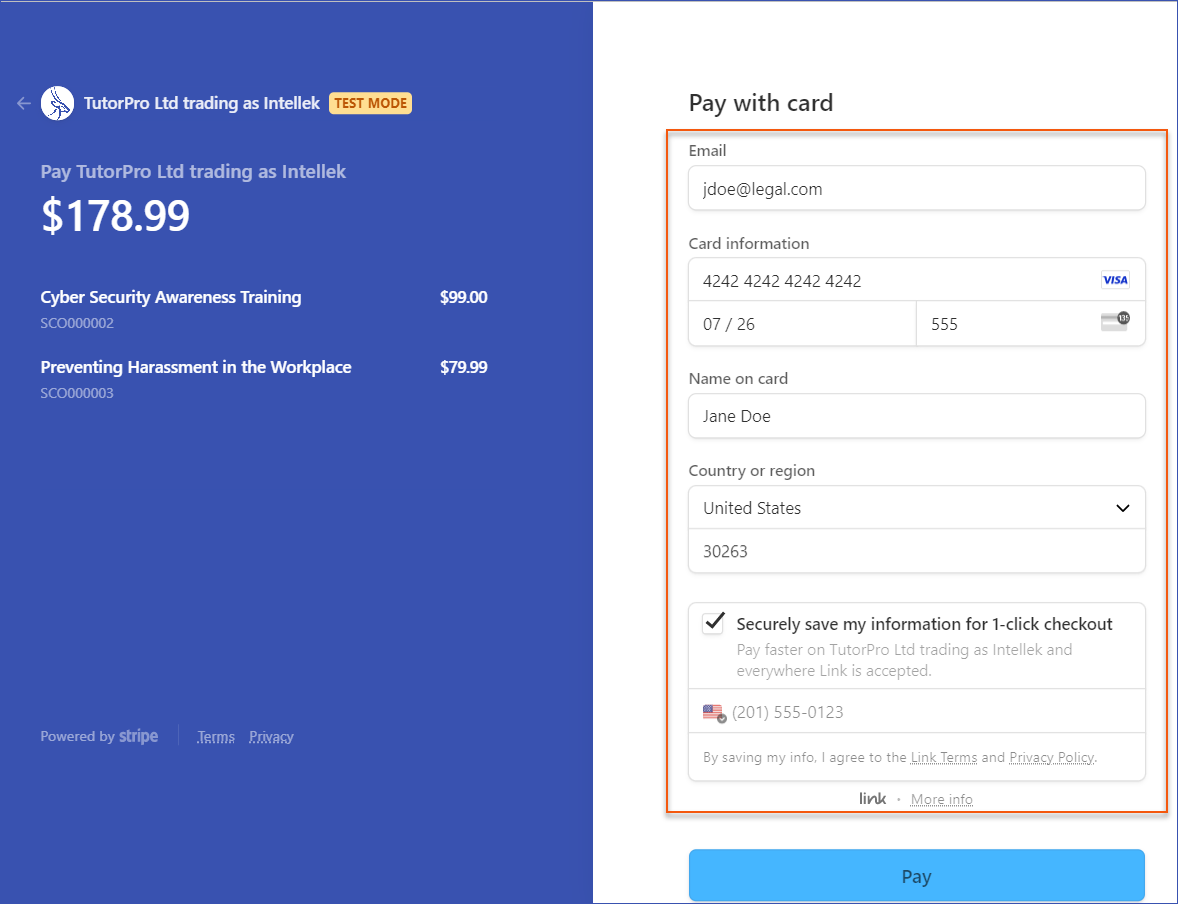
CheckoutEnter all payment details including Email address, Card information, Name on card, Country or region and zip code. Click Pay when ready to proceed.
Following successful payment, the payment confirmation page displays and the purchased course(s)/path(s) are now available to the purchaser through the LMS library.
|
----------------------------------------------------------------------------------------------------------------
Any Issues listed below this line were added after May 30, 2023 when LMS v3.50.0.0 Release Notes were originally made available.
----------------------------------------------------------------------------------------------------------------
•
