The Score Sheet functionality available in Live Content Studio allows you to display a message and/or Score to an end-user in a testing or assessment Live Content file. In order to use a Score Sheet, you should first format the test or assessment Live Content and assign the appropriate Score(s) to each captured Step and Alternative in a Text Instruction or Form Instruction.
|
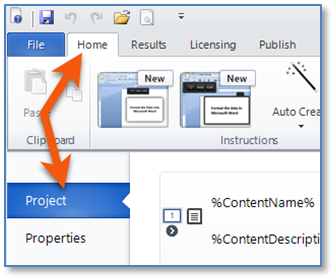
You can add a Score Sheet from either the Main Interface or Add/Edit Instruction window. Up to two Score Sheets can be added to a content. •Add one Score Sheet to display a common Score Sheet to all end-users, regardless of a passing or failing score. •Add two Score Sheets to display one Score Sheet for a passing score, and the second for a failing score. •
|


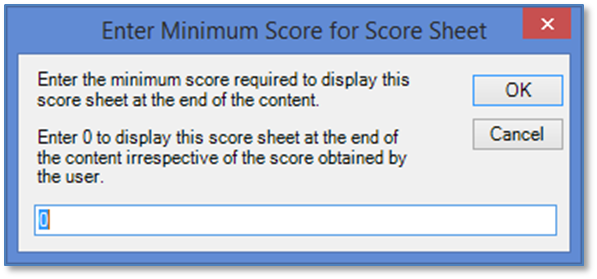
Once a Score Sheet has been added, a window will display asking for a minimum score required to display the Score Sheet at the end of the content. The functionality of setting a minimum score triggers which Score Sheet to display at the end of the content.
•Common Score Sheet (for all end-users, regardless of their final score. •Failing Score Sheet. To set the minimum score for the failed response, leave the setting for the minimum score at zero. •Passing Score Sheet. To set the minimum score for the passing response, enter the passing percentage for the minimum score. For example, if the passing percentage is 80%, enter 80. (See Inserting a second Score Sheet.) |
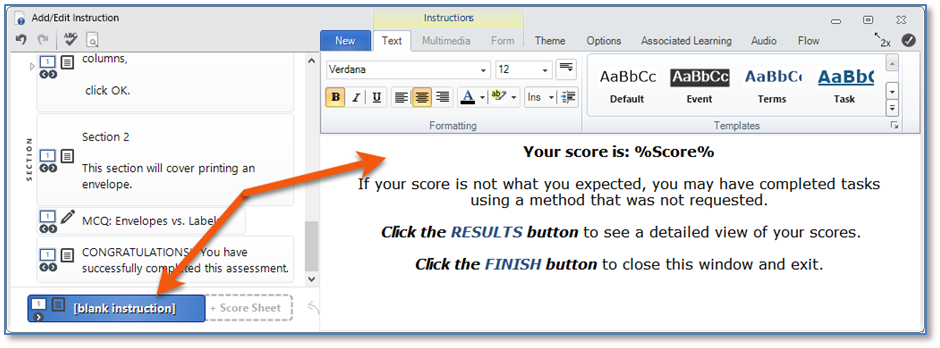
After setting the minimum score, the Add/Edit Instruction window will be displayed and the Score Sheet Instruction will be selected.
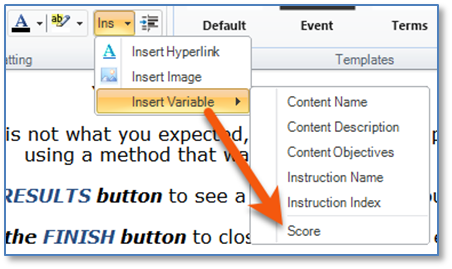
1.Enter the text you wish to include when the user sees the Score Sheet. Use the formatting tools on the ribbon to modify the look of the text. 2.To insert a Score in the sheet, click the
|
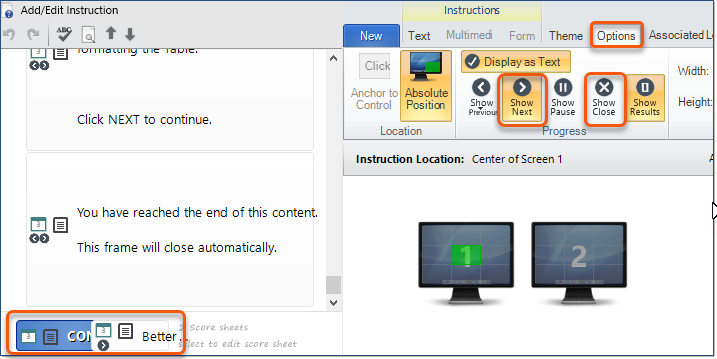
The Score Sheet may not inherit the look, Theme, or toolbar Options used by the other Instructions in the content. It is best to check the following with the Score Sheet Instruction selected in the Add/Edit Instruction window: 1.Click the Theme Tab. a.Select the appropriate Theme. b.Select the appropriate Colors and Toolbar information. 2.Click the Options Tab. a.Make sure that the Toolbar buttons and options are applied here. b.Select the location for the Score Sheet – generally Center. c.If displaying Results to end-users, click the Show Results button in the Progress group on the ribbon.
3.Click Preview to preview the Score Sheet. a.Check the Size. Use the Resize handles and Set Instruction Size b.When two Score Sheets are included, you may need to Preview each Score Sheet to set the appropriate size. Alternately, enter the appropriate Width and Height in the Options tab to ensure both Score Sheets are sized alike.
|
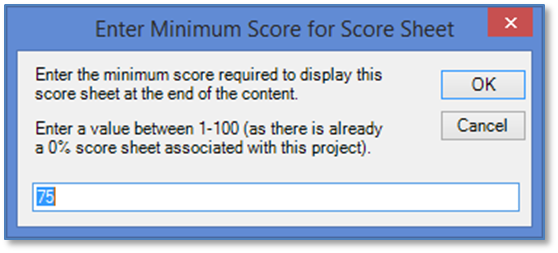
Follow the steps as described to insert a second Score Sheet. You will see both listed at the bottom of the Instruction Pane in the Add/Edit Instruction window and in the Main Interface. When setting up the second Instruction, the minimum score window looks a little different, but has the same impact. In this case, if you are setting up the minimum score to pass the test/assessment, insert the percentage. For example, if the pass rate is 80%, enter 80 in the field (the default is set to 75). Only end-users who attain that minimum score will see the Score Sheet defined with this information.
If you would like end-users to see their exact score, remember you must insert the Score variable as described above. Otherwise, they will only see the message telling them they passed. Make sure to format and review the tabs for the second Score Sheet as described. |