Here are detailed instructions for creating a Learning Path, but paths are as simple as you want them to be. Here is a 1-2-3 how-to guide for the most basic Learning Path.
Set-up
•Make sure all of the courses you wish to include in the learning path are set up correctly.
•Any included scheduled courses should have future events available so your users can enroll.
•Correctly set up any groups of users you might ultimately like to auto-assign to this path.
•Add a Communication > Email Template that would serve as an acceptable, initial path assignment notification. Or, plan to use the established template labeled User Notification - Assigned to Learning Paths. ![]()
oCustom notification template ![]()
Steps
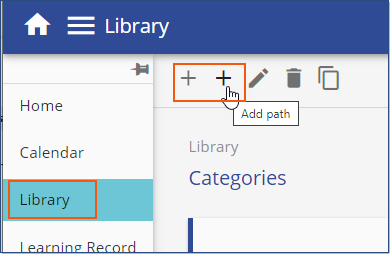
•Navigate to the Library.
•Hover over the Add Course + icon to reveal the Add Path + icon.
•Click Add Path +.
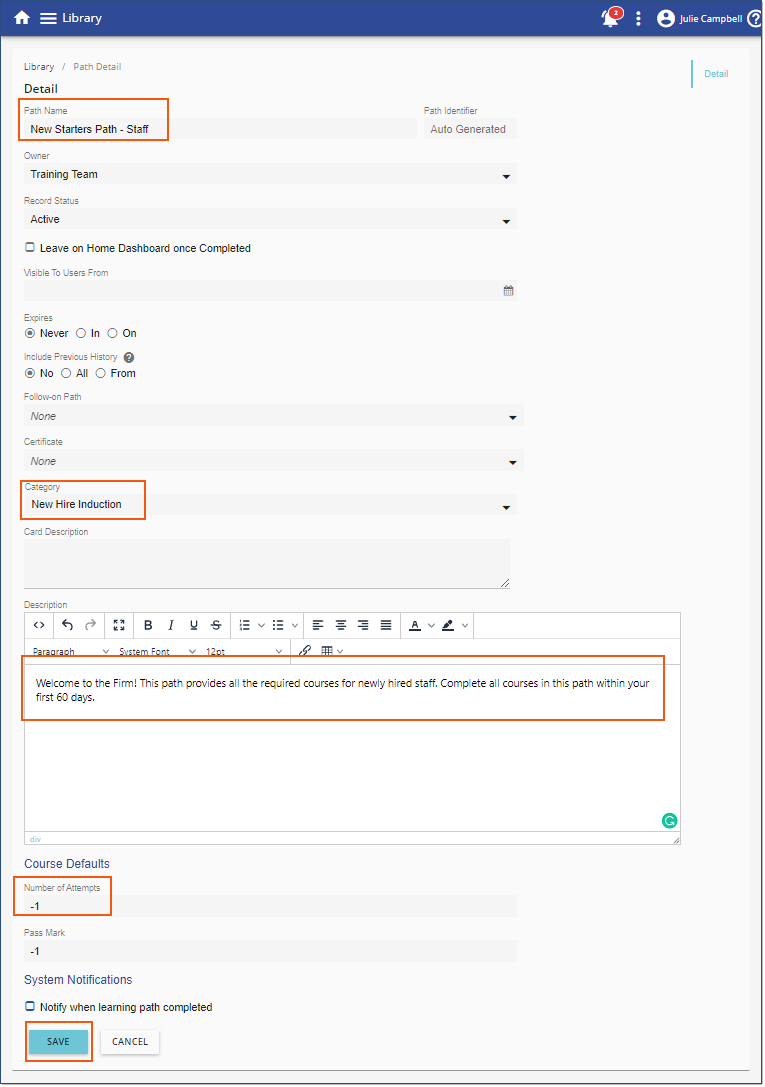
•At a minimum, complete the required and highly recommended Path details:
oPath Name
oCategory
oDescription
oCourse Default - Number of Attempts. This field is pre-populated to allow 1 attempt for each course in your path. If you'd like coursed added to the path to have unlimited attempts, use our code: -1. Once courses are added, attempts can be customized for any specific course if the default set here isn't appropriate.
•SAVE
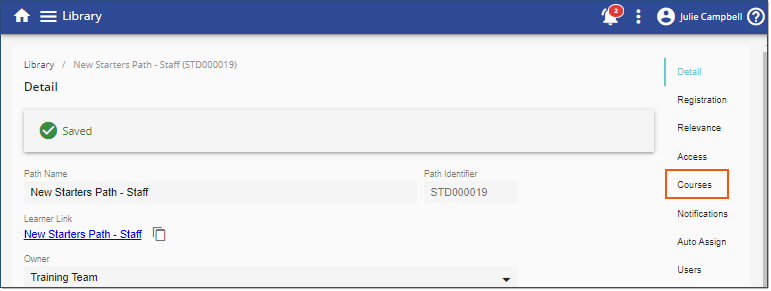
•Once saved, open the Courses Tab
•Add Course + to the Path
•Repeat to add multiple courses
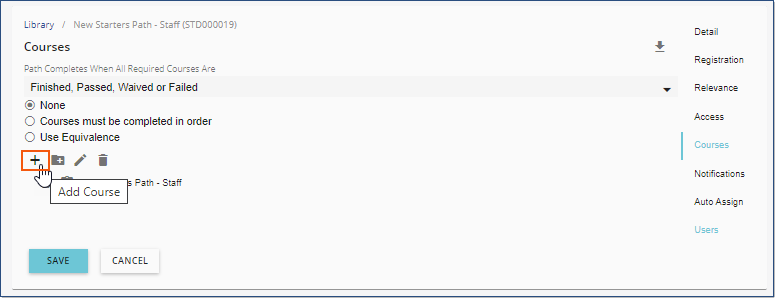
•SAVE
![]() Courses are all required by default. You can update that setting using the edit
Courses are all required by default. You can update that setting using the edit ![]() option on any course. SAVE.
option on any course. SAVE.
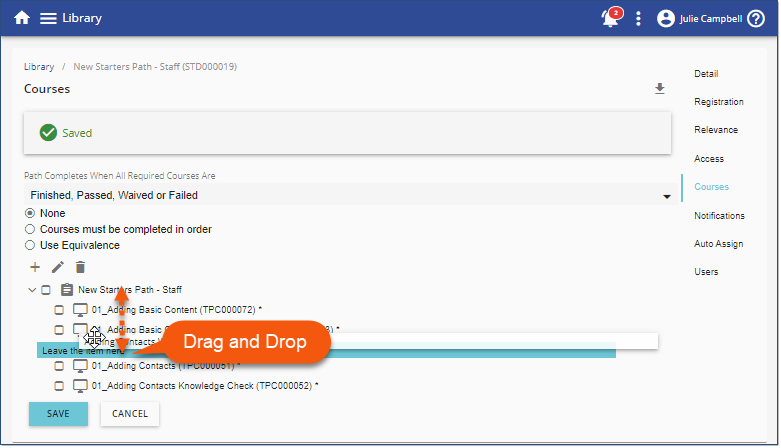
![]() Drag the order of courses to change the order displayed to the end user. SAVE.
Drag the order of courses to change the order displayed to the end user. SAVE.
You've successfully saved your Learning Path. It is now available in your defined Category in the Library for everyone.
Distribute your new Learning Path to users using any/all of the following methods.
Before assigning users, setup Path Notifications if you want automated notifications to apply to this Path.