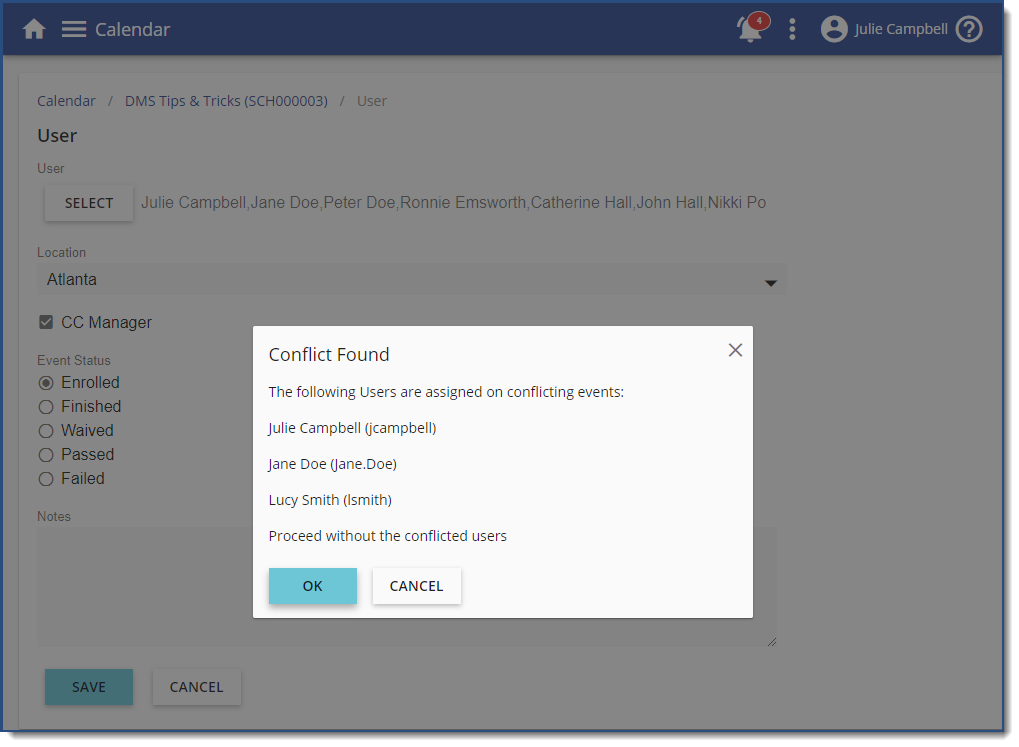
You can enroll Users in an Event on their (or their manager’s) behalf. Once the Event has been scheduled on the Calendar: 1.Navigate to the Calendar. 2.Locate and click the Event on the Calendar. 3.Click the User(s) tab. 4.Click Add a new record 5.Click 6.Use the Free text search to enter the user’s name. Alternatively, click the Search filter 7.Click 8.Select the check box(es) next to the user(s) to be enrolled. 9.Click 10.If there are multiple Locations associated with this Event, click the Location arrow to select the appropriate location for the users being enrolled. 11.Choose the appropriate Event Status.
12.If appropriate, enter Notes. 13.Click
|
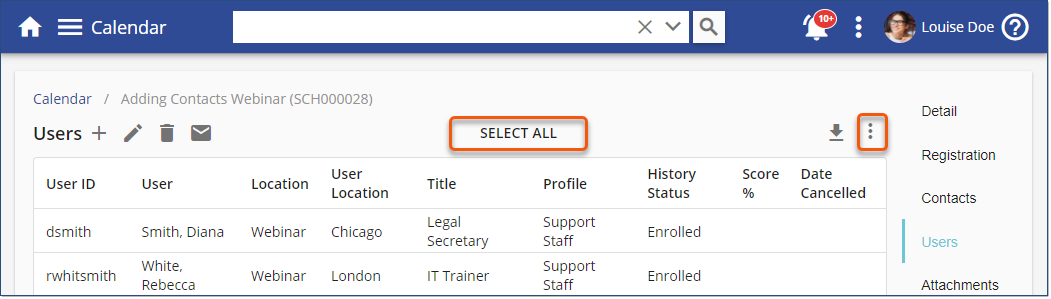
You can email the participants enrolled in an Event and select any History status. For example, you can email all enrolled users, or perhaps those that are canceled or "no show" after the Event. 1.Navigate to the Calendar. 2.Locate and click the Event on the Calendar. 3.Click the Users tab on the right side of the page. 4.Using the Search at the top of the page, filter the location, if relevant, and the History Status of those you want to email. 5.Click 6.Click SELECT ALL. 7.Click the Email 8.If appropriate, click the Template arrow to select an available message Template. 9.Enter or edit the message text and variables as required. You can include the [EventAttachments] variable at this point if required. 10.Click |
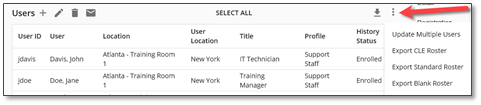
An Event Roster can be used as a sign-in sheet for scheduled training from the Users tab for the Event. You have the option of exporting and printing one or more of three types of rosters: •CLE Roster – If the Compliance module has been turned on and the Course is part of a Compliance body, this additional Roster will be listed as an option. •Standard Roster – Lists the Event Details, Event Contacts, and Enrolled users. •Blank Roster – Includes the Event Details, excluding Event Contacts and Enrolled users. All three options export the selected Roster to a PDF, which you can then print (and save, if desired). 1.Navigate to the Calendar. 2.Locate and click the Event on the Calendar. 3.Click the User(s) tab. 4.Click the three dot Options menu, and then select the appropriate Roster from the list. The Export to Excel Additional options for displaying or printing users(s) for Events on the Calendar can be found in Menu > Run a Report. You must have the correct Security Access to view the Run a Report and Analytics pages. Using the Event People or Training Tracking reports, you can generate a list of user(s) for multiple classes or multiple sessions of the same Event, as well as a variety of other options. |
Once the Event has finished, attendance should be reported to update user history.
1.Navigate to the Calendar. 2.Locate and click the Event on the Calendar. 3.Click the User(s) tab. 4.To the right of each user listed, select all users with the same attendance status (either Finished or No show) using the Ctrl+Click or Shift+Click method, or click SELECT ALL at the top of the Users list.
5.Click the Users List three dot options, and then select Update Multiple Users. 6.Click the History Status arrow, and then select the appropriate status. 7.Click User History will be updated to reflect their attendance (or non-attendance) for the Event. If you need to change the recorded status and/or add Notes for an attendee, display the recorded attendance for the Event (see Displaying recorded attendance).
|
The Bulk Import User History process now offers the ability to import all User History statuses for Calendar Events. Bulk Import User AttendanceAdministrators can use the Bulk Import process to Import User Attendance for calendar events. This is especially useful when you have an external attendance list, such as one from Teams or Zoom, and need to apply that data to a specific calendar event for tracking purposes. The process begins by exporting the event's existing User attendance to an Excel file. Administrators can then update attendance for existing Users, add new attendance records as needed, and complete any missing information. Once the Excel file is updated, it is re-imported to populate the event's User attendance list. 1.Navigate to the Calendar Event > Users tab and select the 3-dot option menu 2.Select Export User Attendance from the menu to generate an excel template with the necessary columns and format for bulk importing User history. Save the template and enter the User Attendance data into the appropriate columns. Any existing Users are included in the exported file. a.Note the following details when adding User history to the excel file: ▪Client_User_Identifier must match the User ID in the LMS User account. ▪Location must be entered accurately as per the LMS Locations. ▪Enter a valid Event Status in the status column. Capitalize each word with no spaces. For example, 'No Show' is entered as 'NoShow', Enrolled, Finished, Waived, Passed, Failed, Cancelled, etc. ▪If a match exists for a User in the existing Event attendance, the import will update the record, i.e. change 'Enrolled' to 'Finished'. b.Save and close the exported file. 3.Select the 3-dot option menu > Import User Attendance to import the updated User Attendance. The bulk import process will process the records and update the Event User history with the data supplied in the import file. If there are any problems along the way the import will display any errors at the top of the Uses page.  Bulk Import User Event Attendance |
Once user attendance has been recorded, the User(s) tab for the Event will have no attendee names listed, as there is no pending enrollment status for users. You can still view the list of attendees, change the enrollment status of a user, add notes regarding a user (such as they arrived late or left the class early), and print another copy of the Attendance Roster if required. 1.Navigate to the Calendar page. 2.Locate and click the Event on the Calendar. 3.Click the User(s) tab. 4.Select Show Filters 5.Select the Location, if the Event has more than one, and the History Status you are looking to edit. 6.Click 7.The users with that status will be displayed. Click the User ID for the user (or click in the user row and then click Edit record 8.Change the Status and/or add any Notes as required. 9.Click Depending on the Event Status selected for the user, the option(s) selected will update the User’s Status or History accordingly. |