The Course Detail screen allows you to select the appropriate tab and modify information as required. The available tabs are listed below. The Detail tab may vary slightly depending on the Course Type associated with the Course. •Detail – This tab is required for all Courses and generally contains information such as Course Identifier, Course Name, Course Delivery, Sub-delivery, Category, Subcategory, Certificates, Surveys, Duration, Duration Units and additional information for each specific Course Type. •Registration – Allows you to set the enrollment rules for the Course. See the Setting Registration Rules topic for more information. •Relevance – Allows you to define the Relevance group(s) for the Course. Examples of Relevance groups might include: Support Staff, Help Desk, Legal Staff, Paralegals, Accounting, Secretarial Staff, etc. This allows both users and managers to filter a list of Courses based on the assigned Relevance group(s). More than one Relevance group can be assigned to a Course. •Access – Allows you to restrict access to the Course based on Access Groups. By default, Courses have the Access Group of Everyone assigned. •Structure – For applicable Course Types, such as SCORM/AICC, General, or Resource, this tab allows you to import new versions of the content associated with the Course Identifier. This tab also allows you to define the Path to a Resource, such as a web page or external resource. See the Uploading New Versions of Courses topic for details. •Attachments – From here you can upload any associated handouts or QRG’s. The user will see these in the Course Summary window and links to the attachments can be sent in Email Templates, using the Attachments variable.
•History •Paths – Displays any Learning Path to which the Course is assigned. Courses cannot be added to Learning Paths from this tab. •Compliance (when enabled) – Displays any Compliance Body(ies) to which the Course is assigned. Click the appropriate toolbar button to Add, Edit, or Delete a Compliance Body from the Course.
•Prerequisites – Allows you to define required prerequisites before users can enroll in or launch the Course.
•Assignments •Waitlist (Scheduled Course Types only) – Allows you to see users who have are waitlisted for this Course. Report on waitlisted users via the Training Tracking Report by selecting "Waitlisted" from the History Status > Open drop down. •Interested (Scheduled Course Types only) – Allows you to see users who have registered Interest for this Course. You can also add users who have expressed interest or need to take the Course. Report on Interested users via the Training Tracking Report by selecting "Interested" from the History Status > Open drop down.
•Summary – Displays the Course Name, Description (if/as completed on the Additional tab) and an Action section appropriate for the Course Type. |
You can edit a Course after it has been added to the Library by displaying the details and adding or modifying the appropriate information.
1.Navigate to the Library page. 2.Search for the Course, hover over the Course card, and then click the Edit 3.Modify or Add information as required. 4.Click |
Currently, bulk edit is available for Courses, but not Paths. When editing multiple Courses, you have the option to update several aspects of the Courses including, but not limited to, the following: •Access rules •Aligned Certificates •Description •Duration •Language •Owner •Record Status •Registration rules •Show Completion Form •Assignment of Surveys •Vendor
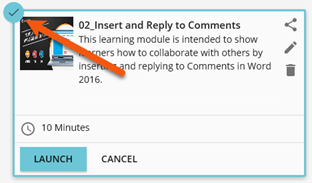
To edit multiple Courses, select the appropriate Courses in the Library. This can be accomplished using one of these methods: •Hovering then selecting the check mark in the top left corner of each Course Card you plan on editing. •Search for the Courses in the Library. Example: Search for all Courses with a Category of Excel 2010. Once the search is complete, you will see a record count and a SELECT ALL option.
Once you have selected the appropriate Courses: 1.Click the Edit 2.From the Bulk Edit screen, you will see the selected Courses listed.
3.Select the Bulk Type to display the options available to you, e.g., Record Status.
4.Select the option(s) you would like to Change to, e.g., Inactive. 5.Click
|
When you need to update documentation or eLearning Course that have a Course Type of General, Resource, AICC, and/or SCORM, you can upload new versions using the Course Structure tab.
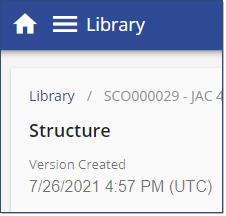
1.Navigate to the Library page. 2.Search for the Course, hover over the Course card, and then click the Edit 3.Click the Structure tab on the right side of the page. 4.Either: •Upload a new file/package: 1.Click Upload a File 2.Click OK to confirm and dismiss the Overwrite warning message. 3.Click 4.Select the file, then click Open and click •Enter a Path: 1.Select the check box in front of the lowest node in the tree. 2.Click Edit record 3.Enter the path in the Launch Path field. 4.OPTIONAL: If the content runs in an iframe window (e.g., YouTube videos), select the Launch in separate window check box. 5.Click 5.Click 6.A Version Created date/time stamp will appear in the structure tab for the latest of the original creation date or the last upload overwriting the content.
|
You can delete Courses that have been added by mistake. If you want to delete a Course that has History, the History will not be retained. 1.Navigate to the Library page. 2.Search for the Course you want to delete, hover over the Course card, and then click the Delete 3.If a confirmation message displays, review you’re happy with the effect and then confirm the deletion. Once you have confirmed the deletion, the Course will be permanently removed.
|


